Saturday, January 15, 2011

Baking Powder Biscuits

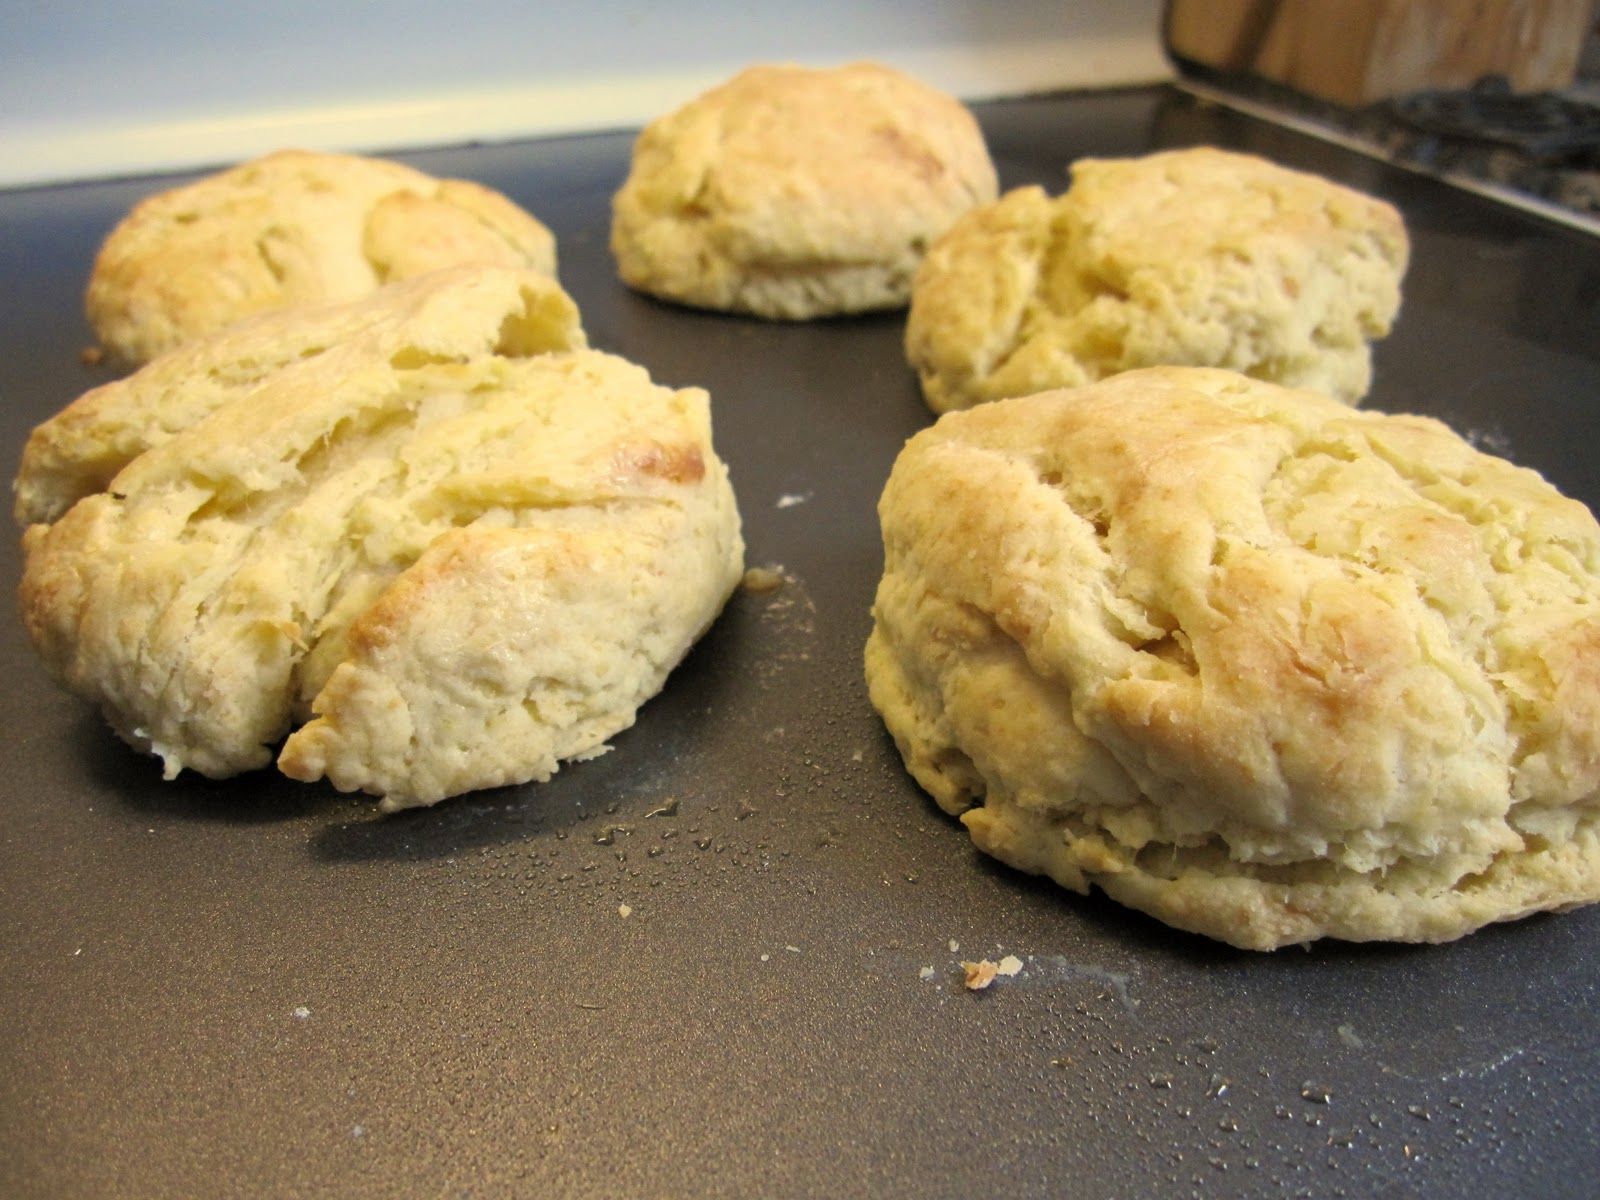
I will be the first to admit that I am definitely on a biscuit baking kick. They're so darn good, what can I say? I also find cooking and baking in general to be very therapeutic. There's something very calming about working with your hands, delicious smells, and in the end, something really yummy that you made entirely by yourself. I decided to try these baking powder biscuits because, well, admittedly I ran out of cheese (shame, shame I know).

I have to warn you that these little guys have a ridiculous amount of heavy cream and butter in them that even I couldn't  really justify adding in whole. If you have no concerns about the state of your arteries (or thighs for that matter!) go ahead and splurge, but I for one decided to only use a quarter of the cream that was recommended (substituted the rest with milk). If you are as Martha-y as I am, you will certainly agree that she uses a boat load of the heavy stuff in her cooking that really isn't all that necessary.

Chef`s final thoughts on these biscuits: sooooooooooooooooooooooooo good. They were so incredibly flaky  and went along beautifully with our beef stew. We plan on toasting them in the morning and serving them up with some yummy, homemade strawberry jam. I can`t wait. Bon appétit!

ps - as a final thought, I highly recommend that you check out this slide show on different kinds of homemade biscuits. They have everything from buttermilk to corn meal to sweet potato biscuits. Yum! http://www.marthastewart.com/photogallery/biscuit-recipes#slide_1
pps - jamming to the Temper Trap while baking is also very therapeutic. Mrs. Giles highly recommends this :)


Ingredients: (for 10 biscuits)
4 cups all-purpose flour, plus more for dusting
2 tablespoons baking powder
2 teaspoons sugar
1 teaspoon salt
1 cup (2 sticks) unsalted butter, cold, cut into small pieces
2 cups heavy cream, plus more for brushing (or 1/2 cup cream + 1 1/2 cups milk ... this worked very well and the biscuits were still DELICIOUS).

Directions:
1. Preheat oven to 400 degrees. In a large bowl, whisk together 2 cups flour, baking powder, sugar, and salt.

2. Using a pastry blender, cut in butter until mixture resembles coarse crumbs with a few larger clumps remaining. Add remaining 2 cups flour, and toss to combine.

3. Pour in heavy cream; using a rubber spatula, fold cream into dough, working in all directions and incorporating crumbs at the bottom of the bowl, until dough just comes together. The dough will be slightly sticky.

4. Turn out dough onto a lightly floured work surface. With floured fingers, gently pat dough into a round about 1 inch thick, pressing in any loose bits. Do not overwork the dough. Use a floured 3-inch round biscuit cutter to cut out biscuits as close together as possible. (Use one cut edge as the edge for the next biscuit.)

5. Place biscuits on an unlined, lightly greased baking sheet about 1 1/2 inches apart. Generously brush tops of biscuits with cream. Bake, rotating sheet halfway through, until biscuits are golden and flecked with brown spots, 20 to 25 minutes. Transfer biscuits to a wire rack to cool.
(recipe cred to www.marthastewart.com)

Monday, January 10, 2011

My Mum's Best Cheese Biscuits

This next post is quite the treat. My mum used to make these cheese biscuits for us all the time as kids and I'm pretty excited to be making them now as an adult. I mean, what else makes you prouder than making your own biscuits? These cheese biscuits go through a couple of generations of Hartley women - they are that good. One recipe should make about 5-6 size medium-large sized cheese biscuits.  In total, these biscuits only take about 20 to 25 min. to make (including preparation and baking time) so they are perfect for lunch or when you're having people over for dinner. I've found that this biscuit recipe also works well if you want to make different variations, say a lemon cranberry, blueberry, ham & cheese, or chive. Be creative and use up your left overs in biscuit form! As you can see from the picture below, I sure do love a good cheese bun. Bon appétit!

Ingredients:
1 cup flour
1/4 teaspoon of salt
3 teaspoons of baking powder
3 tablespoon butter
2 cup of grated cheese (save some for sprinkling on top)
1/2 cup of water

Directions:
1. Mix all of your ingredients in a large baking bowl. Again, I highly recommend that you double the cheese and butter. Save a little bit of cheese for sprinkling on top of your biscuits.
2. Flatten your dough out onto a floured surface. Using a 3 inch wide cup or cookie-cutter, cut out your biscuits. Arrange your biscuits on a greased baking sheet and sprinkle some cheese on the top of each of them. Again, one recipe should make about half a dozen biscuits.
3. Bake your biscuits for 12 min. in a 425° oven (or until they are lightly browned on top). Serve hot and enjoy.


Saturday, January 8, 2011

Sweet Water

"Sweet Water" is the name of a Giles drink that was perfected in Venezuela. Having married in to this wonderful family, I have had the privilege of being introduced to this yummy, fresh drink. When the Giles were living in Caracas, they had a oodles and oodles of delicious, very inexpensive fruit at their fingertips and Sweet Water was born.

Now, I'm afraid that the recipe can't exactly be well, exact. Somehow though, that's the beauty of this little drink. Do enjoy. Bon appétit and a special shout out to the Gilesies in Niagara Falls!

Ingredients: oranges, lemons, water, sugar
Directions: squeeze all of the juice from your oranges and lemons in to a pitcher, add some water, add some sugar to your liking. See, I told you there wasn't much of a recipe!

Really Easy Chunky Tomato Sauce

As promised, here is the recipe for the easy chunky tomato sauce that accompanies the Chicken Parmigiana recipe posted earlier this week. I was excited to use some of my mum's canned tomatoes from the garden. This recipe comes from Everyday Food, about 7 years ago. The sauce can be used on pasta or pizza and spooned over vegetables, rice, or fish. You could also add some hot peppers and maybe some beans to it and make it in to a chunky salsa instead. That said, you`ll want to drain some water if you`re going down the salsa way. I had to skim some anyways because I found the sauce a little watery. I don`t know if that was just because of my canned tomatoes, but either way, go ahead and skim some off if need be. Bon appétit!


Ingredients:  (Makes 6 cups)
3 tablespoons olive oil
1 large onion, chopped (3 cups)
3 cloves garlic, chopped (about 1 tablespoon)
Salt and freshly ground pepper
2 can (28 ounces each) diced tomatoes
1/2 teaspoon dried thyme or Italian seasoning

Directions
1. Heat oil in a large saucepan over medium heat. Add the onion, the garlic, 1/2 teaspoon salt, and 1/4 teaspoon pepper, and cook until softened, about 5 minutes.

2. Add the tomatoes with their juice and the thyme; simmer, stirring occasionally, until the sauce has thickened, 20 to 25 minutes. Sauce can be frozen for up to 2 months

Wednesday, January 5, 2011

Chicken Parmigiana

Continuing on with the delicious rotisserie chicken menu series, I now introduce to you ... Chicken Parmigiana. From what I understand, this dish is commonly paired with pasta but going with a nice fresh salad is a much healthier substitution. This recipe also calls for breading your chicken but, being a little short of time (and bread!), I  decided to skip that step. Of course, I also didn't have to cook my chicken as I just cut the portions I needed from the breast of my beautiful rotisserie chicken that, incredibly, was just waiting for me in the refrigerator. 

The wonderfully rich and delicious tomato sauce is very easy to make. I highly recommend taking the 20 min. and making your own sauce rather than using a store-bought version. Of course, that is an understandable option if you are short of time. The tomato sauce I made came from the my mom's garden canned tomatoes– it was heavenly.I am including the recipe for this easy, chunky tomato sauce in my next post. In the fall, my mom sent up an army of canned, garden tomatoes. She had an abundance of tomatoes and I was the lucky recipient (go miracle grow!). This Christmas we got some canning equipment of our own and are now very keen to start our own preserves. I do hope that you enjoy this meal. I saved a little bit of my chicken and paired it with a big dose of spinach salad for my lunch the next day. Everybody loves a dinner that just keeps on giving. Bon appétit!
*recipe creds to Everyday Food

Ingredients
3/4 cup plain breadcrumbs
3/4 cup grated Parmesan cheese
8 chicken cutlets (about 1 1/2 pounds total), or 4 boneless, skinless chicken breasts, halved horizontally
Salt and freshly ground pepper
1 large egg, lightly beaten
2 cups jarred tomato sauce or Easy Chunky Tomato Sauce
1/4 cup olive oil
6 ounces mozzarella cheese, preferably fresh, cut into eight 1/4-inch-thick slices

Directions
1. Heat broiler. Combine breadcrumbs and Parmesan in a shallow bowl. Season both sides of chicken with 1/2 teaspoon salt and 1/4 teaspoon pepper. Dip chicken in the beaten egg, then dredge in breadcrumb mixture, turning to coat both sides.
2. Spread tomato sauce onto the bottom of a 10-by-15-inch baking dish. Heat 2 tablespoons oil in a large nonstick skillet over medium heat. Place 4 chicken cutlets in skillet; cook until golden, 1 to 2 minutes on each side. Using a spatula, transfer browned cutlets to baking dish, placing them on top of sauce. Repeat with remaining oil and cutlets.
3. Top each cutlet with a slice of mozzarella. Broil about 4 inches from heat source until sauce is hot and cheese is melted and lightly browned in spots, 5 to 8 minutes. Serve immediately.

Tostadas Salsa Verde

This week I decided to do something a little different and picked up a whole cooked chicken from the grocery store (as in, one of those delicious smelling chickens from the rotisserie). I was rather amazed to find out that a whole cooked, bar-b-qued rotisserie chicken costs the same amount as its frozen protégé. While planning my menus for the week, I thought of recipes that would work well with different parts of my beautiful little chicken. Admittedly, this also worked very well for tired Giles' who spent most of their day traveling in the car.

This is a tasty little recipe right out of my brand-new Everyday Food cookbook. This cookbook is actually the first in a series of two of Martha's Every day food magazine compilations. I have the second one but had never had the opportunity to check out the first ... until now - thank you Santa! I know that I have mentioned Poncho Villa restaurant on here before, but once again I am giving them a special shout out for the best tostadas in town. This recipe really is pretty darn tasty though. We switched the salsa Verde for regular salsa as we are not so keen for the green variety. If you have never had a tostada before, you are in for a treat. It is kind of like the Mexican version of the sloppy Joe (kudos to anyone who knows the Mexican name for Joe). In a nutshell you have a toasted, cheesy tortilla shell on the bottom followed by yummy chicken laced with salsa and cumin and then topped with lettuce and sour cream. You can also add, hmmm, I don't know, red onion, avocado, more cheese... be creative! As always ... Bon appétit!
ps - don't you just love my new Amy Butler fabric??? Eeeeeeeee. Can't wait to sew with that!

Ingredients
Serves 4
4 (6-inch) flour tortillas
3 ounces shredded (3/4 cup) pepper Jack cheese
2 1/2 cups (10 ounces) shredded Poached Chicken Breasts
1 cup jarred green salsa, plus more for serving (optional)
1/4 cup chopped plus 2 tablespoons cilantro
1/4 teaspoon ground cumin
1 cup shredded iceberg lettuce
3 plum tomatoes, diced
1/4 cup sour cream

Directions
1. Preheat oven to 400 degrees. Arrange tortillas on a rimmed baking sheet. Sprinkle cheese evenly over tortillas; bake until golden brown, 8 to 10 minutes.
2. Meanwhile, in a medium bowl, toss together chicken, salsa, 1/4 cup cilantro, and cumin. Spoon mixture evenly over tortillas; bake until heated through, about 8 minutes.
3. Top with lettuce, tomato, and sour cream. Sprinkle with remaining cilantro. Serve immediately, with additional green salsa, if desired.

Here is a little close up to up the yum factor :)


Saturday, January 1, 2011

Chicken Tenders with Creamy Honey Mustard

When I was young, whenever we`d go out for dinner I`d always order chicken tenders. Always, always. I just loved`em. For all of my blogger friends out there with little ones, I think that you can relate to this. I can guarantee that your kids will love these crunchy little guys. It`s a nice home-made version of the kind that you can buy at the grocery store, but I feel so much better about knowing what`s in my food and keeping it as clean as possible. This recipe comes along with a yummy honey-mustard sauce. I liked the sauce as is but my family seemed to think that it was a lot better with double the mustard.  Your little guys may not be super keen for high quantities of mustard ... just go with what you and they like. We`ve made these a couple of times now - the 2nd time with corn flakes instead of rice krispies... both were very tasty. Do enjoy and as always, bon appétit!

Ingredients:
1/3 cup all-purpose flour
1 large egg, lightly beaten
coarse salt and ground pepper
4 cups crisp rice cereal
2 tablespoons olive oil
1 1/2 pounds chicken tenders (tenderloins)
1/2 cup reduced-fat sour cream
2 tablespoons Dijon mustard
1 tablespoon honey


Ingredients:
1. Preheat oven to 475. Place flour in a shallow bowl, and egg in a second one; season both with salt and pepper. Pulse cereal and oil in a food processor until fine crumbs form. Season with salt and pepper; transfer to a third shallow bowl.
2. Coat chicken: first in flour, shaking off excess; then with egg, letting excess drip off; and finally in cereal mixture, pressing to help it adhere. Place on a baking sheet, and bake until light golden brown and cooked through, 10 to 15 minutes, turning over halfway through.
3. Meanwhile, in a small bowl, mix together sour cream, mustard, and honey; season with salt and pepper. Serve tenders and vegetables with creamy honey mustard on the side.
*photo creds to Zoe`s Café :)
*recipe creds to Everyday Food

Sautéed Chicken in Mustard-Cream Sauce

I`ve noticed that I`ve been adding mostly SWEET recipes lately on the blog. Hmmm. Seems like it might be the holidays or something! I guess that that`s not all bad. But here`s a more savoury dish that it sure to please :)


I think that any recipe that calls for heavy cream has to be good. Just has to. And when you get to add some white wine to it. Oh boy. Yum, yum, yum. Preparing this dish made me feel like I was cooking at the Cordon Bleu. Sadly the picture leaves a little to be desired, but believe me, the recipe itself was delicious.  I decided to pair the chicken with some super-good-for-you asparagus (covered in more cream sauce of course!) with some toasted slivered almonds on top.  Bon appétit! 

Ingredients
 Serves 4
4 boneless, skinless chicken breasts (6 ounces each)
1/4 teaspoon salt
1/4 teaspoon pepper
2 tablespoons olive oil
1/4 cup dry white wine, or chicken broth
1/2 cup heavy cream
2 tablespoons Dijon mustard
1 teaspoon dried tarragon (or 1 tablespoon chopped fresh)

Directions
1. Sprinkle chicken breasts with salt and pepper. In a large skillet, heat oil over medium-high heat. Add chicken; saute until cooked through, 10 to 12 minutes, turning once. Transfer to a plate; keep warm.
2. Pour wine into hot skillet; cook, stirring, until reduced by half, about 1 minute. Whisk in cream, mustard, and tarragon. Cook, whisking, until thickened, about 2 minutes.

3. Pour any accumulated chicken juices into sauce. Right before serving, drizzle cream sauce over chicken.

Saturday, December 25, 2010

My favourite pie crust recipe

It's Christmas day and I have been home for a week now and have already made 2 pies - the first was a QUICHE and the 2nd was a heavenly (but pain in the be-hind) coconut cream pie, which, I must add, was my first ever experience toasting coconut! Christmas at the Hartley James home is definitely a time for baking ... as I type, I can hear my sister working away at the stove making her famous butter tarts. We just finished off another dulce de leche cheesecake for dessert tonight and, over the course of the past couple of days, have consumed an embarrasing number of cheese biscuits (recipe to follow soon, I promise) and cinnamon buns. Somehow, as a family, we have gone through two and a half 1L cartons of heavy whipping cream. Hmmm.

I now introduce - trumpets abound - the most flawless, flakiest, ... fantastikest pie crust around. Thank you Ms. Martha (of course!). I have cut and pasted from her:
tutorial which I HIGHLY, HIGHLY recommend. It has really nice, clear pictures that show you what your crust should look like along the way. To note is that this recipe uses a food processor which, now that I own one, I strongly recommend any good cook pick up. Everyone knows that you make the best pie crust in a food processor. Hey, anything other than having to use a pastry cutter or, worse yet, 2 knives. These are options though ladies if you find yourself poor in kitchen appliances. Bon appétit all and have a most wonderful Christmas - a celebration of our Saviour's birth! I'll eat pie to that :)

Ingredients and Equipment:
• 2 1/2 cups all-purpose flour
• 1 teaspoon salt
• 2 sticks (1 cup) unsalted butter, cold, cut into small pieces
• 1/4 cup ice water, plus more if needed (I found that adding an extra tbs 1/2 was helpful)
• Food processor
• Rolling pin
• Glass pie plate or metal pie tins


Step 1: Making the Pie Dough
In the bowl of a food processor, combine flour and salt; pulse to combine. After the dry ingredients are pulsed together, the butter pieces are added all at once. The mixture is pulsed again until it has clumps ranging in size from coarse crumbs to 1/2 inch. This usually requires only a few pulses and takes about 10 seconds; it's very important not to overprocess the dough. (To mix by hand, combine dry ingredients in a large mixing bowl, then cut in butter with a pastry blender.)


Step 2
Ice water is added (with the machine running) until the texture of the dough is crumbly and just holds together; the dough should not be wet or sticky. Do not process more than 30 seconds. Test by squeezing a small amount of the dough together; if it is still too crumbly, add a bit more water, 1 tablespoon at a time.

Step 3
The crumbly dough is transferred to a work surface and divided in half. Each portion is placed on a sheet of plastic wrap; the wrap is gathered around the dough and pulled toward the center to form a ball. The dough is then flattened into a disk and chilled. The dough can be frozen for up to 1 month; thaw overnight in the refrigerator before using
 
Step 4: Rolling the Pie Dough
Roll dough back to its proper dimension. Start rolling, working from center. If dough loses circular shape, place end of pin near the crooked edge and roll, working that area by pressing with one hand while holding the pin loosely with the other. Keep the work surface floured so the dough doesn't lose its shape, stick, or tear. Every few passes, release the dough by running a long offset spatula underneath, then throw more flour under it. As you go, run your fingers around the edges of the dough to feel if the thickness is even (and if not, to find where you need to roll more).
 
Step 5: Fitting the Pie Dough
After the pie dough is rolled out to its proper dimension, it's then rolled back up over the pin and gently draped over the pie plate. The dough is then fitted into it.

Step 6: Trimming the Pie Dough
Once the dough is fit properly into the pie plate, kitchen shears are used to trim the dough, leaving an even overhang along the perimeter of the plate.

Tuesday, December 21, 2010

Baked Penné Pasta with Chicken and Sun Dried Tomatoes

Jeremy finished his 4th/5 exams today. Poor guy has had 4 exams in the past 5 days. To decompress, he helped me make dinner tonight while Georgie looked on ... sniffing the air :) I have to say that for this meal, it's very nice to have a helper on hand - one person whisking the sauce while the other runs around getting all of the ingredients ready! If you don`t have a helper on hand, I`d recommend you really prepare the garlic, mushrooms, tomatoes etc. all before hand so that things run smoothly. This dish was pretty darn yummy. You can make it before hand and freeze it for later, which is always nice on a day that things are going to be pretty crazy around dinner time! Bon appétit!


Ingredients:

3 tablespoons butter, plus more for baking dishes
coarse salt and ground pepper
1/2 pound penne rigate
1/2 teaspoon olive oil
1 boneless, skinless chicken breast, halved horizontally
1/4 cup plus 1 tablespoons all-purpose flour (spooned and leveled)
2 garlic cloves, minced
3 cups whole milk
5 ounces white mushrooms, trimmed and thinly sliced
1/4 cup oil-packed sun-dried tomatoes, drained and thinly sliced
3/4 cup shredded provolone (3 ounces)
1/2 cup finely grated Parmesan (2 ounces)


Directions

1. Preheat oven to 400. Butter a shallow 2-quart baking dish. In a large pot of boiling salted water, cook pasta 3 minutes short of al dente; drain pasta, and return to pot.

2. In a large nonstick skillet, heat oil over medium-high. Season chicken with salt and pepper; cook until opaque throughout, 3 to 5 minutes per side. Halve each piece lengthwise, then thinly slice crosswise.

3. In a 5-quart Dutch oven or heavy pot, melt butter over medium. Add flour and garlic; cook, whisking, 1 minute. While whisking, gradually add milk; bring to a simmer, whisking frequently. Add mushrooms and tomatoes; cook 1 minute. Off heat, gradually stir in provolone and 1/4 cup Parmesan.

4. Add chicken and pasta to pot; season with salt and pepper. Add pasta mixture to your baking dish; sprinkle with 1/4 cup Parmesan.

5. Bake, uncovered, until top is golden and bubbling, about 25 minutes. Let stand 5 minutes before serving.

Tuesday, December 14, 2010

My famous Lemon-Poppy Seed Cookies

All I`ll say is that, right now, at this very instant, my house smells delicious. Like heaven. Lemon scented heaven. Tomorrow we`re having a little cookie exchange in the OT department at the hospital so I`ll be coming home with lots and lots of yummy cookies. These lemon poppy seed cookies are famous at the Giles`. They`re from Martha`s 2006 Christmas Cookie magazine that I just adore. One year I made 18 dozen of them for another cookie exchange. Now that was just plain crazy. Our wedding cake was lemon-poppy seed too... the flavour is, hands down, just one of my favourite things. Bon appétit! 

Ingredients:
(Makes about 30)
1/4 cup fresh lemon juice, plus 3 1/2 teaspoons freshly grated lemon zest (2 to 3 lemons)
8 ounces (2 sticks) unsalted butter
2 cups all-purpose flour
1 teaspoon baking powder
1/2 teaspoon salt
1 1/2 cups sugar
1 large egg
2 teaspoons pure vanilla extract
1 tablespoon poppy seeds, plus more for sprinkling

Directions
1. Preheat oven to 375 degrees. Bring lemon juice to a simmer in a small saucepan over medium heat; cook until reduced by half. Add 1 stick butter; stir until melted.

2. Whisk together flour, baking powder, and salt. Cream remaining stick butter and 1 cup sugar on medium speed in the bowl of an electric mixer fitted with the paddle attachment. Mix in egg and lemon butter. Mix until pale, about 3 minutes. Mix in vanilla and 2 teaspoons zest. Mix in flour mixture and poppy seeds.
3. Stir together remaining 1/2 cup sugar and 1 1/2 teaspoons zest. Roll spoonfuls of dough into 1 1/2-inch balls; roll them in sugar mixture. Place 2 inches apart on baking sheets. Press each with the flat end of a glass dipped in sugar mixture until 1/4 inch thick. Sprinkle with seeds.
4. Bake until just browned around bottom edges, 6-8 minutes. Transfer to wire racks; let cool completely. Store in an airtight container up to 1 week.

Sunday, December 12, 2010

Big Soft Ginger Cookies

I was out with some lovely colleagues of mine this past week to the hospital's most visited coffee joint - Ideal Coffee. If you are around the area of Bruyere and Dalhousie, you must, and I mean must check this little joint out. It comes highly recommended by all Bruyere Hospital OT staff and by my very own husband who is quite the coffee snob. Ideal grounds their own coffee beans (making it smell exactly like our basement!) and have a wonderful, quirky staff. Their drinks/eats are remarkably well priced (cookie + chai latté was about 3.00$) and each of their mugs is different. It`s not your regular Starbucks, let me tell you. I write about Ideal because they have the BEST ginger cookies. As I was downing my cookie over lunch, I thought to myself that I could really go for a few more of these mega, soft ginger cookies with the crackled tops. That night I went home, checked to see if I had any molasses and went to town. Bon appétit! 


Ingredients
- 2 1/4 cups flour
- 2 teaspoons baking soda
- 1/4 teaspoon salt
- 1 teaspoon ground cinnamon
- 1 teaspoon 1/2 ground ginger
- 1/2 teaspoon allspice
- 1/2 teaspoon ground cloves
- 3/4 cup unsalted butter, softened
- 1 cup dark brown sugar
- 1 extra-large egg
- 1/4 cup regular unsulphured molasses
- granulated sugar (for coating cookie dough before baking)

Directions

1. Heat oven to 375 degrees with the rack in the center. Line 2 baking sheets with parchment paper or silicon pan liners. Set aside.

2. Sift flour, baking soda, salt, cinnamon, ginger, allspice, and cloves into a medium bowl. Set aside.

3. Cream the butter and brown sugar in a large mixing bowl with mixer on high speed until light and fluffy, about 1 minute. With mixer on medium speed, beat in the egg and molasses, then increase the speed to high and beat about 1 minute longer, until the mixture no longer looks curdled. Scrape the sides with a rubber spatula several times while mixing.

4. Mix in the flour mixture on low speed. The batter will be rather stiff. Place some granulated sugar on a small plate or saucer. Use a tablespoon to form 1 tbs portions of dough. (Spray the spoon with the optional non-stick vegetable spray to make it easier to release the dough.) Transfer the dough to your hands and roll each portion into a rough ball, then roll each ball into the sugar. Place 9-12 sugared balls on each baking sheet, spacing them evenly, because they will spread during baking.

5. Use a slightly damp bottom of a cup or measuring cup and press down lightly on each cookie to flatten it a little and dampen the top. Refrigerate one filled baking sheet while the other bakes. **Just remember the flatter you make your cookies and the longer you bake it, the crispier the cookie will be. So don't over do it.***


6. Bake for 7-10 minutes, or until the cookies have spread and are firm to the touch. Rotate the sheet 180 degrees halfway through the baking time. Remove from the oven and let the cookies cool on the baking sheet. Remember to remove your cookies slightly before they look totally cooked. They will cook a little more on the baking sheet. Watch your cookies really well during the last few minutes so that they do not burn - nobody likes a burnt crispy cookie!

Note: This dough can be frozen for slice-and- bake cookies. Just roll into a log 2-1/2 inches thick. Wrap in plastic wrap and then in foil. Can be stored in the freezer up to 6 months.

Thursday, December 9, 2010

Thai One On Chicken

A few months ago I cut this recipe out of my Clean Eating magazine. I know I've mentioned this magazine on the blog before - it's a magazine that essentially devoted to raw, clean cooking. As in, nothing from a box. Green cooking. Good for you cooking. Cutting down on fat (I recently finished reading an article on common dishes they`d 'scaled' ... I laughed when I read their comparisons between LIGHT and RICH dishes). And yada yada yada. Needless to say, I've been meaning to try this recipe for some little while now. 

Once again, all I can say is YUM. The coconut milk (in the article it calls for 'light'... come on' now... LIGHT coconut milk??) is so incredibly rich and tasty. We did our grilling on our Griddler - one of our favourite cooking appliances - but you could do this right on your BBQ, George Forman etc. I have to admit that after making dinner tonight our whole apartment smelled like Thai food, but it was a small price to pay! As you can guess, I must give photo creds to Clean Eating ... sadly Jerms and I didn't actually have any skewers when we came to threading our meat and veggies. Ours looked something like the picture except our skewer bits were all over our rice :)
Bon appétit!


INGREDIENTS (for 4):
- 13.5 oz light coconut milk
- 1 1/2 tbsp red curry paste
- 2 large boneless, skinless chicken breasts (about 6 oz each), cubed into skewer-size pieces
- 1 cup dry basmati rice
- 1 orange bell pepper (or bell pepper of your choice)
- 2 green zucchini
- 10 to 12 small white button mushrooms

EQUIPMENT:
Metal, bamboo or wooden skewers (soak your bamboo or wooden skewers for at least 20 minutes prior to use)


INSTRUCTIONS:1. In a saucepot, bring coconut milk to a boil. Add curry paste, whisking it in, and cook for another 3 or 4 minutes, until it thickens a bit. Remove from heat and let mixture cool. Place chicken in a resealable container. Reserve some coconut-milk mixture to brush over your vegetables and chicken while they cook. Pour remaining coconut-milk mixture over top of chicken, cover and put in refrigerator to marinate.

2. Cook rice according to package directions. (NOTE: Amy uses this covered-pot method: Bring 1 3/4 cup water to a boil, add rice and simmer for 20 minutes or until water is absorbed. Then add 1 grind sea salt.)

3. Cut pepper and zucchini into chunks that are the same size as your chicken to ensure even grilling. Thread vegetables, including mushrooms, and chicken onto skewers – each skewer should be one-third chicken and two-thirds vegetables.

4. You can use a grill pan over the stovetop, indoor contact grill or outdoor grill. Keep heat moderate so chicken doesn’t burn before it cooks through. Grill your skewers over medium to medium-high heat until chicken is cooked through and vegetables are tender-crisp, turning halfway through and brushing reserved coconut-milk mixture over top of skewers as they cook.


5. Serve chicken-vegetable skewers over shallow bed of rice.

Wednesday, December 8, 2010

New tunes.


The new winter tunes list is up.
Do enjoy some new sounds by some great artists :)

Monday, December 6, 2010

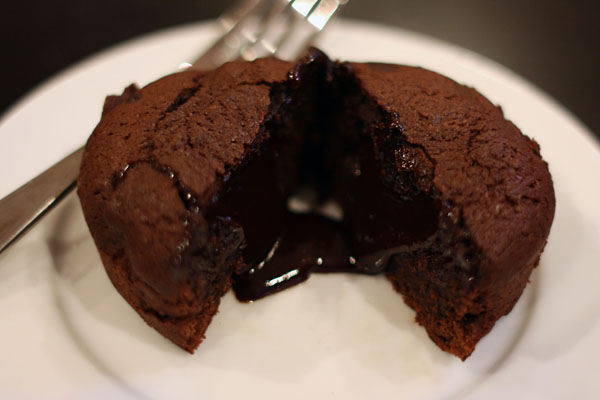
Warm Chocolate Lava Puddings

All I can say about these little guys is yum, yum, yum, yum, YUM. And... did I mention... Yum?
A most lovely friend of mine and I made up a batch of these little lava cakes and were so darn pleased with ourselves. I think that I will make up another recipe (x 2, or 3) for our next round of Yums & Yarns (my monthly craft and chocolate night). The important thing is to have a set of ramekins on hand, otherwise you could probably make these in a muffin tin as well. Very bon appétit! 

Ingredients
Serves 4
- 4 ounces semisweet or bittersweet chocolate, chopped
- 4 tablespoons (1/2 stick) unsalted butter
- 4 tablespoons sugar
- 2 large eggs, yolks and whites separated
- 1/2 teaspoon pure vanilla extract
- 1/4 teaspoon salt
- Ice cream (any flavor), for serving (optional)

Directions
1. Preheat oven to 375 degrees. Place four 6- to 8-ounce ovenproof bowls on a baking sheet. Set aside.

2. Place chocolate and butter in a medium heatproof bowl set over (not in) a saucepan of gently simmering water. Stir occasionally just until melted, 4 to 5 minutes. Remove from heat; mix in 2 tablespoons sugar, then egg yolks and vanilla. Set aside.

3. In a medium bowl, with an electric mixer, beat egg whites and salt until soft peaks form. Still beating, gradually add remaining 2 tablespoons sugar; beat until mixture is stiff and glossy.

4. Using a rubber spatula, mix about 1/3 egg-white mixture into chocolate mixture; gently fold in remaining egg-white mixture just until combined. Divide among bowls. (Puddings can be prepared in advance up to this point; cover with plastic wrap, and refrigerate up to 1 day.)

5. Bake until tops are puffed and cracked but insides are still quite soft (a toothpick inserted in center will come out gooey), 20 to 25 minutes, or 25 to 30 minutes if puddings were previously refrigerated. Serve, warm or at room temperature (puddings may sink as they cool), topped with ice cream, if desired.

    Saturday, November 20, 2010

    Spaghetti and Meatballs


    Because I have to...

    On top of spaghetti,

    All covered with cheese,
    I lost my poor meatball
    When somebody sneezed.
    It rolled off the table
    And onto the floor,
    And then my poor meatball
    Rolled right out the door!

    It rolled in a garden
    And under a bush
    Now my poor meatball
    Was nothing but mush

    The mush was as tasty
    As tasty could be
    Early next summer
    It grew into a tree

    The tree was all covered
    With beautiful moss
    It grew lovely meatballs
    In a tomato sauce

    So if you like spaghetti
    All covered with cheese
    Hold on to your meatballs
    And DON'T EVER SNEEZE!

    A-A-A-CHOO !!

    Bon appétit! 

    Ingredients:
    1 large egg
    Coarse salt and ground pepper
    1 large onion, finely chopped
    6 cloves garlic, minced
    1/2 cup plain dried breadcrumbs
    3/4 cup finely grated Parmesan cheese, plus more for serving
    8 ounces ground pork (I`m sure this would work fine with just pork, just beef, just turkey...)
    8 ounces ground beef
    1 teaspoon Italian seasoning
    2 tablespoons olive oil
    1 can (28 ounces) crushed tomatoes
    3/4 pound spaghetti

    Directions
    1. In a large bowl, whisk together egg, 1/4 cup water, 1 teaspoon salt, and 1/4 teaspoon pepper. Stir in half the onion and half the garlic. Add breadcrumbs, cheese, pork, ground beef, and 1/2 teaspoon Italian seasoning. Mix gently. Form into 16 balls.

    2. Heat 1 tablespoon oil in a large non-stick skillet over medium-high heat. Add half the meatballs; brown on all sides, 4 to 6 minutes. Transfer to a plate with a slotted spoon. Cook remaining meatballs in remaining tablespoon oil; remove meatballs.


    3. Add remaining onion; cook over medium-low until soft, about 5 minutes. Add remaining garlic and 1/2 teaspoon Italian seasoning; cook 30 seconds. Season with salt and pepper. Stir in tomatoes and 3/4 cup water. Return meatballs; cover, and simmer until cooked through, about 20 minutes. Remove meatballs.

    4. Meanwhile, in a large pot of boiling salted water, cook spaghetti according to package direction until al dente. Drain; return to pot. Toss with sauce; serve meatballs on top, sprinkled with more cheese.

    Thursday, November 18, 2010

    Orecchiette with Sausage & Roasted Red Peppers

    I decided to make this dish for my husband because he loves sausage so much. Before, when we weren't planning out our meals, I'd often ask him, so... what do you think we should make for dinner tonight? And the answer... most often was, you guessed it, "Umm... Hmm... Oh, I know! How about sausages?". I love him so much :) 


    I think that the most exciting part about making this dish was roasting the red peppers. I'd never roasted my own pepper before (it's surprisingly easy!). They really did contribute to the taste - I was quite surprised. This dish was pretty mellow tasting - good, but mellow. If I were to make it again, I think that I'd add some garlic and freshly cracked black pepper to give it a little bit more oomph. I decided to take some pictures of what your peppers should look like. Don`t worry, they`re supposed to look charred and beyond reconsiliation but underneath that crispy black exterior is a delicious, perfectly roasted red pepper.   Bon appétit!

    Ingredients:
    2 medium red bell peppers, four flat sides sliced off core, ribs and seeds discarded
    2 medium yellow bell peppers, four flat sides sliced off core, ribs and seeds discarded
    Coarse salt and ground pepper
    1 pound orecchiette or other short pasta
    2 teaspoons olive oil
    1 pound sweet Italian sausage, removed from casings
    1 tablespoon butter, cut into small pieces
    1/3 cup grated Parmesan cheese

    Directions
    1. Heat broiler. Place peppers, skin side up, on a foil-lined baking sheet; broil 4 inches from heat until charred, 18 to 20 minutes. Transfer to a large bowl. Cover with plastic wrap; steam 2 to 3 minutes. Using a paper towel, rub off pepper skins, reserving any juices in bowl. Thinly slice peppers crosswise into 1/4-inch strips; return to bowl. Set aside.


    2. In a large pot of boiling salted water, cook pasta until al dente, according to package instructions. Drain, reserving 1/2 cup pasta water.


    3. Meanwhile, heat oil in a large skillet over medium heat. Cook sausage, breaking it up with a spoon, until browned, 7 to 10 minutes. Add roasted peppers; cook until heated through.


    4. Transfer sausage mixture to bowl; add pasta, butter, reserved pasta water, and Parmesan. Season with salt and pepper. Toss to combine.

    Chicken Enchiladas

    Jeremy and I have a most favourite Mexican restaurant that we like to frequent down on Elgin Street in Ottawa called Poncho Villa. If you`ve never been, it`s probably because you`ve never seen it - you really have to be looking for it as it`s tucked down in a little courtyard. It's almost directly across from Jack Purcell park. They serve, in my opinionin my opinion, quite possibly the best Mexican fare in the city. I love sitting on their little cobblestone patio in the summer and watching all of the folks walk by. I think that what Jeremy really likes is this hot sauce they have that he puts on practically everything (not really a Venezuelan in his choice of heat!). When we were living on Gilmore St. and Panchos was right around the corner... well, all I can say is that we frequented our little restaurante mexicano pretty often. All that to say, everytime we sit down at Ponchos, I have to explain to Jeremy what an enchilada is, what a tostada is, quesadillas... (thankfully he's got the burrito and taco down). I just don`t understand how he can eat this food so often and always forget what`s what. I guess I can never remember how to program the VCR, so there you go! 

    This recipe is pretty yummy. It`s no Panchos, but pretty yummy. A little warning - they take a little bit of preparation. Not crazy, but a little bit. They're nice to make for one dinner and then freeze the rest for a night when things are a little hectic and you can just pull them out of the oven. These serve up really nicely with a side salad with AVOCADO (of course!). Bon appétit!

    For the sauce
    2 tablespoons olive oil
    2 teaspoons ground cumin, divided
    1/4 cup all-purpose flour
    1/4 cup tomato paste
    1 3/4 cups vegetable broth
    3/4 cup water
    salt and fresh ground pepper

    For the enchiladas12 (3) ounces shredded Mexican blended cheeses or pepper Jack cheese
    2 cups cooked black beans
    10 ounces frozen chopped spinach, thawed and squeezed dry
    1 large piece of chicken (boiled and then shredded)
    6 scallions, thinly sliced, white and green parts separated
    1/2 cup corn (optional)
    salt and fresh ground pepper
    8 large white corn tortillas

    To make the sauce
    In a medium saucepan, heat oil over medium. Stir in 1 teaspoon cumin, flour and tomato paste - cook, whisking, for 1 minute. Whisk in broth and water - bring to a boil, reduce heat to a simmer and cook until slightly thickened, about 5 to 8 minutes. Season with salt and pepper - set aside.

    To make the enchiladas
    Start by boiling your chicken in a medium pot. Cutting the chicken up in to smaller chunks will help it cook faster. Meanwhile, in a large bowl, combine 8 ounces cheese (2 cups - not all of your cheese!), beans, spinach, corn, and scallion whites. Shred your chicken by pulling it apart with 2 forks and at it and your remaining 1 teaspoon cumin - season with salt and pepper.

    Preheat oven to 400

    Stack tortillas and wrap in damp paper towel - microwave on high for 1 minute to warm them. Top each tortilla with about a heaping 1/3 cup of filling - roll up tightly and arrange, seam side down, in 2 9" x 9" or 2 7" x 11" baking dishes coated with nonstick spray. You will want 8 rolled tortillas in each one.

    Dividing evenly, sprinkle enchiladas with remaining 4 ounces cheese (1 cup) and evenly spoon the sauce over the top. Bake, uncovered, until hot and bubbly, about 15 to 20 minutes. Cool 5 minutes before serving - garnished with the reserved scallion greens.

    Makes 8 servings.

    Monday, November 8, 2010

    Mango Blueberry Smoothies

    A couple of years ago, some dear friends of ours gave us a 'Party Blender' set (aka the Magic Bullet). Sadly, it sat in our closet until about a month and a half ago, when, late one night, Jeremy decided that he wanted to make himself a cookie and cream milk shake (this entails loading up the blender with about a dozen cookies, some ice cream and milk...). Needless to say, out came the party blender. Our lives have been a non-stop smoothie jamboree ever since. So yummy and so darn good for you. We decided to pick up some mango at the grocery store this week to feed to the blender and came up with this yummy concoction. Bon appétit! 


    Ingredients (2 smoothies):
    - 1 mango, chopped
    - handful of blueberries
    - 1 banana, split
    - dollup of plain yoghurt


    Directions: BLEND.

    Monday, November 1, 2010

    Homemade Pizza Puffios

    As much of an extrovert that I am, I still consider myself to be a real homebody. I love cuddling up on the couch with my husband and puppy to watch a movie or read a book. I have this special blanket from Jesse & Kavi that feels like you`re being bundled up in a big, soft, warm and cuddly sheep (without the sheepie smell!). It`s amazing. 


    Once a month, Jeremy and I have `pizza and a movie` night where we toss our pizza dough ingredients in to the bread maker, take Georgie out for our nightly trip to the puppy park and then return home to freshly made, ready to go pizza dough. It's fantastic. If you have a bread maker, I highly recommend you try making your own pizza dough - it's so incredibly easy, inexpensive and so much better than buying store bought. On our last 'pizza & a movie' night, we decided to do things a little differently and made ourselves some 'puffios' instead, mostly so that I could have something to bring in my lunches this week. "What the heck is a 'puffio'?" you might be asking. If you are from Corunna or Sarnia you should be ashamed of yourself if you don't know (Antonio's Pizza... ), but if not, I believe they're also called "calzones" - essentially, pizza folded in on itself. Puffios are typically deep fried so that they, yup, you guessed it - PUFF up, but, having just finished a shift on Stroke Rehab, I decided to save my arteries the unnecessary punishment and baked em' instead. These guys are a little bit of work, but fun if you have little ones because they can each decorate their own. You can use whatever pizza dough recipe you typically use, but in case you need a good one, here's my favourite from my most wonderful friend Lyndsay who is getting married in less than a week. Remember that the dough takes a good hour to rise so start that ahead of time. Bon appétit! 


    Ingredients:


    Dough
    1 package active dry yeast (2 1/2 tsp)
    2 tsp sugar
    2/3 cup warm water
    2 cups flour (if you want to do a 'whole wheat crust', use 1 1/2 cups white four and 1/2 cup whole wheat or 12 grain flour)
    1 tbs corn meal
    1/2 tsp salt
    1 tbs. olive oil 
    Optional: any herbs to season your dough - dash of oregano, pinch of rosemary, pinch of red pepper flakes etc.


    Filling
    Really... this is what you want, but I've included a few ideas that are always good... I did not add any quantities of ingredients. Go with what you'd like... 
    1 can pizza sauce
    Sprinkle of garlic powder
    Different meats: Pepperoni, sausage, bacon, ham (all pre-cooked...)
    Different vegetables: Olives, red or green pepper, pineapple, broccoli, onion
    Different cheeses: mozzarella, feta, goat, parmesean


    Directions:


    TO MAKE THE DOUGH
    For the bread maker: 
    Toss er' all in and set your bread maker to 'pizza dough' ... if you don't have that kind of setting, I'm sure just the 'dough' setting would work too. This usually takes 45 minutes to an hour.


    For the hands:
    1. Combine your yeast, 1 tsp. sugar and the water in a large bowl for approx. 10 minutes (until mixture becomes frothy)
    2. In a separate bowl, combine your flour, 1 tsp. sugar, corn meal and salt
    3. Add the olive oil to the yeast mixture
    4. Add 1 3/4 cups of your dry mixture to the wet and knead until a rough ball forms
    5. Transfer your dough to a floured surface and knead 3-4 minutes
    6. Spray a large bowl with cooking spray or butter, add the dough and cover with a damp towel. Place in a warm, dry and draft-free place for 1 hour (I like to turn the oven on for 20 seconds just to warm it up a little bit, turn off the heat and then place the bowl in the oven).
    7. Once the dough his risen, PUNCH it down and fold in on itself to make another ball. Transfer this to your floured surface. 


    TO MAKE THE PUFFIOS 
    - Once your dough is ready, place it on a floured surface and ensure that it is in a nice, uniform ball. Cut the ball in half, then cut each of these 1/2 in to 3 pieces each (you should end up with 6 pieces of dough).
    - Form each of the individual pieces in to a ball and then roll out to about the size of a salad plate (I'm thinking about 6-7" in diameter). Do not make them too thin though or they can rip when you try to fold them over.
    - Pre-Heat your oven to 375F and prepare 2 baking sheets sprayed with cooking spray or butter and lightly sprinkled with corn meal
    - Add your ingredients.  Be sure to leave a good 3/4" space around the outside. Start by adding a good tbs of pizza sauce toward the middle (but not right in the middle...), then your toppings, followed by the cheese(s) and finished with a sprinkle of onion and/or garlic powder. Warning: You do not want to have sauce hanging over the edge or it wont seal correctly and, as tough as it is, try your hardest not to over stuff :)
    - Lightly brush the outside edge of the circle with water. Fold the top over and seal with a fork. Punch 3-4 holes in the top of each to let the steam escape. 
    - Bake at 375F for about 10-15 minutes until golden brown. Enjoy!