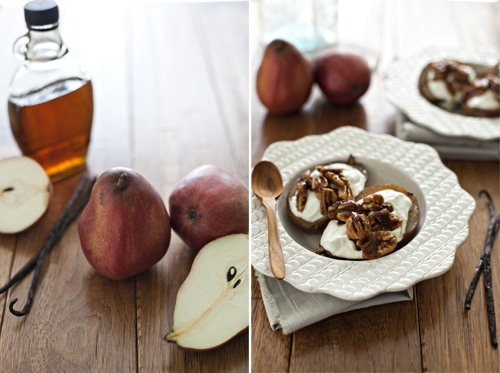
Who doesn't love a nice, fresh pear? This dessert is really quite lovely for the pear lovers out there. It would make a nice brunchy-breakfast too. Make sure not to skip the lemon juice step as this is important for ensuring that the pears don`t brown too quickly. The original recipe called for fresh heavy cream, but I`ve suggested going with yoghurt for a slightly more healthier bent. Picking up some nicely pressed yoghurt would be just devine with this dish. If it`s a special occasion though, go for it with the cream. No regrets. A big thanks to my mum for finding this recipe for us. Bon appétit!
Ingredients1/2 cup heavy cream (or substitute yoghurt for a healthier twist)
1/4 teaspoon ground cardamom
1/4 teaspoon vanilla
3 Comice pears (about 1 3/4 pounds)
1 tablespoon lemon juice
1 1/2 tablespoons unsalted butter
3 tablespoons pure maple syrup
handful of roasted walnuts, pecans or almonds
Directions
1.In a chilled mixing bowl, combine cream, vanilla and cardamom and whip until cream holds soft peaks. Alternatively, mix cardamom and vanilla with fresh plain or pressed yoghurt. Refrigerate, covered.
2.Quarter or half pears, core, and peel. If desired, cut quarters in half. Sprinkle with lemon juice.
3.Melt butter in a large skillet over medium-high heat. Arrange pears in skillet and cook on one side until pears just begin to brown, about 3 minutes. Add maple syrup and cook until pears are tender, about 1 minute more. Turn pears and cook for another minute. Remove from heat and allow pears to cool slightly. Transfer to bowls and serve warm, topped with whipped cream/yoghurt.
- recipe adapted from Everyday Food, photo cred to Simple Bites
This blog is dedicated to food. Lots and lots of great, homemade food. It's full of my most favourite recipes that I hope you will enjoy too. I welcome your comments, recipe ideas, and suggestions to spice up what you see and.. as always, bon appétit!
Showing posts with label whipped cream. Show all posts
Monday, July 25, 2011
Thursday, July 7, 2011
Chocolate Icebox Cake (no-bake!)
Ohhhhhhhhhhhhhhh so good. We used to make these icebox cakes all the time growing up. I`d take a giant piece and feel so darn sick at the end because of all the whipped cream. Enjoy. Feel jolly and fat when you're done. Mmmm. Bon appétit!
Ingredients
1 3/4 cups heavy cream, chilled
1/4 cup sugar
1 package (9 ounces) chocolate wafers
optional: 3/4 teaspoon mint extract
Directions
1. Make the whipped cream: With an electric mixer, beat heavy cream and sugar (+ mint extract if you're going for a minty flavour instead) until stiff peaks form.
2. Line a serving platter with two sheets of wax paper side by side. Assemble the cake: Spread each wafer with about 1/2 tablespoon mint cream, forming stacks. Lay stacks horizontally along seam of paper, pressing gently to form a log. With small spatula or knife, cover log with remaining mint cream. Refrigerate at least 4 hours or up to 2 days.
3. To serve, gently remove wax paper from underneath cake (holding cake in place with a metal spatula, if necessary), and sprinkle with chocolate chips. Slice cake diagonally with a serrated knife.
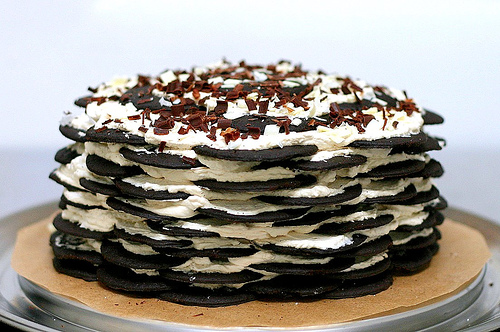
** I`ve also seen an icebox cake prepared in vertical layers in a more typical `cake` shape, like this one below. I'd guess that you'd need at least 2 if not 3 boxes of cookies to make this dessert:
Subscribe to:
Posts (Atom)