Saturday, April 30, 2011

Stained Glass Tree Cookies

These are Martha`s versions...
so beautifully back lit and practically
perfect in every way!
Okay, so this post is a little Christmassy for Spring but I was chatting with a dear, very pregnant Aussie friend of mine this morning and remembered that I'd made these cookies at her wedding a couple of years ago and just had to share them on the blog. I will be upfront with you all and tell you 2 important things about these cookies 1) they`re gorgeous and you will get tonnes of compliments on your baking prowess and 2) they are an unbelievable pain in the butt to make.  You will probably end up crying and cursing and tossing a third of em' because they'll break or crack or the candy center will leak all over your cookie... you get the idea. I recommend a couple of things: use a nice, wide cookie cutter and do not make the inside triangle too big (or else the dough is bound to break when you transfer it to the cookie sheet). Also, use nice, FRESH candy or else you'll be hammering away at a horrible, gooey mess. Yah. Been there. These little guys really are lovely at a wedding, shower, Christmas party or to hang on your tree... next year! Bon appétit!

Ingredients
2 cups all-purpose flour, plus more for work surface
1/4 teaspoon coarse salt
1/2 teaspoon baking powder
1/2 cup (1 stick) unsalted butter
1 cup sugar
1 large egg
1 teaspoon pure vanilla extract
7 ounces assorted clear colored hard candies, such as Jolly Rancher, colors separated and finely chopped (about 30)

Directions
1. Sift together flour, salt, and baking powder into a large bowl; set aside.

2. Put butter and sugar in the bowl of an electric mixer fitted with the paddle attachment; mix on medium speed until pale and fluffy, about 3 minutes. Add egg; mix until smooth, 1 minute. Reduce speed to low. Add flour mixture, and mix until combined. Stir in vanilla.Wrap dough in plastic, and refrigerate until cold, about 45 minutes.

3. Preheat oven to 325 degrees, with racks in upper and lower thirds. Roll out chilled dough on a well-floured surface to a little more than 1/8 inch thick. Cut out shapes using a 5-inch tree-shape cookie cutter. Using a metal spatula, space 2 inches apart on baking sheets lined with parchment paper. Using the tip of a paring knife, make a triangular cutout in center of each cookie for candy filling. Reroll scraps, and cut.

4. Sprinkle candy in a single layer in hole of each cookie, avoiding edges of triangle. Refrigerate until dough is firm, about 15 minutes.

5. Bake cookies until candy has melted and completely filled cutout and cookie edges are just starting to turn pale golden brown, 11 to 12 minutes. Do not let the cookies brown, or the candy centers may become bubbly. Let cool completely on sheets on wire racks. Use a metal spatula to remove cookies from parchment. Cookies can be stored in airtight containers at room temperature up to 5 days.

- recipe cred to Martha Stewart Holiday Cookies

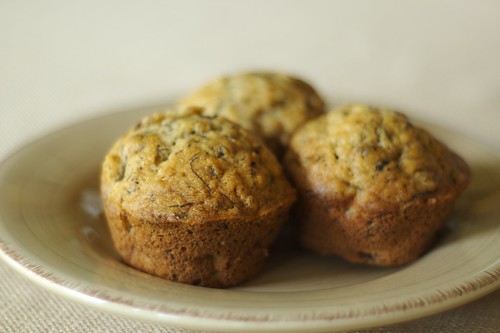
Here`s what mine looked like... not too bad if you ask me!

Friday, April 29, 2011

Arépas (Venezuelan Corn Cakes)

As I`ve said in the past, one great thing about having married in to the Giles` family is learning how to make their amazing Venezuelan food - one of the most exciting being the arépas. Arépas in Venezuela are equivalent to our bread here. They`re eaten anytime, anywhere and with whatever you want. This recipe is for tuna-salad style arépas, but I`ve also added a couple of different variations. Arepas were originally made by the indigenous inhabitants of Venezuela and Colombia. These small corncakes are sold in Venezuelan restaurants called "aréperías" and really are stuffed with all manner of different fillings (much like we would a sandwich). From what I understand, in Colombia, arepas are made a little smaller and are spread with butter or topped with cheese. A mini arépas is an 'arépita' (aww! so cute!).

This is what you're looking for!
A couple of important notes: the cornmeal used to make arépas is a special, precooked type that usually goes by the name masarepa, or masa precocida or Harina PAN (it is in a yellow bag with a lady wearing a polka dot head scarf). It can definitely be found in Latino markets but I have also seen it frequently at Freshco and Loblaws. The more commonly found masa harina is not the correct type to use for this recipe.

Buen provecho!

Ingredients (Makes 5-10 arepas)
2 cups Harina PAN Pre-cooked cornmeal (see notes) --
Salt - 1/2 teaspoon (we use a dash of Adobo Seasoning instead)
Water - 1 1/2 cups
Oil - 3 tablespoons

for filling (other ideas posted below):
1 cans of tuna
1 onion, chopped
1 green pepper
mayonaise (mixed to desired consistency)
cheese, shredded for serving on top

Directions:
1. Preheat oven to 400ºF. In a large bowl, mix together the cornmeal and salt. Pour in 2 1/2 cups of the boiling water and mix with a wooden spoon to form a mass. Cover with a towel or plastic wrap and set aside to rest for 5 to 10 minutes.

2. Using wetted hands, form balls of dough out of about 1/4 cup of dough and press to form a cake about 3 inches wide and 3/4 inch thick. If the dough cracks at the edges, mix in a little more water and then form the cakes.

3. Heat the oil in a sauté pan or skillet over medium-high heat. Sauté the patties, a few at a time, to form a light brown crust on one side, 5 to 6 minutes. Flip and brown on the other side.

4. When all the patties have been browned, transfer them to a baking sheet and bake in the oven for 15 to 20 minutes, or until they sound lightly hollow when tapped. Serve immediately.

5. Split your arepas in half when finished and scoop out a little of the soft dough filling. Stuff with your chosen filling.

Variations:
- Arépa de Pabellón: shredded, seasoned meat and black beans.
- Reina Pepeada: chopped chicken, avocado, and mayonnaise mashed together.
- Arépa de Dominó: black beans and crumbled white cheese.
- Arépa de Perico: scrambled eggs with tomatoes, peppers and onions.
- Columbian Arepas: make smaller and thicker and don't bake. Top with butter and melted cheese.


Other possible fillings: grated white or cheddar cheese; guasacaca, ham and cheese, hard-boiled quails eggs.


[arepa-cara.jpg]

[Arepa-Bake.jpg]

Roasted Pepper Pasta Salad

I loved how fresh this salad tasted. I also loved the inclusion of the almonds and if you've never roasted your own peppers (or garlic for that matter), you're in for a treat. Actually taking the time to roast the peppers is definitely not a step to skip out on (read the title!). The salad itself does take a fair bit of time to make, but it`s worth it. Such a nice change from the standard `mayonnaise ` based pasta dishes. The only change I would make is adding a little more acidity. Even with the lemon juice I wanted a little more acid. I drizzled a little bit of balsamic over the top of my individual serving and that did the trick for me. Again, given that this dish has a fair bit of steps, I`d recommend making it with a buddy or doing some prep the night before depending on your time limits. Bon appétit! 

Ingredients
salt
12 ounces mezzi rigatoni or other short tube-shaped pasta
2 bell peppers (red and/or yellow), halved, stemmed and seeded
6 cloves garlic, unpeeled
1/4 cup almonds
1/3 cup extra-virgin olive oil
1 lemon
8 ounces bocconcini (small mozzarella balls)
1 bunch fresh basil, leaves torn
Freshly ground pepper

Directions
1. Preheat the broiler. Bring a pot of salted water to a boil. Add the pasta and cook as the label directs. Drain and rinse under cold water to stop the cooking*. (we served ours HOT as a main dish for dinner and therefore did not cool it off). Shake off the excess water.

2. Meanwhile, place the bell peppers cut-side down on a foil-lined broiler pan, add the garlic and broil until charred, 7 to 8 minutes. Transfer the peppers to a bowl, cover and set aside about 5 minutes.

3. Heat a dry skillet over medium-high heat. Add the almonds and toast, shaking the pan, 4 to 5 minutes. Let cool, then coarsely chop.

4. Squeeze the garlic from its skin onto a cutting board. Add 1/2 teaspoon salt; mince and mash the garlic into a paste with a large knife. Peel the roasted peppers and slice into strips; transfer to a large bowl. Add the garlic paste and drizzle with the olive oil. Finely grate about 1 teaspoon lemon zest into the bowl and squeeze in all of the lemon juice. Add the bocconcini, basil, almonds, pasta, 1 teaspoon salt, and pepper to taste; toss.

- Recipe and photo cred to the Food Network (camera was out of battery that night!)

Crunchy Garlic Chicken

I felt like a real chef making this chicken. You'll need a food processor (or a natural ability to cut your food into teeny tiny little pieces). This is a Jamie Oliver recipe and he notes that the crumbing technique used is very versatile in that you can use it with pork or even fish (he suggests cod) in exactly the same way. As there is butter in the crumb mixture, you can grill, fry, roast or bake the meat dry in the oven and it will go lovely and golden. Bon appétit!

Ingredients (for 2)
• 1 clove of garlic
• 1 lemon
• 6 saltine crackers
• 2 tablespoons butter
• 4 sprigs of fresh Italian parsley
• sea salt and freshly ground black pepper
• 2 heaped tablespoons all-purpose flour
• 1 large egg, preferably free-range or organic
• 2 skinless chicken breast fillets, preferably free-range or organic
• olive oil

To prepare your chicken: Peel the garlic and zest the lemon • Put your crackers into a food processor with the butter, garlic, parsley sprigs, lemon zest and a pinch of salt and pepper • Whiz until the mixture is very fine, then pour these crumbs on to a plate • Sprinkle the flour on to a second plate • Crack the egg into a small bowl and beat with a fork • Lightly score the underside of the chicken breasts • Put a square of plastic wrap over each one and bash a few times with the bottom of a pan until the breasts flatten out a bit • Dip the chicken into the flour until both sides are completely coated, then dip into the egg and finally into the flavored crumbs • Push the crumbs on to the chicken breasts so they stick – you want the meat to be totally coated

To cook your chicken:

You can either bake or fry the chicken • If baking, preheat your oven to its highest temperature (475˚), place your chicken on a sheet pan and cook for 15 minutes • If frying, put a frying pan on a medium heat, add a few good lugs of olive oil and cook the chicken breasts for 4 to 5 minutes on each side, until cooked through, golden and crisp

To serve your chicken:
Either serve the chicken breasts whole, or cut them into strips and pile them on a plate • Beautiful and simple served with a lemon wedge for squeezing over, and a tiny sprinkling of salt • Great with a lovely fresh salad or simply dressed veggies.

- recipe cred Jamie Oliver

Tuesday, April 26, 2011

Banana Muffins

Okay, these are quite possibly the yummiest banana muffins you`ll ever have. A friend of mine suggested I try this recipe several months ago and I put it in my embarrassingly enormous and ever-growing "to try" collection. And I know what you're thinking - who needs another banana muffin recipe? Let me tell you though, these little guys are so darn good. Such a perfect little treat for breakfast or for your morning or afternoon snack. Even if you don`t think you can cook, these are 100% “fool-proof” which makes them all that much better! With only 8 ingredients (all of which you probably have on-hand) I am certain that you’ll agree that these are incredibly easy! .Bon appétit!

Ingredients (makes 12 muffins)
- 3 or 4 Large bananas, mashed (the more bananas the moister, so I use 4)
- 1/2 cup white sugar (original recipe calls for 1 cup, but I don’t like them too sweet)
- 1 slightly beaten egg
- 1/3 cup melted margarine or butter
- 1 teaspoon baking soda
- 1 teaspoon baking powder
- 1/2 teaspoon salt
- 1 1/2 cups flour

Directions:
1. Mix the mashed banana, sugar, egg and margarine together. Set aside. 

2. In a separate bowl, mix together baking soda, baking powder, salt and flour. Mix wet and dry ingredients all together! The trick when making any muffins is to mix until just wet - your mixture will definitely still be lumpy but that`s okay.

3. Pour into greased muffin tins, and bake in 350 degrees F oven for approximately 20 minutes. Enjoy!

*These are much more flavourful the next day, and they freeze very nicely too!
- recipe cred to Cat Can Cook

Saturday, April 23, 2011

Spaghetti Carbonera

If you've never had spaghetti carbonera, you're in for a treat. Carbonera is definitely the "breakfast spaghetti" in that the main ingredients are bacon and eggs! Very neat, I know. I would recommend that you a) read the full recipe through ahead of time (especially the last steps) and, b) that you make it with a buddy. I find that things can move pretty quickly so it's good to have everything out and ready to go. Essentially, you'll literally be cooking your eggs in the hot spaghetti so you need to move very quickly. This is a super rich dish that we coupled with a light salad to make it slightly less bad for you. Bon appétit!


Ingredients
salt
6 slices thick-cut bacon, cut into 1/2-inch pieces
2 tablespoons extra-virgin olive oil
3 cloves garlic, crushed
1/2 teaspoon minced fresh rosemary
2 red jalapeno peppers, seeded and minced
1/4 cup cognac or brandy (optional) ... we used white wine and it was yummy!
12 ounces spaghetti
3 large eggs
3/4 cup freshly grated parmesan cheese, plus more for garnish
1/2 cup freshly grated pecorino romano cheese
2 tablespoons chopped fresh parsley
Freshly ground pepper

Directions
1. Bring a large pot of salted water to a boil. Combine the bacon, olive oil, garlic, rosemary, jalapenos and 1/4 cup water in a large skillet. Cook over medium-high heat, stirring occasionally, until the water evaporates and the bacon crisps, about 12 minutes. Discard the garlic. Add the cognac, if desired, and cook until it evaporates. Remove from the heat and set aside 1/4 cup bacon mixture forgarnish.

2. Meanwhile, cook the spaghetti in the boiling water as the label directs. Mix the eggs, cheeses, parsley and 1 teaspoon pepper in a bowl. Drain the pasta, reserving 1/4 cup cooking water.

3. Return the skillet to medium-high heat. Add the pasta and toss until heated through, 1 to 2 minutes. Remove from the heat. Whisk the reserved pasta water into the egg mixture, then quickly pour over the pasta and toss to gently cook the eggs and make a creamysauce. Garnish with the reserved bacon mixture and more parmesan.

- recipe cred The Food Network

Friday, April 22, 2011

Moroccan Grilled Salmon

A dear friend of mine (thank you Mr. JWilts!) got me a Chapters gift certificate for my birthday last year and it has been sitting in my purse just begging to be used. Well, after a rowdy trip to IKEA, I decided to stop in to that beautiful bookstore. Out I walked the proud new owner of "Great Easy Meals - 250 Fun & Fast Recipes" by the Food Network Magazine. This is one of the first recipes that I tried and it was delicious. Incredible, zingy flavours that, if you're a salmon lover, I highly recommend you check out. The nice thing about it was that it literally took about 10 minutes to prepare. We were in a rush and didn't have time to marinate, but it was delicious all the same. Enjoy and, as always, bon appétit!

Ingredients

1/2 cup plain yogurt
Juice of 1 lemon, plus lemon wedges for garnish
1 tablespoon extra-virgin olive oil, plus more for the grill
2 to 3 cloves garlic, smashed
1 1/2 teaspoons ground coriander
1 1/2 teaspoons ground cumin
Kosher salt and freshly ground pepper
4 6-ounce skinless center-cut salmon fillets
1/4 cup chopped fresh cilantro or parsley, for garnish

Directions
1. Stir together the yogurt, lemon juice, olive oil, garlic, coriander,cumin, 1/4 teaspoon salt, and pepper to taste in a small bowl. Pour half of the sauce into a large resealable plastic bag; cover and refrigerate the remaining sauce. Add the salmon to the bag and turn to coat with the marinade. Refrigerate for 20 to 30 minutes, turning the bag over once.

2. Preheat a grill to medium-high. Remove the salmon from the marinade and blot off excess yogurt with paper towels. Lightly oil the grill and add the salmon; cook, turning once, until browned on the outside and opaque in the center, 4 to 6 minutes per side, depending on the thickness. Serve with the reserved yogurt sauce and garnish with the herbs and lemon wedges.
- recipe and photo cred to the Food Network

Saturday, April 16, 2011

Chicken Chow Mein with Bok Choi

If, like me, one of the first things you learned to cook was stir fry, you`ll love this dish. This is, in my opinion, the grown up version of stir fry. It`s a bit trickier than just adding veggies and meat to a wok, but not much more. This was my first experience working with bok choi (a japanese cabbage) and have to admit that I felt like an organic superstar at the grocery store buying it. It was really delicious and gave the food a very authentic feel. The first time I made this dish though, I didn`t buy the whole bok choi (only 1 or 2 of the leaves) and was sorrily disappointed - like spinach, the bok choi leaves wilt down significantly so you really do want to buy the whole thing. Another word to the wise: don`t skimp out on the water chestnuts - their crunchiness really adds to the experience. Soooo good the next day. Bon appétit!

Ingredients:
• a thumb-sized piece of fresh root ginger
• 2 cloves of garlic
• ½–1 fresh red chilli, to your taste
• 1 large skinless chicken breast, preferably
free-range or organic
• sea salt and freshly ground black pepper
• 2 spring onions
• a small bunch of fresh coriander
• 1 bok choi
• 100g (2 bundles) chow mein noodles
• groundnut oil (yah... I don't know what this is... we just used regular oil...)
• 1 heaped teaspoon cornflour
• 1 x 220g tin of water chestnuts
• 2–3 tablespoons soy sauce
• 1 small lime

To prepare your stir-fry:
• Put a large pan of water on to boil
• Peel and finely slice the ginger and garlic
• Finely slice the chilli
• Slice the chicken into finger-sized strips and lightly season with salt and pepper
• Cut the ends off your spring onions and finely slice
• Pick the coriander leaves and put to one side, and finely chop the coriander stalks
• Halve the bok choi lengthways
• If using the mushrooms, either tear into pieces or leave whole

here are some pictures of the play-by-play from Jamie's website:


To cook your stir-fry:
1. Preheat a wok or large frying pan on a high heat and once it’s very, very hot add a good lug of groundnut oil and swirl it around. Stir in the chicken strips and cook for a couple of minutes, until the chicken browns slightly. 

2. Add the ginger, garlic, chilli, coriander stalks, mushrooms (if using) and half the spring onions. Stir-fry for 30 seconds, keeping everything moving round the wok quickly. 

3. Add your noodles and bok choi to the boiling water and cook for 2 to 3 minutes, no longer. 

4. Meanwhile, add the cornflour, water chestnuts and their water to the wok and give it another good shake to make sure nothing sticks to the bottom. Remove from the heat and stir in 2 tablespoons of soy sauce. 

5.  Halve the lime, squeeze the juice of one half into the pan and mix well. Drain the noodles and bok choi in a colander over a bowl, reserving a little of the cooking water. Stir in the noodles and bok choi, with a little of the cooking water to loosen if necessary, and mix well. Have a taste and season with more soy sauce if needed

To serve your stir-fry
Use tongs to divide everything between two bowls or plates, or to lift on to one large serving platter. Spoon any juices over the top and sprinkle with the rest of the spring onions and the coriander leaves. Serve with lime wedges

- recipe and photo cred to Jamie Oliver

Jalfrezi Curry

As many of you know, we are currently cooking our way through Jamie Oliver's "Easy Curries". The more we make curries, the more we want to eat more curries. This particular dish is vegetarian (being meat lovers, we added a bit of chicken, but you certainly don't have to). The amazing thing with this dish is the slightly sweet and sour flavour that you get from the peppers. The recipe encourages the 'currier' (haha) to experiment with other combinations of vegetables such as courgettes, aubergines or potatoes once you’ve mastered this version – bigger, chunkier veggies need longer cooking times, so add them at the start, and delicate veggies like peas and spinach need only minutes, so they can go in right at the end. To note is that this recipe will serve 8 people – just halve the recipe if your pan isn’t large enough, or else freeze any leftovers. Bon appétit!


To make the paste:
2 cloves of garlic / a thumb-sized piece of fresh root ginger / 1 teaspoon turmeric /½teaspoon sea salt / 2 tablespoons groundnut oil / 2 tablespoons tomato purée / 1 fresh green chilli / a small bunch of fresh coriander
Spices for toasting: 2 teaspoons cumin seeds / 1 teaspoon brown mustard seeds / 1 teaspoon fenugreek seeds / 1 teaspoon coriander seeds


Directions for making the curry paste:
First peel the garlic and ginger • Put a frying pan on a medium to high heat and add the spices for toasting to the dry pan • Lightly toast them for a few minutes until golden brown and smelling delicious, then remove the pan from the heat • Add the toasted spices to a pestle and mortar and grind until fine, or put them into a food processor and whiz to a powder • Either way, when you’ve ground them whiz the toasted spices in a food processor with the rest of the ingredients until you have a smooth paste


-----------------------------------------------------
Ingredients for the curry dish (serves 8 so 1/2 it if you're expecting less for dinner):
• 1 medium onion
• 1 fresh red chilli
• a thumb-sized piece of fresh root ginger
• 2 cloves of garlic
• a small bunch of fresh coriander
• 2 red peppers
• 1 cauliflower (we used snow peas & zucchini instead)
• 3 ripe tomatoes
• 1 small butternut squash
• 1 x 400g tin of chickpeas
• groundnut or vegetable oil
• a knob of butter
• ½ a 283g jar of Patak’s jalfrezi curry paste (or make your own as above)
• 2 x 400g tins of chopped tomatoes
• 4 tablespoons balsamic vinegar
sea salt and freshly ground black pepper
• 2 lemons
• 200g natural yoghurt

To prepare your curry dish:
1. Start with food prep: Peel, halve and roughly chop your onion. Finely slice the chilli. Peel and finely slice the ginger and garlic. Pick the coriander leaves and finely chop the stalks. Halve, deseed and roughly chop the peppers. Break the green leaves off the cauliflower and discard. Break the cauliflower into florets and roughly chop the stem. Quarter the tomatoes. Carefully halve the butternut squash, then scoop out the seeds with a spoon and discard. Slice the squash into inch-size wedges, leaving the peel on but removing any thick skin, then roughly chop into smaller pieces. Drain the chickpeas

2. Start cookin': Put a large casserole-type pan on a medium to high heat and add a couple of lugs of oil and the butter. Add the onions, chilli, ginger, garlic and coriander stalks and cook for 10 minutes, until softened and golden.  Add the peppers, butternut squash, drained chickpeas and jalfrezi curry paste.  Stir well to coat everything with the paste.  Add the cauliflower, the fresh and tinned tomatoes and the vinegar.  Fill 1 empty tin with water, pour into the pan and stir again (only if it looks dry!). Bring to the boil, then turn the heat down and simmer for 45 minutes with the lid on.  Check the curry after 30 minutes and, if it still looks too liquidy, leave the lid off for the rest of the cooking time. 

3. When the veg are tender, taste and add salt and pepper – please season carefully – and a squeeze of lemon juice.

4. This dish is yummy with poppadums or some nice fluffy rice recipe and with a few spoonfuls of natural yoghurt, a sprinkle of coriander leaves and a few lemon wedges for squeezing over.

- recipe cred Jamie Oliver

now how delicious does that look?

Salmon Tika with Naan & Avocado Yoghurt

It's onward ho' with an attempt at including more fish in our diet and this is the latest creation. Given that I was going to be heavily 'spicing' the salmon, I decided to buy frozen fish, rather than fresh. This was a really fresh dish that was bursting (I mean it!) with flavour. So pretty too! You could easily cook your fish on the bbq for an even more authentic taste. The higher the temperature the better when making tandoori anything. As a word of warning, our dish ended up pretty spicy, so, if heat's not your cup of tea, be careful with the size of your chili. Bon appétit!

Ingredients
• 2 naan breads
• 1 fresh red chilli
• ½ a cucumber (I used avocado as I am not a fan of this brute!)
• 1 lemon
• 4 tablespoons natural yoghurt
• sea salt and freshly ground black pepper
• a few sprigs of fresh coriander
• 2 x 200g salmon fillets, skin on,scaled and bones removed
• 1 heaped tablespoon Patak’s tandoori curry paste (making your own is EASY. Check out my tandoori chicken recipe for the ingredients/directions to make your own)
• olive oil

Directions:
1. Preheat your oven to 110°C/225°F. Pop your naan breads into the oven to warm through.

2. Halve, deseed and finely chop your chili. Peel and halve your cucumber (...or avocado) lengthways, then use a spoon to scoop out and discard the seeds. Roughly chop the cucumber (....) and put most of it into a bowl. Halve your lemon and squeeze the juice from one half into the bowl. Add the yoghurt, a pinch of salt and pepper and half the chopped chilli. Pick the coriander leaves and put to one side

3. Slice each salmon fillet across lengthways into three 1.5cm wide slices. Spoon the heaped tablespoon of tandoori paste into a small dish, then use a pastry brush or the back of a spoon to smear the tandoori paste all over each piece (don’t dip your pastry brush into the jar!). Heat a large frying pan over a high heat. Once hot, add a lug of olive oil, put the salmon into the pan and cook for about 1½ minutes on each side, until cooked through
4.  Place a warmed naan bread on each plate. Top each one with a good dollop of cucumber yoghurt and 3 pieces of salmon. Scatter over a little of the reserved cucumber, chilli and coriander leaves and finish with a squeeze of lemon juice. Enjoy!

- recipe cred to Jamie Oliver

Bar-B-Qu'ed Chicken with Spicy Peach Glaze

Today I found out that Ottawa was voted the #1 city to live in in Canada (booya!). We love living here. It's officially BBQ time here in Ottawa too. We have a little hibachi that makes the BEST bbq'ed eats. If you've never cooked with charcoal, you don't know what you're missing! This is wonderful, easy little dish that you can make up in a couple of minutes. The peach really nice and sweet with the chicken. We made up a batch of corn bread and some oven roasted potatoes and mmmmmmmmmm. Bon appétit!

Ingredients (for 4):
1/2 cup peach preserves, or jam
1 large clove garlic, minced (1 teaspoon)
1 tablespoons olive oil
1/2 tablespoon plus 1 teaspoon soy sauce
1/2 tablespoon dry mustard
1/8 teaspoon cayenne pepper
1/2 teaspoon salt, plus more to taste
1/8 teaspoon freshly ground black pepper
2 chicken breasts, (about 2 1/2 pounds), split
2 ripe peaches, cut in half and pitted

Directions
1. Preheat grill to medium hot. In a medium mixing bowl, combine preserves, garlic, olive oil, soy sauce, dry mustard, cayenne pepper, salt, and black pepper, and mix well to combine.

2. Boil chicken breasts to cook through and then sprinkle with additional salt and pepper. Place, skin side down, on the grill. Cook the chicken about 10 minutes on each side before brushing the upturned side with glaze. Continue cooking chicken for another 10 to 12 minutes, turning it every 3 to 5 minutes and brushing each upturned side with glaze every time, until the chicken is cooked through. Move chicken to the oven or a cooler part of grill if it gets too dark before it is cooked through.

3. Place peach halves on the grill, cut side down, and grill 2 minutes. Turn, and brush the tops with glaze. Grill 3 to 4 minutes more, until the peaches are soft and the cavities fill with juices. Transfer the cooked chicken and peaches to a serving platter.

Chicken Empanadas

Yum yum yummy. These are tasty little guys that take a fair bit of time and resulted in some lovely oil burns on my arms but boy were they good. I would never have thought to put the sugar on top, but it actually does make a big difference in the taste. Instead of making a dozen, we made half that! Big ones though. Bon appétit! 


Ingredients (for empanada dough):
Makes enough for 1 dozen
2 cups all-purpose flour, plus more for work surface
3/4 cup fine cornmeal, or masa harina
2 teaspoons sugar
1/2 teaspoon salt
3 tablespoons vegetable shortening
2 large egg yolks

Directions:
In a food processor, combine flour, cornmeal, sugar, and salt. Add shortening; process 5 seconds. Add yolks and 3/4 cup water; process until dough is very soft, about 5 minutes. Turn out onto a lightly floured work surface; knead until smooth. Cover; let rest 30 minutes before using.

----------------

Ingredients (for filling):
Makes 1 dozen
1 whole chicken breast (1 pound), skin removed
1/2 white onion, halved
1 dried bay leaf
1 fresh poblano chile
6 cups (48 ounces) vegetable oil
2 garlic cloves, crushed
3/4 teaspoon ground cumin
1/4 teaspoon ground canela (Mexican cinnamon) or regular cinnamon
4 canned plum tomatoes, coarsely chopped
2 canned chipotle chiles in adobo, coarsely chopped
Coarse salt and freshly ground pepper
2 tablespoons coarsely chopped fresh cilantro
1 tablespoon pepitas (pumpkin seeds), toasted and coarsely chopped
1/2 cup shredded queso blanco
1/4 cup sugar, for sprinkling
Crema pura or sour cream, for serving (optional)

Directions:
1. Make filling: Place chicken breast, half the onion, and the bay leaf in a medium saucepan. Cover with cold water, and bring to a boil over medium-high heat. Reduce heat to medium-low, and poach until chicken is cooked through, about 15 minutes. Transfer chicken to a plate; reserve 1 cup cooking liquid, and discard onion and bay leaf. When chicken is cool enough to handle, shred meat from the bone with a fork; set aside.

2. Roast poblano chile directly over a gas flame, turning as each side blackens and blisters. (Alternatively, roast chile under the broiler.) Transfer to a bowl, and cover with plastic wrap; let steam 10 minutes. Remove plastic wrap; peel off and discard blackened chile skin. Remove stem, seeds, and ribs; discard. Slice chile into 1/4-inch strips; set aside.

3. Finely chop remaining onion. Heat 2 teaspoons oil in a medium saucepan over medium heat. Add chopped onion and garlic; sauté until soft and translucent. Stir in cumin and canela; cook 1 minute. Add shredded chicken, tomatoes, chipotle, poblano, and reserved cooking liquid. Cook over medium-low heat, stirring occasionally until liquid has thickened, about 25 minutes. Remove from heat. Season with salt and pepper; stir in cilantro and pepitas. Set aside to cool.

4. Make empanadas: Break off a 1 1/2-inch ball of empanada dough. On a clean work surface, roll dough into a circle about 1/8 inch thick. Using a 3 1/2-inch cookie cutter, cut out a round of dough. (Or use an inverted glass as a guide, cutting around it with a sharp paring knife.)

5. Place 1 teaspoon filling in center of each round; sprinkle with cheese. Using a pastry brush, moisten edges of dough with water; fold dough over to seal, pressing gently. Crimp edges with a fork; set aside. Repeat with remaining dough. Gather scraps and reroll. (Only do this once, to avoid toughening the dough.)

6. Pour remaining oil into a medium saucepan; oil should be 2 inches deep. Place over medium heat until oil reaches 375 degrees.on a deep-fry thermometer. Working with a few empanadas at a time to avoid overcrowding, fry until golden, turning once, about 1 minute. Using a slotted spoon, transfer to drain on a paper-towel lined baking sheet. While still hot, sprinkle tops with sugar. Serve immediately with crema pura or cream on the side, if desired.

Alsatian Potato Pot Pie

Folks. This is one yummy, yummy little pie. And when I mean yummy, I mean YUMMY. And when I mean little, I mean BIG. Now who doesn't like puff pastry? I mean, really? This pie is definitely a bit more work than your average pasta and sauce (it's a Martha Stewart... what can I say?) but it`s worth it if you`re in the mood for making a special dish. The potatoes definitely make it filling so you really don`t need that much. It`s nice paired with a salad to offset the cream, pastry... etc. etc. We cut the recipe in half and only used 1/2 of a puff pastry brick. I think that you could easily use 1/2 an 1/2 cream rather than full as well! Enjoy and, as always, bon appétit!


Ingredients: 
Serves 6
3 (about 1 1/2 pounds) Yukon gold potatoes, peeled and cut into 1/4-inch-thick rounds
Coarse salt
1 cup heavy cream
5 cloves garlic, crushed with the flat side of a large knife
1/2 teaspoon freshly grated nutmeg
Freshly ground pepper
2 tablespoons unsalted butter
1 medium leek, white and light-green parts only, halved lengthwise, thinly sliced crosswise, and washed well
1/4 cup chopped fresh flat-leaf parsley
1 piece boneless skinless chicken, diced in to small pieces
1 large egg yolk
1 (14 ounces) frozen puff pastry, (such as Dufour), thawed
All-purpose flour, for work surface
1 1/2 cups grated Comte or Gruyere cheese (I used mozzarella)

Directions:

1. Cover potatoes with water in a medium saucepan. Bring to a boil over high heat. Add a pinch of salt; cook until just tender, 13 to 15 minutes. Drain. Let cool.

2. Bring 3/4 cup plus 3 tablespoons cream, the garlic, and nutmeg to a boil in a small saucepan over medium-high heat. Cook mixture until reduced by half. Season with salt and pepper; set aside.

3. Melt butter in a skillet over medium heat. Add leek; cook, stirring occasionally, until softened, about 5 minutes. Remove from heat. Stir in parsley; season with salt and pepper. Set aside. When finished, cook chicken until browned. Set aside.

4. Preheat oven to 400 degrees. Whisk egg yolk and remaining tablespoon cream in a small bowl; set aside. Divide puff pastry on a lightly floured surface into two 6-by-13-inch rectangles. Set 1 rectangle on a baking sheet lined with parchment paper. Add half of the potatoes, leaving a 1/2-inch border all around and overlapping potatoes slightly. Top with half of the leek mixture and 3/4 cup cheese; season with salt and pepper. Repeat layering with remaining potatoes, leeks, and cheese. Brush edges of dough with egg wash. Cover with remaining dough rectangle; gently press edges with a fork to seal. Cut 2-inch slits lengthwise in center of crust, 2 inches apart. Brush with egg wash. Refrigerate until cold, about 30 minutes.

5. Bake pie until golden brown and puffy, about 35 minutes. Remove from oven. Pour cream mixture into pie vents with a funnel. Bake 10 minutes more. Let stand 15 minutes before serving.

* recipe cred, Martha Stewart

Monday, April 4, 2011

Honey Barbeque'd Chicken


This weekend in Ottawa, we reached a balmy 10C. Mmmm. Spring is in the air! That said, we decided to pull out the habachi and bbq' us up some yummy chicken. This is a great, super easy little bbq'ed chicken recipe. Often the big problems with bbq'ing chicken is that it turns out BURNT on the outside and uncooked on the inside and SO TOUGH that you can hardly chew it.   I recommend 3 things when bbq'ing chicken: 

1) boil your chicken first to ensure that it is cooked through and juicy, 
2) when using bbq sauce, brush it on just a few minutes before you take the chicken off of the grill. By doing this, you can have the flavor from the sauce, but you won't risk burning the meat. Barbeque sauces tend to have a high sugar content and therefore can burn really quickly, even at low temperatures. 
3) as much as possible, cook your chicken on a low heat and a longer period of time. The faster you cook it, the drier it tends to be. Using low heat for a long time will help it stay moist, and using a dry rub will give it a lot of flavor without leaving anything to burn.

Bon appétit folks and happy Spring!

Ingredients:
3 boneless skinless chicken breasts
6 tablespoons barbecue sauce
3 tablespoons honey
1/4 teaspoon red pepper
1/4 teaspoon pepper
1/4 teaspoon garlic powder
1/4 teaspoon chives

1. Boil the chicken in hot water for a few minutes before you place it on the grill. This will help make sure the insides are cooked before you finish it on the barbecue for the great grilled flavor.

2. Arrange the chicken breasts on the grill over medium heat. Generously baste them with barbecue sauce and honey, and sprinkle with the spices. Turn once while cooking and cook for four to five minutes on each side.

3. Serve! I chopped mine up and served it with a hearty serving of greens with mango while Jerms popped his on a nicely toasted bun and ate it as a chicken burger. Either way - delicious!

- recipe cred to Barbeque Bob`s Special BBQ Recipes and Secrets