Monday, December 17, 2012

Big, Chewy Oatmeal Cookies

One of my favourite foods from my old highschool cafeteria was the big soft oatmeal cookies that the ladies would bake up first thing in the morning. They were HUGE and cost $0.50 a piece. Every now and then I'd buy one before homeroom :)   ... needless to say, it was gone before O'Canada!

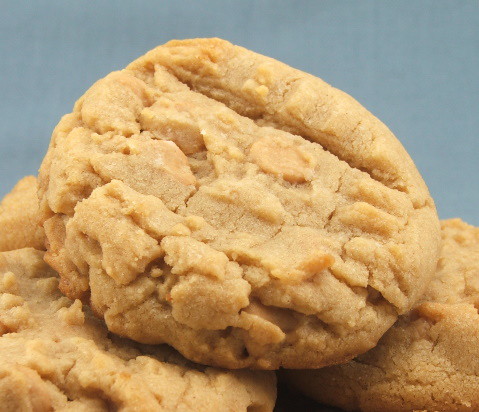
These cookies are really tasty. My saying is always that "an under-cooked cookie is a well cooked cookie" so make sure that you remove the cookies just, just as they start to brown. That way, you'll ensure that they stay nice and chewy. Bon appétit!

Ingredients:
1 1/2 cup unbleached all-purpose flour
1/2 teaspoon salt
1/2 teaspoon baking soda
1/2 teaspoon baking powder
1/4 teaspoon freshly grated nutmeg
1 cup unsalted butter, softened
1 cup packed light brown sugar
1 cup granulated sugar
1 eggs
3 cups old-fashioned rolled oats
1 1/2 cup raisins (optional)

Directions:
1. Adjust the oven racks to the low and middle positions, and heat the oven to 350 degrees. Line two large baking sheets with parchment paper.

2. Whisk the flour, salt, baking powder and nutmeg together in a medium bowl; set aside. In the bowl of a standing mixer fitted with the paddle attachment, beat the butter at medium speed until creamy, about 1 minute. Add the sugars and beat until fluffy, about 3 minutes.

3. Beat in the eggs one at a time. With the mixer running on low speed, slowly add the dry ingredients and mix until just combined. Stir in the oats and raisins, if using.

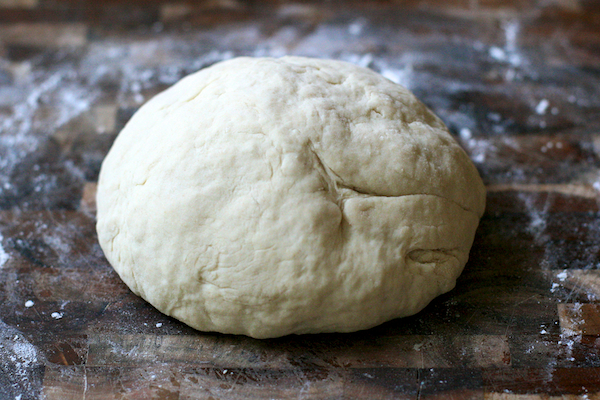
4. Working with a generous 2 tablespoons of dough each time, roll the dough into 2-inch balls. Place the balls on the parchment-lined cookie sheets leaving at least 2 inches between balls.
5. Bake, reversing the position of the baking sheets halfway through baking (from top to bottom and front to back), until the edges of the cookies turn golden brown, 6-8 minutes (check check check them though!). Slide the cookies, on the parchment, to a cooling rack. Let cool at least 30 minutes before peeling the cookies from the parchment.

Homemade Sloppy Joes

Growing up, I love, love, LOVED Sloppy Joes. Under the influence of my father, I honestly believed that they were named after my real-life Uncle Joe who was (according to dad) always a messy eater. I think that I liked making this meal too because it was one of the few dishes that I could actually make by myself - all I had to do was brown the ground beef and add a package of Old El' Paso seasoning. I have since discovered that - amazingly enough - you can make an even better (an cheaper!) version on your own.  This recipe is pretty darn tasty and an easy weeknight dinner. Bon appétit!

* I've tried my best to estimate the seasonings but you may have to do a little tweaking to get the flavours right.

Ingredients
1 pounds ground beef
1 medium onions, chopped
2 to 3 garlic cloves, crushed
3 tsp. cumin
3 tsp. chili
2 tbs. brown sugar
1 tsp. onion powder
1/4 tsp. cayenne pepper
1/4 cup apple cider or cider vinegar
Salt & pepper to taste
Hamburger buns, split

Directions
1. In a large skillet, cook the beef, onions and garlic over medium heat until the meat is no longer pink; drain. Stir in the tomato paste and seasonings. Bring to a boil. Reduce heat; simmer, uncovered, for 20 minutes.
Serve about 1/2 cup meat mixture on each bun. Or cool and freeze in freezer containers for up to 3 months.
Yum!

Saturday, November 17, 2012

Honey Oat Bread

It has been a very long time since I have posted anything on my little blog. There is one big reason for that: I'm pregnant! This'll be baby #1 for us and I must confess that 99% of the past 3 months' dinners have consisted of a welcoming bowl of Cheerios. I have done little to no baking, cooking or meal prep in general and my poor husband has been living off perogies and hot dogs. Today I had a bit of energy and inspiration though (the latter from my brother in law who sent us up some very yummy looking wild pear & wild grape jams!) and decided to whip up a loaf of this delicious honey oat bread from the lovely Darla at Bakingdom. A tip that she suggests is lining the loaf pan with parchment to make the bread easier to remove (a bit will hang over the edges and you just lift it out... brilliant!). I hope that you will enjoy it too! (makes enough for 1 9×5-inch loaf). Bon appétit!
ps - the oats on top will make you feel pro star :)

Ingredients
3 cups (381 grams) all-purpose flour
3/4 cups oats (I have used instant and old fashioned, both work great)
2 1/4 teaspoons instant yeast
1 1/2 teaspoons salt
1 cup (250 ml) milk (almond or soy milk for vegan/dairy free)
1/4 cup (62 ml) lukewarm water
2 tablespoons (28 grams) unsalted butter or margarine
1/4 cup honey (agave for vegan)

Topping:
1 1/2 to 2 tablespoons honey (or agave), warmed
1 1/2 to 2 tablespoons oats

Directions:
In a large bowl, or the bowl of a standing mixer, combine the flour, oats, yeast, and salt.

In a small bowl, or two cup (450 ml) measuring cup, warm the milk so that it’s hot enough to melt the butter, but not boiling. Add the butter, stirring until melted, then stir in the water and honey.

Pour the milk mixture into the flour mixture, mixing until it just comes together to form a dough. Knead for 10 minutes, until the dough is smooth and elastic. If the dough is still very wet and sticky after 5 minutes of kneading, add more flour, 1 tablespoon at a time, until the dough is barely tacky. If the dough is too dry, add water, 1 teaspoon (5 ml) at a time, to soften it up.

Place the dough in a lightly oiled bowl, cover, and allow to rise until doubled, about 1 to 1 1/2 hours.

Once doubled, place the dough on a clean, dry work surface. If the dough is too sticky, lightly flour the surface before continuing. With your fingers, flatten the dough into a 9 by 12-inch rectangle. Tightly roll the dough, tucking the ends as needed, into a loaf. Place the shaped dough into a 9×5-inch loaf pan, cover with a clean dry towl, and allow to rise until doubled, about 1 to 1 1/2 hours.

Preheat oven to 350 degrees (180 C). Place an empty loaf pan on the bottom rack of the oven and bring 2 cups of water to a boil.

When the loaf is doubled again, brush the top with the warmed honey and sprinkle with the oats.

Place the bread in the oven and pour the boiling water into the empty loaf pan on the bottom rack of the oven. Bake for 40 to 50 minutes, until the bread is deep golden brown and the internal temperature is about 190 degrees.

Transfer to a wire cooling rack and allow to cool completely before serving.

Monday, September 17, 2012

Peanut Butter Chip Cookies

Word to the wise - have an event of sorts to bring these to so that you don't end up eating them all yourself! They're incredibly tasty little cookies. With lots of nice, smooth peanutty buttery flavour. When I read in the cookbook that this recipe would make 5 dozen cookies, I let out an audible scoff. Who honestly makes 5 dozen cookies with a recipe? Those must be some measly, sad little cookies if you ask me.  I shot for what I saw as a more appropriate 2 1/2 dozen.  Bon appétit!

Ingredients:
2-1/4 cups all-purpose flour
1 teaspoon baking soda
1/2 teaspoon salt
1/2 cup (1 stick) butter, softened
1/2 cup peanut butter
3/4 cup granulated sugar
3/4 cup packed light brown sugar
1 teaspoon vanilla extract
2 eggs
2 1/2 cups peanut butter chips

Directions:
1. Heat oven to 375°F.

2. Stir together flour, baking soda and salt. Beat butter, granulated sugar, brown sugar and vanilla in large bowl with mixer until creamy. Add eggs; beat well. Gradually add flour mixture, beating well. Stir in Reese's peanut butter chips. Drop by rounded teaspoons onto ungreased cookie sheet.

3. Bake 7-8 minutes or until lightly browned. Cool slightly; remove from cookie sheet to wire rack. Cool completely.

Homemade Pizza Dough


The first time I made pizza dough from scratch, I was terrified. Thought for sure that it just wouldn't work out. And, like most of my new experiences in the kitchen, I discovered that working with yeast was no big deal. None, whatsoever. The dough came together perfectly. Since then, I've perfected things even more and use my stand mixer with the dough hook attachment, making it really simple. I can never wait long enough to let it rise to it’s full height (i.e., double in size), but it always works great regardless! 

If you're a fan of multigrain dough, I suggest substituting a 1/4 cup of the regular flour for 1/4 cup of 12 grain (or whole wheat with a variety of seeds/nuts etc.) thrown in.  This recipe makes such a yummy, chewy dough. Delicious! Bon appétit!

Ingredients:

1 package active dry yeast (2 1/2 tsp) (10g)
2 tsp sugar (13g)
2/3 cup warm water (167g)
2 cups flour (if you want to do a 'whole wheat crust', use 1 3/4 cups white four and 1/4 cup whole wheat or 12 grain flour ... I especially like the 12 grain) (358g)
1 tbs corn meal
1/2 tsp salt (5g)
1 tbs. olive oil (11g)
Optional: any herbs to season your dough - dash of oregano, pinch of rosemary, pinch of red pepper flakes etc.

Directions:
For the bread maker:
Toss er' all in (except for the corn meal!!) and set your bread maker to 'pizza dough' ... if you don't have that kind of setting, I'm sure just the 'dough' setting would work too. This usually takes 45 minutes to an hour.

For the hands/stand mixer:
1. Combine your yeast, 1 tsp. sugar and the water in a large bowl for approx. 10 minutes (until mixture becomes frothy)
2. In a separate bowl, combine your flour, 1 tsp. sugar, and salt
3. Add the olive oil to the yeast mixture
4. Add 1 3/4 cups of your dry mixture to the wet and knead until a rough ball forms
5. Transfer your dough to a floured surface and knead 3-4 minutes
6. Spray a large bowl with cooking spray or butter, add the dough and cover with a damp towel. Place in a warm, dry and draft-free place for 1 hour (I like to turn the oven on for 20 seconds just to warm it up a little bit, turn off the heat and then place the bowl in the oven).
7. Once the dough his risen, PUNCH it down and fold in on itself to make another ball. Transfer this to your floured surface.

---
Once your dough is ready... 

1. Set your oven to 425F. Lightly oil your pizza pan and sprinkle with corn meal. You can use a conventional round pizza pan or a cookie baking pan would work well as well. Roll your dough out on a lightly floured surface until you reach the desired shape of your pizza pan. Transfer dough to pizza pan.

2. Top your pizza with all of your ingredients and bake at 425F for 12-15 minutes. Let sit for 5 minutes for cutting. Enjoy!

Friday, August 17, 2012

Thai Chicken & Mango Stir Fry


This is a nice little stir fry that doesn't require much planning and tastes delicious. Both ripe and underripe mango work well. If the mangoes you have are less ripe though, use 2 teaspoons brown sugar. If they’re ripe and sweet, just use 1 teaspoon or omit the brown sugar altogether.  The fresh herbs are really what make this great dish (if you don't have them though, don't worry - it'll still taste great). A little note that if you anticipate having left overs - I'd recommend setting those portions aside before adding your fresh herbs and then adding the herbs the following day. That way you won't lose the intense flavour of the fresh herbs and your dish will reheat much better.  Also - a word to the wise: do not add the mango until the very, very end - otherwise it will just disappear into the dish. Bon appétit!

Ingredients:
2 tablespoons plus 1 teaspoon fish sauce (see Note)
2 tablespoons lime juice
1 1/2 teaspoons cornstarch
1-2 teaspoons brown sugar
4 teaspoons canola oil, divided
1 pound chicken tenders, cut into 1-inch pieces
2 cloves garlic, minced
1 teaspoon minced fresh ginger
1-2 fresh small red or green chile peppers, stemmed and sliced, or 1/2-3/4 teaspoon crushed red pepper
2 cups of red/green pepper, or broccoli, or maybe some nice snow peas
1/4 cup water
2 mangoes, peeled and sliced
1 bunch scallions, cut into 1-inch pieces
1/4 cup chopped fresh cilantro
1/4 cup chopped fresh basil, preferably Thai
sprig of chopped fresh mint
1 lime, cut into 6 wedges
+ rice, vermicelli, naan or whatever you like to serve your stirfry with...

Directions:
1. Combine fish sauce, lime juice, cornstarch and brown sugar to taste in a small bowl.

2. Heat 2 tbs. oil in a wok or large skillet over high heat. Add chicken; cook, stirring, until just cooked through, 5 to 7 minutes. Transfer to a plate.

3. Add the remaining 2 tsp. oil, garlic, ginger and chiles (or crushed red pepper) to the pan. Cook, stirring, until fragrant, about a minute. Add veggies and water; cook, stirring, until beginning to soften, about 2 minutes. Add the reserved sauce and chicken; cook, stirring, until the sauce is thickened and the chicken is heated through, about 1 minute. Add mangoes and scallions; cook, stirring, for 30 seconds. Stir in cilantro, basil and mint. Serve with lime wedges!

Chicken Tikka Masala Curry


So unfortunately I don't have an actual picture of this dish because we ate it rehydrated on our week-long canoe trip through Algonquin Park. And all the credit goes to the amazing husband on this one - he did all the cooking and dehydrating and I just posed for the picture. This curry was incredible. Mouth wateringly incredible. Sweet yet tangy and it even dehydrates into a nice, light, cut-up-able sheet! On site, we added a brick of coconut solid because we needed the fat/proteins, but that'd be up to you. This recipe comes from Jamie Oliver - he recommends you marinate the chicken over night if you can, but of course we didn't do that (I'd be interested to know who thinks ahead to do these things!). Giles boys - another one you'll love. Bon appétit!

Ingredients (for 4):

• ½ fresh red chilli, deseeded (taste for spiciness!)
• 1 clove of garlic, peeled
• thumb-size piece of fresh ginger
• vegetable oil
• a pinch of paprika
• ½ tablespoon garam masala
• a teaspoon of tomato puree
• 3 sprigs of fresh coriander, leaves picked and chopped, stalks reserved
• 400g chicken breast, diced
• 1 small onion, peeled and sliced
• ½ red pepper, deseeded and sliced
• ½ green pepper, deseeded and sliced
• a pinch of ground cinnamon
• a pinch of ground coriander
• a pinch of turmeric
• 1 x 400g tin plum tomatoes
• 100ml plain yoghurt
• 100ml double cream (again, we used the coconut solid instead...)


For the curry paste:
Blitz the chilli, garlic, ginger and vegetable oil in the food processor. Add the paprika, garam masala and tomato puree, plus the coriander stalks, and blitz again to form a paste. Place the chicken pieces in a large bowl, coat them with the marinade and leave in the fridge overnight.

The next day…
In a little vegetable oil, on a medium heat, fry the onion, peppers and spices in a large saucepan. Cook gently for 10 minutes then add the tin of tomatoes and the yoghurt. Add the chicken and simmer gently for 15 to 20 minutes until cooked. Just before serving, stir through the double cream and chopped coriander leaves.


Monday, July 23, 2012

Zucchini Goat Cheese Omelet

My mum and dad have by far, the BEST vegetable gardens around. I'm not going to even mention the flower beds because this is a food blog, but lets just say that they could easily be featured in Better Homes & Gardens! This year the zucchini harvest was plentiful!  Just tonnes and tonnes of fresh, beautiful zucchini. Needless to say, I was richly blessed to receive a zucchini-filled care package in the mail earlier this week and decided to make the most out of those delicious little guys. This is a nice, light summer omelet which I hope you will enjoy! Bon appetit!

ps - The picture is a little dark, my apologies, but I had to use this one because I didn't want to display my flopped, failed to be properly formed omelet for all the world to see.  Taste over presentation, taste over presentation ...

Ingredients:
red onion, thinly chopped
goat cheese
3 eggs
splurt of milk
salt/ground pepper
thinly sliced zucchini
fresh baby spinach

Directions:
1. Mix your eggs, milk and salt/pepper in a large bowl and set aside. Pan fry the red onion until fragrant and tender and add your zucchini. Grill until lightly browned. Add everything to the egg mixture.

2. Over medium heat and a lightly oiled pan, fry your egg mixture until the top starts to look kind of cooked. Add the fresh spinach and goat cheese and then flip. Serve hot and enjoy!

Frozen Orange Sherbet Cream Sickle Dessert

This dessert is an orange cream-sickle lover's heaven. It's truly divine and quite possibly my favourite summer dessert. I've also made it with raspberry sherbet and blended fresh raspberries into the creamy part as well, but the orange is definitely my favourite. A perfect summer treat. A couple of hints when making this dessert - you'll want to pre-freeze the plate that you're going to serve it on to avoid a melty mess and you'll also want to make sure that you freeze the whole thing for a good day to make sure that it's good a solid. This just might be a "could have bought it at Loeb" kind of cake! Bon appétit!

Ingredients:
2 cups orange sherbet, softened (enough to have approx. 1 1/2" of sherbet on base of pan)
1 pkg. (8 oz.) cream Cheese, softened
1 can (14 oz.) sweetened condensed milk
1/2 cup frozen orange juice concentrate
rind of 1 orange
2/3 tub thawed coolwhip

Directions: 
1. Line a bread loaf pan with foil. Spread sherbet onto bottom of prepared pan to form even layer. Freeze 10 min.

2. Meanwhile, beat cream cheese in large bowl with mixer until creamy. Gradually add condensed milk, orange rind and frozen juice (I just dollop in 1/2 the can of frozen juice concentrate), beating until blended. Whisk in cool whip; spread over sherbet in pan.

3. Freeze the whole thing for a good 6-7 hours, or, ideally overnight. To unmold, invert pan onto a pre-frozen plate; remove foil.  Enjoy!

Wednesday, June 20, 2012

Chipotle Marinated Chicken with Black Bean Salsa


I love it when we can actually get our act together and marinade something longer than 20 minutes. The result is always worth the wait! If you haven't noticed, I definitely have developed a new special spot in my heart (and blog!) for canned chipotle chiles in adobo sauce (tends to be found with the mexican food).  I'm telling you, these chiles are so darn delicious and somehow very 'authentic' tasting. A chipotle chile is a smoked, ripe, jalapeno pepper. They're pretty spicy so you may want to taste the sauce first before loading it in to your food. This particular dish can be made with either pork or chicken. The black bean accompaniment is pretty tasty! Enjoy and ...   bon appétit!


Ingredients
For The Pork/chicken
1 canned chipotle chile, in adobo sauce
3 garlic cloves
1/2 cup coarsely chopped white onion
2 tablespoons fresh lime juice
1 teaspoon sherry vinegar
1 teaspoon dried Mexican oregano
1 pound pork tenderloin, trimmed of fat

For The Salsa
1 can (19 ounces) black beans, drained and rinsed
1 cup grape tomatoes, quartered
1/4 cup finely chopped white onion
1/4 cup finely chopped fresh cilantro
3 tablespoons fresh lime juice
2 teaspoons minced canned chipotle chile, in adobo sauce
1/2 teaspoon ground cumin
pinch of vinegar

Directions
1. Make the meat marinade: Process chile, garlic, onion, lime juice, vinegar, and oregano in a blender until smooth. Rub marinade all over the pork/chicken. Transfer to a dish, and cover with plastic wrap. Refrigerate overnight.

2. Preheat oven to 350 degrees. Heat a grill pan over high heat. Grill meat until seared on all sides, about 2 minutes per side. Transfer pan to the oven; cook until an instant-read thermometer inserted into center of meat registers 145 degrees, 20 to 25 minutes. Let pork stand at room temperature 5 to 10 minutes before slicing.

3. Meanwhile, make the salsa: Stir together the black beans, tomatoes, onion, cilantro, lime juice, chile, and cumin in a small bowl. Serve with the yummy meat! Enjoy :)

- recipe adapted from Martha Stewart


Monday, June 18, 2012

Tomato & Goat Cheese Salad

With the thermometer about to hit 32 (humidex 46!!!) this week, I was keen to find some no-cook, no-heat recipes. This turned out to be a nice, fresh,  kinda different little salad that was easy to put together. Believe it or not, Martha actually suggests cutting your goat cheese with a piece of dental floss - I decided that it was probably better that I simply didn't go down that road.  Bon appetit!

Ingredients: cherry tomatoes, cilantro, red/green onion, fresh goat cheese.

Tuesday, April 17, 2012

Chipotle Chicken Tacos with Fresh Guacamole

This is a recipe for chicken tacos spiced up with chipotle peppers and topped with a cool guacamole sauce. Again, really, really yummy. A good idea if you happen to end up with left over chicken from another meal. We BBQ'ed our chicken before hand so it had some of that great smokey flavour as well. ENJOY! And, as always ... Bon appétit :)


Ingredients (6 servings)
1 yellow onion, diced
3 cloves garlic, minced
2 chipotle chiles in Adobo, seeds scraped out, minced, plus 1 tablespoon of the Sauce
3 cups cooked chicken, rough chopped
1 teaspoon oregano
1 teaspoon chile powder
1/2 teaspoon salt & fresh black pepper
1/4 cup water
Tortillas/shells
Your choice of fixin's: sour cream, cheese, diced lettuce, tomato, onion, salsa, lime wedges, salsa etc.

Guacamole:
2 avocadoes, halved, pitted, flesh removed
2 teaspoons fresh squeezed lemon juice
1-2 crushed pieces of garlic
1/2 cup tomato, diced
1/3 cup yellow onion, finely diced
2 teaspoon fresh cilantro, finely chopped
Salt and pepper

Directions:
1. Saute the onion in oil until translucent, add garlic and saute until fragrant, add chipotles and saute for a minute or two.

2. Add chicken, oregano, chile powder, salt, pepper, and water. Mix well and heat over medium-low heat about 8 - 10 minutes, stirring often.  You may have to play around with the spices until you get it right... sorry, those are approximations on the spices!

3. Serve in heated tortillas with fixin's.

Chicken Fettuccine with Pesto Cream Sauce

Oh my is this ever an amazing dish.  So pro-star too. You will be so impressed with yourself it's not even funny. I recently posted a yummy pesto recipe too, or you could also pick some up from the grocery store (I of course, highly suggest you make your own though). In Ottawa, you can get great fresh basil this time of year at Nicastros in the Glebe.  Much better tasting (and priced!) in my opinion than the usual tiny sprigs you can buy at the grocery stores. Bon appétit!

ps - My camera battery had died the day I made up this dinner, so you get the beautiful Martha picture to go along with this recipe too.

Ingredients:
3 boneless, skinless chicken breast halves (6 to 8 ounces each)
Coarse salt and ground pepper
1 tablespoon olive oil
1/2 pound fettuccine
1/2 cup basil pesto
1/4 cup heavy cream

Directions:
1. Place chicken breasts between two pieces of plastic wrap. With a meat mallet or heavy skillet, pound chicken to an even 3/4-inch thickness. Season with salt and pepper.

2. Heat the oil in a large nonstick skillet; cook the chicken until golden brown and cooked through, 3 to 4 minutes per side. Slice each piece across the grain into 4 or 5 strips; cover to keep warm.

3. Meanwhile, cook pasta according to package instructions. Reserve 1/4 cup cooking water. Drain pasta and return to pot.

4. In a small saucepan, heat pesto over low until liquefied. Stir in cream; heat until warm. Toss pasta with reserved cooking water and half the sauce. Divide among shallow bowls; top with chicken. Drizzle with remaining sauce.

- recipe cred to Martha 

Sesame Beef Sandwiches

My apologies to my poor little half-abandoned blog. I haven't been taking care of you the past few weeks as I should have. I also haven't been very adventurous in the kitchen the past few weeks either - which, remarkably enough, is suggestive of the fact that the blog has been lacking!

On the weekend, my husband cooked an absolutely mammoth piece of beef. I'm talking huge. It's only the 2 of us and, while I'm sure Georgie would have loved his share, he has quite the delicate little disposition. Needless to say, we`ve been looking for ways to eat up our excess of beef. This recipe is quite different in that you use pan-fried pizza dough as your `bun`. Neato.
Bon appétit!

Ingredients:
1 pound pizza dough (fresh, not frozen)
3 tablespoons vegetable oil, plus more for greasing
2 tablespoons sesame seeds
2 cups shredded coleslaw mix
1 tablespoon rice wine vinegar
1/4 to 1/2 teaspoon chili oil
6 ounces roast beef (you could easily use deli sliced)
1 tablespoon toasted sesame oil
3 scallions, thinly sliced
1/2 teaspoon grated peeled ginger
1/2 cup fresh cilantro

Directions
1. If using pre-bought pizza dough, microwave dough on 50 percent power to soften, 1 to 2 minutes, then let rest 5 minutes. I`ve never tried pre-made dough so hopefully it works out okay. If you`re keen, you can make your own very easily with this recipe. Grease a large plate with vegetable oil; shape the dough into a 9-inch round and place on the plate. Sprinkle with 1 tablespoon sesame seeds and 1/4 teaspoon salt.

2. Toss the coleslaw mix, vinegar, chili oil, and salt to taste in a bowl. In another bowl, toss the roast beef, sesame oil, scallions and ginger.

3. Heat 3 tablespoons vegetable oil in a large nonstick skillet over medium-high heat. Add the dough seed-side down and sprinkle with the remaining 1 tablespoon sesame seeds. Cover and fry, shaking the pan occasionally, until the dough is golden, about 3 minutes per side, turning with tongs. Transfer to paper towels, season with salt and cool.

4. Wipe out the skillet and place over high heat. Add the roast beef mixture and stir-fry until crisp, 1 to 2 minutes. Slice the flatbread in half horizontally. Layer the beef, coleslaw mixture and cilantro on the bottom half. Cover with the top and cut into 4 wedges.

- photo and recipe cred to the Food Network

Tuesday, February 7, 2012

Fresh Basil Pesto

One of my greatest pleasures during the summer months is having access to copious amounts of fresh garden basil. That said, come winter, it`s always so disappointing to have to go and buy those ridiculously overpriced packages of herbs at the grocery store. They really are a taste of those smidgens of summer though and are a real treat for making delicious homemade pesto during that long cold stretch from October-May. I made up this yummy batch of basil pesto and kept some left over basil leaves for adding to our salads and sandwiches this week. So good.

A couple of really important pesto notes:
1. Don't heat it! Rule number one is don't heat the pesto. Let the pesto room to warm temperature and add to hot pasta or top vegetables.
2. Some people prefer to mix half parsley and half basil to tone-down the strong basil flavor. I personally really dig that bail-goodness so I always go for 100% fresh basil.
3. Don't skimp on the cheese. Buy good quality Parmigiano Regiano. The results will be worth the extra dollar for the cheese.
4. You may think it’s nice to toast the pine nuts until they’re coloured, to give them a nutty taste, but, according to Jamie, the really good, truly Italian pestos just have them very lightly toasted, to give a creaminess rather than a nuttiness.

Bon appétit!

Ingredients:
1 clove of garlic, chopped
sea salt and freshly ground black pepper
3 good handfuls of fresh basil, leaves picked and chopped
a handful of pine nuts, very lightly toasted
a good handful of freshly grated Parmesan cheese
extra virgin olive oil
optional: a small squeeze of lemon juice

Directions:
Pound the garlic with a little pinch of salt and the basil leaves in a pestle and mortar, or pulse in a food processor. Depending on how much of a garlicky taste you like, go for either 1/2 a clove or a whole one. You can add more later if need be. Add the pine nuts to the mixture and pound again. Turn out into a bowl and add half the Parmesan. Stir gently and add olive oil – you need just enough to bind the sauce and get it to an oozy consistency.

Season to taste, then add most of the remaining cheese. Pour in some more oil and taste again. Keep adding a bit more cheese or oil until you are happy with the taste and consistency. You may like to add a squeeze of lemon juice at the end to give it a little twang, but it’s not essential. Try it with and without and see which you prefer.

Sunday, February 5, 2012

Lemon-Thyme Green Beans

As a nice winter pick-me-up surprise, my mum dropped off a little bundle of summer greens that she`d kept frozen from her beautiful vegetable garden. Included were some "fresh", crunchy french green beans. We made them up with some fresh thyme and freshly squeezed lemon juice. So delicious - such a nice, easy side dish. Be careful not to go overboard on the thyme - just use a sprinkle ... you can easily taint your beans by going 'over thyme'. Bon appétit!

Ingredients
Coarse salt and ground pepper
Big pile of green beans, ends trimmed
Freshly squeezed lemon juice + zest from 1 lemon (? about 3 tbs. maybe?)
2 tablespoons butter
1/2 teaspoon fresh thyme leaves

Directions
1. In a large skillet with a tight-fitting lid, bring about 1/2 inch water to a boil; salt generously.

2. Add green beans; reduce to a simmer, and cover skillet. Steam beans, tossing occasionally, until crisp-tender, 5-6 minutes.

3. Drain off the water and then add your butter to pan-fry the beans for a minute or two. Throw in your zest/thyme and season with salt and pepper, and toss to melt butter. At the last second, squeeze in your lemon juice and remove from heat. Enjoy!

Saturday, February 4, 2012

Cinnamon Raisin French Toast

After this last round of back surgery, my mummy came up to look after me for a few days. She brought along a special treat of freshly-baked cinnamon raisin bread (yummmmm...). This morning we decided to use it for our weekly Giles Saturday morning brunch meal. I heart Saturday mornings. Ok, so who doesn't?  Saturday mornings at Chez Giles' always consist of a nice sleep in, morning snuggles, special breakfast and then coffee and tea on the couch. You can use any kind of bread for making french toast, but I have to admit that using homemade bread (especially your mum's homemade cinnamon raisin bread!) will definite elevate it to a cut above the rest. Bon appétit!

Ingredients:
8 slices cinnamon raisin bread
1 cup milk/cream mixture (I like 3:1 ratio milk to cream)
1 large egg
2 tbsp sugar
2 tsp vanilla extract
3/4 tsp cinnamon
pinch of salt

Directions:
1. Mix milk/cream, egg, sugar, vanilla, cinnamon, and salt. Dip each piece of bread into the batter, flipping after 30 seconds to fully saturate bread.
2. On a griddle or a hot skillet, melt 1 tbsp of butter and place dipped bread on hot surface. Cook each side until crispy and beginning to brown (approximately 2-3 minutes per side ... watch carefully so it doesn`t burn!). Serve up with fresh maple syrup!

Thursday, February 2, 2012

Bottom of the Bottle Dijon Dressing

I love this idea. Whenever you`re left with just a teeny, tiny, scrapethebottomofthejar bit of mustard, don't throw it out. Instead, toss in a few ingredients and shake a tangy Dijon vinaigrette right in the container. Bon appétit!

Ingredients:
Up to you really: I usually go with 1 crushed garlic clove, some chopped fresh herbs (whatever I have on hand: tarragon, shallot, thyme, basil are all good), some balsamic vinegar, salt and pepper, a touch of sugar, freshly squeezed lemon juice

Directions: 
Mix all of your ingredients directly in the bottle, close the lid and give it all a good shake. Add olive oil (2 parts oil to 1 part vinegar ... I personally like less oil and more vinegar so go with what you like); shake again to emulsify the dressing. Play around with the flavours - there`s no real `recipe` here really. Drizzle over your favorite salad and enjoy. With a tightly sealed lid, the dressing will keep in the refrigerator for up to one week.


Tuesday, January 31, 2012

Flax & Sesame Multigrain Pizza Crust

This recipe looked so appealing to me because I had a strong desire to make our pizza-night meals more healthiful (I think that`s a word...). As much as I love traditional pizza, I love healthy pizza all the more. And a thick, chewy crust popping with a multigrain crunch? Even better. You can do a couple of different things with this recipe - it would yield about 8-10 6" personal crusts (which can be kept frozen for easy dinners down the road) or you can make a nice big traditional dough for a large sized pizza crust. Either way, just so you know, this recipe will make 2 `large` pizza doughs. So seedy. So grainy. Yum! Bon appétit!

Ingredients:
1 1/2 c. hot water
1 T. yeast
1/3 c. olive oil
1/2 c. oatmeal
1/4 c. quinoa, uncooked
1/4 c. flaxseed
1 1/2 t. salt
1 egg white
1 c. whole wheat flour 2 c. white flour
1 T. poppy seeds
2 t. sugar
1 T. black sesame seeds


Directions:
1. In a large bowl, dissolve yeast into water. Add olive oil and egg white, then add remaining ingredients, mixing in just enough flour to make the dough pliable, but not terribly sticky. Knead until elastic. Monitor your flour content. You may need to add more or less. Drizzle with olive oil, cover loosely with a flour sack, and allow to rise until double in bulk.

2. Press small portions of the dough into very thin, pizza-sized circles. Place onto a well oiled cookie sheet. Allow to rise 20-30 minutes, then bake in an oven heated to 400 degrees just until cooked (but not browned), about 5-6 minutes. Remove and top with desired toppings then return to oven to finish cooking. To freeze, allow cooked crusts to cool. Stack with parchment between each crust, wrap tightly in plastic wrap and freeze. Frozen pizza’s will last up to 2 months in the freezer.

Monday, January 30, 2012

Venezuelan Creamy Rice Pudding

I love rice pudding. Absolutely love it. Whenever I'm home from hospital (ie. OFTEN these days!), it's my go-to food. I really could eat it morning, noon and night. This recipe comes from the Giles' cookbook from their time in Venezuela. It's pretty darn good. Be careful to stir, stir, stir your milky mixture as you cook it though so as not to burn your pudding. Nobody likes burnt rice pudding, trust me. The thing about making rice pudding is that you have to take your time, follow all the directions to a “T” and know your stove-top enough to be able to tell if the pudding is getting too hot or not hot enough. Having a nice, thick-bottomed pot will also work leaps and bounds in your favour. This recipe really does have a lot of stirring, so I tend to set up shop at the stove with a stool and a good book :) Today, however, I'm watching a movie on Netflix about an American man whose job is outsourced to India... it's fantastic. If you're looking for a fun movie to watch, check out "Outsourced". Bon appétit!

Ingredients:
1 cup basmati rice
2 cups water
7 cups milk
4 cinnamon sticks + 1 tsp. cinnamon
2 cups sugar
1/2 tsp. salt
Alternative additions: 1 tsp. vanilla, raisins, currents, rum, whipping or 1/2 and 1/2 cream for part of the milk, nutmeg, cardamom, fresh fruit etc. I tend to like my rice pudding pure and simple, but feel free to be creative!

Directions:
1. In a large, heavy pot, boil your rice and water for 7-8 minutes.
2. Add the milk and cinnamon and boil again for another 15-16 minutes - stir frequently. VERY frequently.
3. Add sugar and cook for 30 minutes. Again, stirring very frequently.
4. Add salt and cook for another 2 minutes. Add your vanilla. Stir, stir, stir.
5. Remove from heat and cool. Yum!

Chicken Stuffed with Spinach & Ricotta

You will feel like a pro-star making this chicken, believe you me. Truly pro-star. This recipe is adapted from a Food Network recipe book that I picked up a couple of years back that has a 'mix and match' stuffed chicken recipe where you can mix up different potential stuffing ingredients (ex. cheese/tomato, feta/olive etc.). I definitely love this spinach and ricotta blend. It's so tasty. So, so tasty. I have made this recipe before using goat cheese instead of ricotta and both are delicious. To save some cooking time, you can pan-fry your chicken for a couple of minutes on each side before baking it. Bon appétit!


Ingredients
1 1/2 cups freshly chopped spinach (or 1 package frozen chopped spinach, thawed)
1/2 cup ricotta cheese or 1/2 cup goat cheese
2 cloves garlic, finely minced
Coarse salt and ground pepper
4 boneless skinless chicken breasts

Directions
1. Preheat oven to 375 degrees. Mix ricotta/goat cheese, garlic, spinach, 1/2 teaspoon salt, and 1/4 teaspoon pepper; stir well to combine. Set filling aside.

2. Insert a pairing knife into the thickest part of 4 6-8oz chicken breasts (boneless skinless) to make 3" deep pockets. Stuff the breasts with your prepared filling. Rub olive oil on outsides of chicken breasts and season with salt and pepper.

3. Place on a rimmed baking sheet; roast until chicken is cooked through, 25 to 30 minutes. Another option is to pan-fry the chicken for 2-3 minutes each side (with toothpicks to stabilize) and then bake for about 15 minutes. Important thing is to check that your chicken is cooked to a minimum of 155F inside. Serve immediately. Enjoy!

Mango Vinaigrette

In grade 10, I had the awesome experience of living with a wonderful little French family for 3 1/2 months. It was there that I was introduced to the fact that salad dressing didn't necessarily have to come out of a bottle. In fact, I don't think that I ever saw a container of Hidden Valley or Blue Ranch. It had never dawned on me that you could actually make your own salad dressings! Since then, I usually do make my own vinaigrettes with the ratio that I was taught by my French mom (2:1 vinegar to oil). You really do just have to play around with what you like though and what tastes good to you. This is a super tasty little vinaigrette that would also be good with peach or raspberries. I made it up in our little "magic-bullet" style blender (so easy!). I now feel inspired to post a few more of my favourite home-made salad dressings ... hopefully that will happen in the next couple of weeks. Bon appétit!

Ingredients:
1 ripe mango
1/2 cup freshly squeezed lemon juice, 1 lemon
2 tablespoons olive oil
1/4 teaspoon crushed red-pepper flakes
2-3 tablespoons of balsamic vinegar
Salt and freshly ground black pepper

Directions:
Peel and chop mango away from pit and place in blender with lemon juice, and puree until smooth  (magic bullet-type blenders are perfect for this kind of thing). Transfer to a medium bowl, and whisk in olive oil and balsamic vinegar. Add red-pepper flakes, and season with salt and pepper. Add more vinegar if you want more zing. Enjoy!


Sunday, January 29, 2012

Moroccan Eggplant

First off - I highly recommend you get past the downright awful looking little side picture.  The end result of actually making this neat little side dish will surely wow you. I will start this post by admitting that I am not a huge eggplant fan myself. I think that it's the texture mainly. The sponginess of the whole thing kind of weirds me out. I decided that I needed to broaden the Giles' vegetable palate this week though and thought that I'd check out a few of the cookbooks. This came up and I thought I'd give it a whirl. I was looking for something fun to serve up beside this Moroccan Chicken dish. The eggplant looks really greasy and gross but it's actually really sweet and tangy and syrupy like. Yummmmmmm. Nice to try something a little different every now and then!  Bon appétit!

(Serves 4 to 6 as a side)

Ingredients:
2 small eggplants (about 1 1/2 lbs.)
2 to 3 tablespoons olive oil
2 tablespoons olive oil
4 garlic cloves, pressed or very finely chopped
4 tablespoons honey
4 tablespoons lemon juice
1 small spoonful harissa, or 1/4 teaspoon cayenne pepper
1 teaspoon cumin
1/2 teaspoon ginger
salt


Directions:
1. Peel the eggplants, and cut into 1/4 inch thick slices. Brush both sides of the slices with olive oil.

2. Heat a large non-stick frying pan over medium to medium high-heat. Fry the eggplant, turning once, until golden brown. Set aside.

3. Remove the pan from the heat, and allow the pan to cool for a minute or two. Add the olive oil and the garlic, and leave the garlic to soften. When the aroma of the garlic has been released, add the honey, lemon juice, harissa, spices and salt to taste. Stir to blend.

4. Return the eggplant to the pan, and bring the sauce to a simmer over medium heat. Cook the eggplant for about 10 minutes, or until the egpplant is tender and the sauce has a syrup-like consistency. Add a little water during the cooking if you feel it's necessary, but not so much that the eggplant will overcook while the liquids reduce.

Serve at room temperature.

Moroccan Spiced Chicken

I love, love, love playing around with spice mixtures. I also love it when I can find a recipe that uses cardamom. Who doesn`t love getting out the mortar and pestle?  This recipe uses an absolute plethora of moroccanish spices and the end result is so yummy. I am home recovering from another round of back surgery and have my mum looking after me. It was a lot of fun to make this dish together. We paired it with some super tangy Moroccan eggplant (recipe to follow!). Yum. We altered this recipe a tad so that you have some left-over marinade to serve with the chicken as ours ended up being a little dry. Enjoy! Bon appétit!

Ingredients:
1 cup plain nonfat Greek yogurt
Juice of 1 lime
3 tablespoons honey
1 teaspoon ground turmeric
1 teaspoon ground ginger
1 teaspoon ground cumin
1/2 teaspoon ground cinnamon
1/2 teaspoon ground cayenne pepper
1/4 teaspoon ground cardamom
1/4 teaspoon ground nutmeg
1/2 teaspoon salt
4 boneless skinless chicken breasts

Directions:
1. Place Greek yogurt, lime juice, honey, turmeric, ginger, cumin, cinnamon, cayenne pepper, cardamom, nutmeg, and salt in a medium bowl and mix until well combined. Reserve about a 1/4 cup of marinade to serve with your chicken later on. Spread remainder of marinade evenly over chicken breasts in a shallow dish and refrigerate for an hour.

2. Heat oven to 350˚F. Heat a nonstick grill pan over medium high heat. Spray with nonstick cooking spray and sear chicken for 2 minutes per side or until browned. Place chicken in a large rectangular dish and bake with your leftover marinade at 350˚F for 8 to 10 minutes or until cooked through and no longer pink in the center. Makes 4 servings.

Saturday, January 28, 2012

Ancho Honey Chicken with Tropical Rice

This chicken was so, so, SO incredibly yummy. We were blown away with the yumminess of it all. You just have to try it. Just have to. Definitely a lot of summer flavours, which made it perfect for a freezing cold January in Ottawa evening!

I also never, ever do anything exciting with rice. I am truly a plain Jane when it comes to rice so this recipe definitely called for a step outside of the old rice comfort zone.  End result was pretty darn tasty if I don`t say so myself. You will end up with lots of left over fruit (1/2 a cantaloupe and a good deal of pineapple too) so have some fun and make yourself up a nice big fruit salad for later deserts and lunches. Scour your kitchen for any other left over fruit you might have on hand - I added some chopped oranges, a handful of blueberries and more lime with a sprinkle of sugar. Très bon appétit!

Ingredients:
Chicken:
2 tablespoons packed brown sugar
2 tablespoons honey
2 tablespoons apple cider vinegar
1 tablespoon Worchershire sauce
1 tablespoon ancho chili powder
1 teaspoon cayenne pepper
3/4 teaspoon salt (1/2 tsp. sprinkled directly on chicken)
1 tablespoon canola oil
4 boneless, skinless, chicken breasts

Tropical Rice:
2 cups finely chopped cantaloupe
2 cups finely chopped fresh pineapple
1 red pepper, finely chopped
1/2 cup finely chopped red onion
4 cups cooked brown rice
1 cup toasted slivered almonds
2 tablespoons canola oil
Juice of one lime
3/4 teaspoon salt

Directions:
1. To make the chicken, heat oven to 350˚F. Place brown sugar, honey, vinegar, Worchershire sauce, ancho chile powder, cayenne pepper, and 1/4 teaspoon salt in a small saucepan and cook over medium heat for 5 minutes or until brown sugar is dissolved and mixture has reduced to 1/4 cup. Sprinkle chicken breasts with remaining 1/2 teaspoon salt. Place chicken breasts on a grill pan heated over medium high heat and sear chicken breasts on both sides for 1 to 2 minutes or until lightly browned. Place seared chicken in a 13×9-inch baking dish and use a pastry brush to rub half the glaze on all sides of the chicken breasts. Bake at 350˚F for 10 minutes. Remove from oven and baste with remaining glaze. Bake an additional 2 minutes at 350˚F or until chicken is cooked through and no longer pink in the center.

2. Meanwhile, make the tropical rice by mixing cantaloupe, pineapple, red pepper, and onion in a large bowl. Remove 1/3 cup fruit mixture for chicken garnish, if desired. Stir in rice, toasted almonds, canola oil, lime juice, and salt until well mixed.

3. To serve, place rice on 4 plates and top each with a piece of chicken and fruit garnish. Makes 4 servings.

- recipe cred to Bake, Batter & Bowl  :)

Wednesday, January 18, 2012

Spaghetti Carbonara with Leeks & Lemon

Any time I make carbonara, I feel like I'm having a massive freak-out in the kitchen. I'm always afraid that if I don't move fast enough, the egg won't set and I'll have runny, gooey pasta. I definitely recommend having a buddy on hand for this dish. That, or have everything right ready to go so that you can move quick, quick, quick when you're mixing the egg mixture into the pasta. Quite a yummy dish this one is. Do try to get the real parmesan cheese - you won`t regret it. Bon appétit!


Ingredients
Coarse salt and ground pepper
6 slices bacon, cut crosswise into 1-inch pieces
4 leeks (white and light-green parts only), halved lengthwise, rinsed well, and thinly sliced
3/4 pound short pasta, such as campanelle or orecchiette
2 large eggs
1/2 ounce Parmesan, grated (1/4 cup), plus more for serving (optional)
1 tablespoon finely grated lemon zest, plus 1 tablespoon lemon juice
1/2 cup fresh parsley leaves, coarsely chopped

Directions
1. Set a large pot of salted water to boil. In a large skillet, cook bacon over medium heat, stirring occasionally, until crisp, 8 to 10 minutes. With a slotted spoon, transfer bacon to paper towels to drain. Pour off all but 2 tablespoons fat from skillet. Add leeks, season with salt and pepper, and cook, stirring often, until leeks are golden brown, about 10 minutes.

2. Add pasta to pot and cook according to package instructions. In a large bowl, whisk together eggs, Parmesan, and lemon zest and juice. Whisk 1/4 cup pasta water into egg mixture.

3. Drain pasta and immediately add to egg mixture, along with bacon, leeks, and parsley. Season with salt and pepper and stir to combine. Sprinkle with more cheese if desired and serve immediately.

Monday, January 16, 2012

Oven-Baked Zucchini Chips

The temperature in our house is currently 16C. Brrr. Our furnace seems to be slowly dying so it feels so good to be working in the kitchen and opening a 425F oven for these little guys. This is definitely a different, fun-for-the-little-guys way to make zucchini. Usually I just pan fry my zucchini with a little bit of olive oil so this was quite the experience! Very yummy. Bon appétit folks :)

Ingredients
1/4 cup dry breadcrumbs
1/4 cup (1 ounce) grated fresh Parmesan cheese
1/4 teaspoon seasoned salt
1/4 teaspoon garlic powder
1/8 teaspoon freshly ground black pepper
sprinkle of fresh thyme
2 tablespoons milk
2 1/2 cups (1/4-inch-thick) slices zucchini (about 2 small)
Cooking spray


Directions
1. Preheat oven to 425°. Combine first 5 ingredients in a medium bowl, stirring with a whisk. Place milk in a shallow bowl.

2. Dip zucchini slices in milk, and dredge in breadcrumb mixture. Place coated slices on an ovenproof wire rack coated with cooking spray; place rack on a baking sheet. Bake at 425° for 30 minutes or until browned and crisp. Serve immediately.

Sunday, January 15, 2012

Chicken & Kale Flaky Hand Pies

Holy crap these were tasty little buggers. Go Martha go! Definitely a kick in the butt to get them out and on your plate, but the end result was so darn good. I had this big plan to go on a 'kale kick' after having tasting it as a delicious side prepared by my bro' in law's lovely gf over Christmas, but was super bummed to discover that the grocery store was fresh out. So, in the end, these ended up being "Chicken & Spinach" hand pies. Going for fresh thyme is a MUST. The pastry turned out beautifully but with a lot of huffing and under-breath cussing on my part, hence the "I bleepin' hate making bleepin' pastry. Bleep bleep" FB post. I actually also forgot to add the cheese when making the pastry but it was delish nonetheless. Bon appétit!!

Ingredients
Flaky Pie Dough recipe doubled and 1 cup shredded cheddar added with flour, or store-bought
2 tablespoons all-purpose flour, plus more for rolling
1 tablespoon unsalted butter
1 leek (white and light-green parts only), halved lengthwise, cut crosswise 1/4 inch thick, and rinsed well
1 small bunch black (Tuscan) kale, tough stems removed, coarsely chopped
1 teaspoon fresh thyme, leaves
Coarse salt and ground pepper
1 cup low-sodium chicken broth
1 splash of whipping cream
1 cup cooked chicken, torn into bite-size pieces (about 5 ounces)
1 large egg, lightly beaten

Directions
1. Preheat oven to 350 degrees. Divide dough in half. On a floured sheet of parchment paper, roll out one half to a 14-inch round. With a knife or biscuit cutter, cut out six 4 1/4-inch circles (rerolling dough once if necessary) and transfer, on parchment, to a baking sheet. Repeat with remaining dough, cutting out six (larger) 4 1/2-inch rounds. Chill rounds on sheet until ready to use.

2. In a large skillet, melt butter over medium-high. Add leek and cook, stirring, until soft, 3 minutes. Add kale and thyme, season with salt and pepper, and cook until kale wilts, 3 minutes. Sprinkle flour over mixture and stir to combine. Add broth and bring to a boil. Cook, stirring often, until mixture thickens, 2 minutes (I added that splash of whipping cream here). Transfer to a medium bowl, season with salt and pepper, and stir in chicken. Let cool slightly.

3. Place a heaping 1/4 cup chicken mixture on each of the smaller dough rounds, leaving a 1/2-inch border. Brush edges with egg and top with larger dough rounds; using fingers, press edges firmly to seal. Cut a small vent in each pie. Bake until browned and crisp, 30 minutes, rotating sheet halfway through. Let cool slightly on sheets on a wire rack. Serve warm or at room temperature.

Saturday, January 14, 2012

Uber Yums Black Beans

This could not be any easier and is a delicious side dish for any "south of the border" food you might be serving up. I am used to black beans looking like a goobey mess but these guys are different. I'm also used to beans taking several hours to cook up - these guys only take 10 minutes. If that. We`ve also made these up to serve on tacos (they were a big hit!). Do enjoy! Bon appétit!

Directions:
Take a can of red kidney or black beans beans and rinse em'  out really well. Put them in a medium hot pan with some olive oil (maybe 2 tbs?).  Turn them around in the pan for a minute. Add 2-3 cloves of garlic (I like a lot of garlic), about 1 tsp oregano and salt and pepper. Heat the beans through and they are done. So good.

Salted Tilapia with Crispy Zucchini Ribbons

I can imagine that you're probably thinking that this dish is too indulgent looking to be good for you. Well, let me tell you. It's too indulgent tasting, too. A perfect combination of tender-crunchy textures and salty goodness. Definitely recommend splurging and getting your fish fresh from the fish market rather than buying frozen. Trust me. I should note that I had a little trouble frying up the zucchini, but it was all really tasty in the end. You just have to move quickly (or better yet, cook with a buddy) or else you may end up with burnt zukes. Yummy dish all around. Bon appétit!

Ingredients:
2 tablespoons coconut oil
1 zucchini
1 yellow squash
1/2 teaspoon onion powder
1 pound tilapia
1/2 teaspoon dried thyme
salt & pepper to taste

Directions:
Heat up a grill pan over medium high heat, with 1 tablespoon of coconut oil in the pan. Use a potato peeler to shave the zucchini and yellow squash into long ribbons. Salt and pepper the zucchini ribbons, then lay them flat into your hot oil. Don't crowd them in your pan! Too many inside your pan will keep them from getting crispy, and they simply aren't as delightsome when they are mushy. Grill until golden brown on one side, flip and grill on the second side until golden brown and crispy.

Remove the zucchini ribbons, melt the second tablespoon of coconut oil, and place the tilapia in your pan. Sprinkle with salt and pepper. Toss a bit of dried thyme on top, as well. Grill on both sides until the fish is white and flaky. Serve on top of Crispy Zucchini Ribbons. Enjoy!

Recipe cred to Cheeky Kitchen

Flaky Pie Dough

Just a nice little flaky pie dough recipe I like to use (from Martha). I`m planning on making some little hand pies for dinner this week out of kale and chicken (recipe to come!!) and thought I`d share this yummy recipe that seems to work well every time. Bon appétit!

Ingredients
1 1/4 cups all-purpose flour (spooned and leveled)
1/2 teaspoon coarse salt
1/2 cup (1 stick) cold unsalted butter, cut into 1/2-inch pieces
1/4 cup ice water

Directions
1. In a food processor, pulse flour and salt to combine. Add butter; pulse until mixture resembles coarse meal, with a few pea-size pieces of butter remaining.

2. Sprinkle with 2 tablespoons ice water; pulse until dough is crumbly but holds together when squeezed (if necessary, add up to 2 tablespoons more water, 1 tablespoon at a time).

3. Form dough into a 1-inch-thick rectangle, wrap tightly in plastic, and refrigerate until firm, 1 hour (or up to 3 days).

Cashew Chicken with Broccoli

Next I bring you a nice, simple recipe for those crazy mid-week dinners. This recipe is as easy as can be to make, and tastes even better than take-out. If you're feeling like adding extra veggies, try stir-frying celery with the chicken or toss some water chestnuts in with the broccoli. Super easy, super nutty. Enjoy! Bon appétit!

Ingredients:
1 pound chicken breast tenders, cut into chunks
1 tablespoon olive oil
1 tablespoon sesame oil
1 large clove garlic, finely chopped
1/2 tablespoon chicken bouillon powder
4-6 tablespoons soy sauce
2 tablespoons cornstarch
1/3-1/2 cup water
2-3 cups broccoli florets, cut into bite-sized hunks
1/2 cup salted cashews, toasted
2 package Udon noodles, cooked according to package directions with 1/4 cup of soy sauce tossed into the water as they cook

Directions:
1. In a wok, heat the olive oil to medium heat then toss the chicken into the oil. Stir fry until cooked through. 

2. Add the garlic and allow it to cook for a moment before sprinkling the mixture with the chicken boullion powder and soy sauce. 

3. In small cup, whisk together the cornstarch and water (use more water if you like a thinner sauce, or less water for a thicker sauce). Pour this mixture over your chicken, stir to coat, then add the broccoli. Cover and cook just until the broccoli is a bright green. 

4. Toss in the cashews, lightly drizzle with some sesame oil and serve over Udon noodles or rice. Enjoy!