Showing posts with label baking. Show all posts

Friday, February 6, 2015

Buttermilk Biscuits

So I haven't been able to do much blogging since my baby was born, but my kitchen has still been busy. Tonight I made up some delicious buttermilk biscuits and hoped that my picky toddler would totally snarf them down - I was in luck! He devoured them. They were flaky with a beautiful golden brown top. One thing that I will say about technique for biscuit making is that the key is not in the ingredients, but in the handling of the dough: handle it as little as possible or you will have tough biscuits. And that's it! Bon appétit!
ps - we found these were great the next morning served with some fresh jam. Another idea would be to use them the next morning for a bacon & egg on a biscuit type a' thing. Num'...

Ingredients:
2 cups all-purpose flour, plus more for dusting the board
1/4 teaspoon baking soda
1 tablespoon baking powder
1 teaspoon salt
6 tablespoons unsalted butter, very cold (I freeze it for 15-20 minutes)
1 cup buttermilk (approx)*

*if you do not have buttermilk,  you can add 2tbs white vinegar to your 1 cup of milk and let it stand for 10 minutes until the milk thickens slightly. No, it's not REAL buttermilk, but it's still delicious.

Directions:
1. Preheat your oven to 450°F. Grease a baking pan.

2. Combine the dry ingredients in a bowl, or in the bowl of a food processor.

3. Cut the butter into chunks and cut into the flour until it resembles course meal. If you are using a food processor, just pulse a few times until this consistency is achieved.

4. Add the buttermilk and mix JUST until combined. If it appears on the dry side, add a bit more buttermilk. It should be very wet. Turn your dough out onto a floured board.

5. Gently, gently PAT (do NOT roll with a rolling pin) the dough out until it's about 1/2" thick. Fold the dough about 5 times, gently press the dough down to a 1 inch thick. Use a round cutter to cut into rounds. (You can gently knead the scraps together and make a few more)

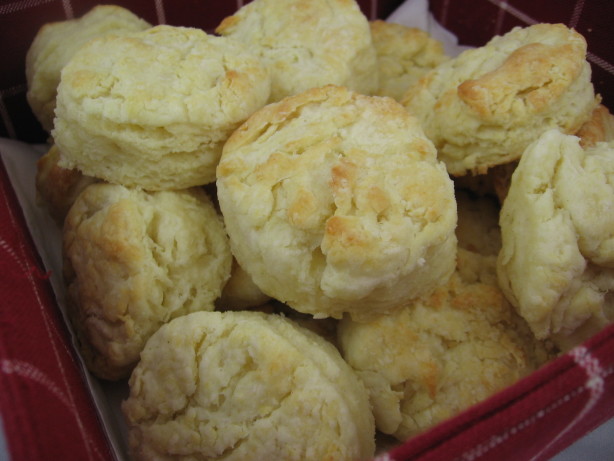
6. Place the biscuits on a cookie sheet- if you like soft sides, put them touching each other. If you like"crusty" sides, put them about 1 inch apart- these will not rise as high as the biscuits put close together. Bake for about 10 minutes- the biscuits will be a beautiful light golden brown on top and bottom. Do not overbake & watch them very closely!

Friday, July 22, 2011

Bannock Bread (aka Twist!)

When I married into the Giles family, one of the traditions I soon discovered was that of roasting bannock, aka "twist", over a camp fire's hot coals. The bread is named "twist" because of how the dough is twisted around a stick. I also discovered that the same bread that we'd roast over the fire made an incredible quick bread (no-yeast) that we could make at home.

I love this recipe because it is super quick to mix up, it doesn't have to rise and takes only about 20 minutes to bake. The recipe below will feed a good 6-8 folks for dinner so you may want to cut the recipe in half if you're cooking for less. I've included instructions for cooking over an open fire and for making the bannock at home in the oven. Bon, bon appétit!

Ingredients:
4 cups flour (1/4 cup of which 12 grain flour)
1/2 tsp. salt
5 tsp. baking powder
1/3 cup brown sugar
1/4 cup finely chopped cold butter
1 1/2 cups water
optional: chopped mixed nuts, cranberries, lemon, blueberries, acorns...  you get the idea!

Directions:
Oven instructions:
1. Preheat oven to 400 degrees.

"oven bannock"
2. Mix the flour, salt, baking powder, sugar, optionals and the cold butter. Add the water last until a stiff dough forms. Knead on a floured surface and feel free to add a little bit more flour or water if needed.

3. Form the dough into a round/oblong loaf about 1" high. Bake on a GREASED baking sheet for 15-20 minutes until cooked through. Sometimes I have to cut the bread open to bake the middle when I make it a little too thick.

4. Serve warm with butter/jam/honey or just straight up. Enjoy!


Campfire instructions:
1. As above, mix the dough until a still dough forms.

2. Roll the dough into a long "log" shape and then wrap it securely around a 1" diameter stick that has had its end whittled free of the bark. You'll want to make sure that the dough is not too thick and not too thin as you'll be roasting it over hot coals - the idea is that you want the middle to cook without the outer part burning.

3. Roast your stick over the fire - a patient camper always wins out when it comes to bannock: keep the bread free from the flames and slowly turn it over a period of 10-15 minutes.

4. Serve with jam!

Fellow Gilesies roasting their twist over the open fire
Me!
A winter hot dog & twist roast in Muskoka 

Monday, January 10, 2011

My Mum's Best Cheese Biscuits

This next post is quite the treat. My mum used to make these cheese biscuits for us all the time as kids and I'm pretty excited to be making them now as an adult. I mean, what else makes you prouder than making your own biscuits? These cheese biscuits go through a couple of generations of Hartley women - they are that good. One recipe should make about 5-6 size medium-large sized cheese biscuits.  In total, these biscuits only take about 20 to 25 min. to make (including preparation and baking time) so they are perfect for lunch or when you're having people over for dinner. I've found that this biscuit recipe also works well if you want to make different variations, say a lemon cranberry, blueberry, ham & cheese, or chive. Be creative and use up your left overs in biscuit form! As you can see from the picture below, I sure do love a good cheese bun. Bon appétit!

Ingredients:
1 cup flour
1/4 teaspoon of salt
3 teaspoons of baking powder
3 tablespoon butter
2 cup of grated cheese (save some for sprinkling on top)
1/2 cup of water

Directions:
1. Mix all of your ingredients in a large baking bowl. Again, I highly recommend that you double the cheese and butter. Save a little bit of cheese for sprinkling on top of your biscuits.
2. Flatten your dough out onto a floured surface. Using a 3 inch wide cup or cookie-cutter, cut out your biscuits. Arrange your biscuits on a greased baking sheet and sprinkle some cheese on the top of each of them. Again, one recipe should make about half a dozen biscuits.
3. Bake your biscuits for 12 min. in a 425° oven (or until they are lightly browned on top). Serve hot and enjoy.