Showing posts with label bbq. Show all posts

Monday, August 12, 2013

Sticky Honey Ginger Chicken

Fresh ginger is the cat's meow at Chez Giles. We love it and try to put it in as much of our food as we can. Plus it's super good for you (and your gas!). I like to frequent our neighbourhood Chinese grocery store "Green Fresh!" where I can buy insane quantities for next to nothing. When I came across this recipe in last month's edition of Chatelaine, I was pretty excited. This recipe calls for fresh ginger so don't you dare chicken out and go with the powdered kind. It just won't taste right and you'll have such a feeling of self-gingerless-loathing, that it's just not worth it.

I had a lot of fun grilling up the oranges for this meal as well. We're currently in a tiny apartment with no back porch so we made up this dish on our little panini press, but the bbq would be hands down much better if you have access to one. Bon appetit!

Ingredients
3/4 cup orange juice, about 2 oranges
1 tbsp orange zest
1/3 cup honey
4 tsp minced ginger
1/2 tsp salt
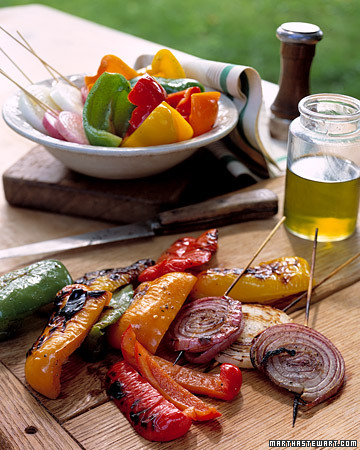
4 skinless, boneless chicken breasts
2 oranges, halved

Instructions
1. Preheat barbecue to medium.

2. Whisk juice with zest, honey, ginger and salt in a large shallow bowl. Pour half into a small bowl and reserve. Add chicken breasts to juice mixture in large bowl. Let stand at room temperature for 15 min, flipping halfway.

3. Oil grill, then barbecue chicken, with lid closed, basting often with marinating liquid, for 6 min. Flip and continue grilling, without basting, until springy when pressed, 6 to 8 more min. Add oranges to the grill, cut-side down, for the last 5 min. Drizzle reserved orange mixture on chicken and serve with grilled oranges.

Recipe & photo cred to Chatelaine Magazine

Saturday, October 15, 2011

Fish Tacos with Salsa Verdé (with Tilapia)

I'll be the first to admit that when I first heard of "fish tacos" my stomach simply recoiled at the thought. In my mind, it just didn't seem natural. This recipe, however, was the exact opposite of what I think of when I think of fish tacos. These are light. Fresh tasting. Clean. Flavourful. They were so good that Jeremy and I were scraping the bits from the bottom of the pan.

A couple of very important notes about this recipe:
- I highly recommend you use tilapia fillets (or some other kind of hard white fish)
- Admittedly, I found the jalapeno/salad mixture very, very spicy - that was because I used a scotch bonnet from my garden and just about cried (ok, maybe I cried a little). So just becareful with the heat level of the pepper you are using.

Enjoy, and, as always... Bon appétit!


Ingredients
1 bunch fresh cilantro (roots and thick stems removed)
4 tablespoons fresh lime juice (from 2 limes)
3 tablespoons olive oil
Coarse salt and ground pepper
Handful of greens (arugula, baby spinach etc.)
3 scallions, thinly sliced
Making the salsa verdé was super easy with
the food processor
1/2 jalapeno chile (ribs and seeds removed, for less heat), minced
1 1/2 pounds skinless tilapia fillets (about 4)
1/2 teaspoon ground coriander
12 corn tortillas (6 inches each)
Avocado (for serving)

Directions
1. Heat broiler, with rack set 4 inches from heat. In a blender, combine cilantro, 2 tablespoons lime juice, 2 tablespoons oil, and 2 tablespoons water; season with salt and pepper (I also added a bit of cumin to the mix too). Blend until pureed. Set salsa aside.

2. In a small bowl, mix together remaining 2 tablespoons lime juice, remaining tablespoon oil, greens, scallions, and jalapeno (see notes above re: jalapeno!); season with salt and pepper. Set salad aside.

3. Place tilapia on a rimmed baking sheet; season with coriander, salt, and pepper. Broil until opaque throughout, 4 to 5 minutes; break up into chunks (we bbq'ed it instead).

4. Meanwhile, using tongs, hold tortillas over a gas flame until lightly toasted, about 30 seconds per side (or wrap stacked tortillas in damp paper towels, and microwave on high until warm and soft, about 1 minute). To assemble, fill tortillas with fish, jalapano/greens salad and avocado; top with salsa verde and fold.

- recipe adapted from Martha Stewart

Wednesday, July 27, 2011

Blackened Cayenne Chicken

Remarkably, it's now been almost 2 months since we last made dinner inside. I'm sure that this is doing wonders for our electricity/AC costs. Instead of using a pre-made spice rub, why not make your own? This rub uses ingredients that you should be able to find in your own spice cupboard and is delicious! The more cayenne you add the spicier it'll be :)  I guess our finished product didn't exactly blacken per se, but I'm sure you could end up with that result if you were ambitious enough.  Bon appétit!


Ingredients
1 tablespoon olive oil, plus more for grill
1 teaspoon paprika
2 teaspoons ground pepper
1 1/2 teaspoons coarse salt
1 teaspoon cayenne pepper
1/2 teaspoon dried oregano
1/2 teaspoon dried thyme
1 garlic clove, minced
4 bone-in, skin-on chicken breast halves (2 1/2 pounds total)

Directions
1. Set up a grill for indirect cooking over medium-high. Clean and lightly oil hot grill. In a bowl, combine paprika, ground pepper, salt, cayenne, oregano, thyme, garlic, and oil; rub on chicken.

2. Grill chicken, skin side down, directly over heat source until skin is browned, about 4 minutes. Flip chicken; move to cooler side of grill. Cover grill and cook chicken until cooked through, 35 to 40 minutes. Transfer to a platter and tent with foil. Let chicken rest 10 minutes.

Recipe cred Everyday Food

Tuesday, July 26, 2011

BBQ'ed Sweet Chili Chicken Pizza

Mum Giles, this recipe is for you! 


Now how cool is this recipe? I mean really? BBQ'ing pizza. Wow. Had never done that before. This recipe may be taking the whole grilling experience to a new level. The ultimate BBQ adventure. You'll definitely want a buddy when you're making this dish because it can move REALLY quickly. The important thing to note is that when you first put your dough on the grill, you are initially cooking the top side of the pizza that will eventually house your ingredients on (seems backwards... I know!).  It will become obvious as you prepare your pizza, but just to clarify things:
1) the side of the dough you oil will eventually be the top side of the pizza (this side is cooked down first)
2) when the top side is cooked, flip the dough (so that the cooked side is on top) and add your toppings
3) put your 1/2 cooked dough with the toppings now on it back on the grill (toppings up of course :)

Depending on your ingredients, you may want to toss your pizza in the oven to broil it for a minute or two before serving. Bon, bon appétit!


Ingredients
3 tablespoons olive oil
All-purpose flour, for shaping dough
1 pound pizza dough (either purchase at store, or, better yet make your own)
Sauce: Sweet Chili Sauce for Chicken*
Pizza toppings: cooked chicken, scallions, crumbled goat cheese, avocado, red onion, red pepper, grated cheese etc.

* a note on the sauce: this is not garlicky or spicy, but rather a nice sweet sauce with a hint of chili spice. The bottle looks something like this:

Directions
1. Heat grill to medium. Brush a large rimless baking sheet (or an inverted rimmed sheet) with 1 tablespoon oil (we use our panini press sheets). On a lightly floured work surface, roll and stretch dough to two 8-inch ovals or rounds. Transfer to prepared sheet. Brush tops with 1 tablespoon oil.

2. Place crusts on your baking sheets oil side down. Transfer dough to grill. Cook, without turning over, until undersides are firm and begin to char, 2 to 3 minutes. Using tongs and a large spatula,

3. Scatter crusts with sweet chili sauce, grilled chicken, scallions, cheese, red onion and red pepper; and slide back onto grill. Cook, rotating occasionally, until cooked through and cheese begins to melt, 3 to 5 minutes.  Be very careful to watch your crust to ensure it doesn`t burn. Transfer to a cutting board.

4. Serve with some nice avocado and spinach on top. You may need to broil your pizza in the oven for a couple of minutes if you want that grilled top look. It will certainly be grilled on the bottom though. Enjoy!

Grilled Lemon Garlic Chicken

This is such an easy, tasty dish. No marinading. Just lemony deliciousness on your plate in 1/2 an hour. I definitely recommend working with thinner pieces of chicken so that they cook through quickly and evenly (and so that you don't end up with charred chicken on the outside, pink totally uncooked chicken on the inside). Oh to the hot days of summer.... so perfect for the bbq. Bon appétit!

Ingredients:
2 tablespoons fresh lemon juice
2 tablespoons extra-virgin olive oil, plus more for grill
1 small garlic clove, minced
1 tsp freshly cracked pepper
8 boneless, skinless chicken thighs (about 2 pounds total)

Directions
1. Heat grill to high; lightly oil grates. Mince 1 garlic clove, and place in a shallow dish. Add lemon juice and 1 tablespoon oil; season with salt and pepper. Add chicken, and toss to coat. Let stand at room temperature at least 5 minutes (and up to 30).

2. Brush bread on both sides with remaining 2 tablespoons oil; season with salt and pepper. Grill bread until beginning to char, about 1 minute per side. Cut remaining garlic clove in half, and rub cut sides over grilled bread; set bread aside (discard garlic clove).

3. Grill chicken until opaque throughout, 1 to 3 minutes per side. Serve with fresh lemon wedges.

- recipe and photo cred to Everyday Food

Saturday, July 23, 2011

Maple Mustard Pork Chops

Well, I am now home recovering from round #6 of back surgery. When will it end? The only upside to going through these procedures is that my mum comes up to visits and takes really good care of me for a few days. On the way home from a walk today, she picked up a boat load of nice, fresh pork chops from Metro that were uber on sale. We split them all up into individual freezer bags and are now all set to go for weeks of delicious bbq'ed chops. This is a nice little recipe that I came across while perusing Canadian Living online. Yum, yum. The maple/mustard combo would be delicious on chicken too. Remember not to heat your grill too, too high as the sugar in the maple syrup can cause the ribs to char too quickly. Nice, slow steady heat will do it. We served these pork chops up with a yummy pasta salad and french bread. Bon appétit!


Ingredients
4 pork loin chops
2 tbsp honey or maple syrup
2 tbsp Dijon mustard
2 tbsp grainy mustard (or perhaps a few tbsp of mustard seeds)
1/2 tsp each salt and pepper

Directions
1. Heat grill to medium; lightly oil grates. Trim any fat from pork chops. Combine honey, Dijon and grainy mustards, salt and pepper; brush over both sides of pork chops. Save a tablespoon or 2 of sauce to brush on top when the chops are fully grilled.

2. Place on greased grill over medium heat or under broiler; close lid and grill, turning once, until juices run clear when chops are pierced and just a hint of pink remains inside, 8 to 10 minutes.

3. Brush with leftover sauce and serve. Enjoy!

Recipe cred: Canadian Living, photo Kalatogas

LONG LIVE THE BARBEQUE!

Friday, July 22, 2011

Grilled Mixed Peppers and Onions

Grilling veggies is such a classic summer side dish. I came across this recipe from Everyday Food that has you skewer your onions, almost like a lollypop! Skewering the onion slices through all the layers ensures ease of grilling and keeps pieces of onion from falling through the grill. You have to make sure that you have a fairly thick onion on there though or else they`ll just break when you stick your skewers through. Ingredients listed below are very general - go with what you like. Bon appétit!

Ingredients
1 white onion, peeled, cut into 1/4-inch-thick rounds
1 red onion, peeled, cut into 1/4-inch-thick rounds
1 green bell pepper, cut into quarters and seeded
1 red bell pepper, cut into quarters and seeded
1 orange bell pepper, cut into quarters and seeded
1 yellow bell pepper, cut into quarters and seeded
3 tablespoons olive oil
1/2 teaspoon coarse salt
1/2 teaspoon freshly ground black pepper

Directions
1. Soak wooden skewers 20 to 30 minutes. Heat a grill to medium. Skewer the white and red onion slices, passing the skewer through each layer; skewer the green, red, orange, and yellow peppers. Place the skewered vegetables, olive oil, salt, and pepper in a shallow bowl, and turn the vegetables until they are coated.

2. Place vegetables on grill, and cook until lightly charred, 6 to 8 minutes per side. Transfer vegetables to a cutting board. Cut peppers into 1/2-inch-thick slices, and remove skewers from onions. Transfer vegetables to a serving platter.

- recipe and photo cred to Everyday Food