Thursday, December 24, 2015

Homemade Chocolate Coconut Mounds Bars

So... these homemade delicacies are pretty divine. I think that if Jesus had a favourite chocolate bar, it'd be one of these little guys. They are super sweet and delicious, look amazing and pair so nicely with a cup of tea or coffee (or for breakfast when you're pregnant... or not even when you're not...). And hey, there's only 4 ingredients - how easy is that?


I wanted to share a few things that I learned from making these a couple of times now:
- do not skip on the coconut extract. I made the first batch without any and they were good, but they didn't have that big, coconutty 'umph' that I was hoping for. Using an extract is where it's at!
- follow the instructions on melting chocolate closely and do not be tempted to "thin" the chocolate to make it easier to coat. I thought that if I added a splash of cream to the chocolate that it would just make it a little thinner, but nope - it created a giant ball of squishy goo.
- keeping your mounds bars in the fridge will make the chocolate dry and crack a lot faster. I wouldn't recommend it
- one similar recipe that I saw made 'almond joys' by rolling the filling into a parchment paper log to facilitate the forming stage. I didn't try this personally, but the author ended up with nicely shaped little bars... just at thought! 
- I'll warn you that the chocolate dipping stage is a bit of a pain and you'll be silently cursing that they don't look "perfect", but just do your best! There isn't much getting around having them look "homemade", but your friends will love you all the more for them.  You may need to re-warm your chocolate a few times along the way.

Bon appétit! 


Ingredients:
15 oz milk cooking chocolate (I used 2 packages of milk chocolate chips)
3 cups flaked sweetened coconut
1 cup sweetened condensed milk
3 tsp. coconut extract (or, to taste)
* parchment paper

Directions:
1. In a medium bowl, mix coconut, sweetened condensed milk and coconut extract to make a thick and sticky paste.

2. Using your hands, form some rectangles with the paste. Press firmly to make sure the rectangles will keep their shape. Every 3 or 4 rectangles, wash your hands and do not dry them completely. That way, the paste won't stick on your hands.


3. Arrange on a baking sheet lined with parchment paper and put in the freezer for about 20 minutes. This will make the candy easier to dip in chocolate. Don't skip this part or it'll be a mess!

4. In the meantime, put 2/3 of your chocolate it in a microwave safe bowl. Microwave on medium power for 30 seconds, stir, then repeat in 15 seconds interval until the chocolate has melted. 

5. Add 1/3 remaining chocolate and keep stirring until it is fully melted. It's called tempering chocolate. It will allow the chocolate to have a glossy texture and to set correctly.

6. It's time for dipping now! Remove rectangles from the freezer 2 at a time and leave the rest in the freezer to stay firm. Using two forks, dip one rectangle in melted chocolate and roll it to cover all sides. Using one fork, remove rectangle from chocolate. With the other fork, remove excess chocolate and arrange your bounty on a parchment paper lined baking sheet. 


7. I finished mine off by drizzling some chocolate over top. Add some leftover chocolate to a small ziplock bag and cut a TINY little hole in the corner. Pipe your chocolate and let set for a couple of hours. Enjoy!


Wednesday, March 11, 2015

Honey Oat Bread

One thing that I've found about being home with my 1 1/2 year old is that you have to have a keen mind to think of things to DO. There's only so much time that can be spent with play dough, watching the garbage truck and tackling the dog. Before Mali came along, I used to make all sorts of bread - baguettes, fougasses, brioche, beautiful pinwheel and braided breads ... you name it, I made it. When baby came along though, all that went out the wayside. Now that he's a bit older though and likes to pour and scoop and stir, we've started up again and are having a great time. These days, Mali and I make up a loaf of bread every 3-4 days. I'm always asked, "how on earth do you make your own bread with a baby in the house??!!" - the answer, primarily, is that it's something to do. And what a delicious "something"! There's of course the added benefits of of making your own bread: it's inexpensive, it's substantially tastier than store-bought bread, it isn't filled with preservatives and it's super good for you and packed with nutrients. The OT in me also loves all the benefits that come with having your child help you to cook - sequencing, fine motor skills, balance, sensory integration... and so on.

Ordinarily when baking bread, I would mix the dough with my first child stand mixer, but making bread is easy enough that this is just a convenience, not a requirement by any means. Basically, instead of doing the kneading and stirring described below, I just flip a switch and the machine does it for me.

Okay, on with the bread!

Ingredients:
- 2 1/2 cups flour
- 1/2 cups oat mix*
- 2 tbs. sugar
- 1 tbs. milk powder
- 1 tsp. salt
- 1 1/2 tsp. yeast (I like to use bread machine yeast as you can just mix it in)
- 1 1/2 tsp. oil
- 1 1/4 cups water
- 2 tbs. honey

* sometimes these are sold as "porridge oats" - they're sold in the breakfast section of the grocery store and have a nice mix of flax seeds, quinoa, oatmeal etc. I like the "Rogers" brand. You could easily make your own if you have the ingredients on hand. A handful of this and a handful of that!

Directions:
* if you are using a bread maker, just follow your own instructions. The instructions I'm posting are for use with a stand mixer:

1. Combine all of your ingredients in your mixer with the dough hook attachment and mix on medium speed for 5-6 minutes.
* if mixing by hand you'll have to knead your dough on a lightly floured surface until smooth and elastic, which usually takes about 20 minutes. If you are not using bread machine yeast, you will have to let your yeast proof with warm water and sugar first.

2. Lightly oil a large bowl, place the dough in the bowl and turn to coat with oil. Cover with a damp cloth and let rise in a warm place until doubled in volume, about 1 hour.

3. Punch down the dough! My toddler loves this part. Turn your dough out onto a lightly floured surface and use a rolling pin to roll it out into an approximate square that is the length of your loaf pan.

4. Roll your square of dough into a loaf and tuck the ends under. Transfer to a lightly greased 9x5 inch loaf pan. Let rise until doubled in volume, about 30-40 minutes.

5. Bake at 350 degrees F (175 degrees C) for about 25-30 minutes or until the top is golden brown and the bottom of the loaf sounds hollow when tapped. Remove your loaf from the pan and place on a wire rack to cool. Do not let your loaf cool in the pan as it will get damp. Enjoy!

Friday, February 6, 2015

Buttermilk Biscuits

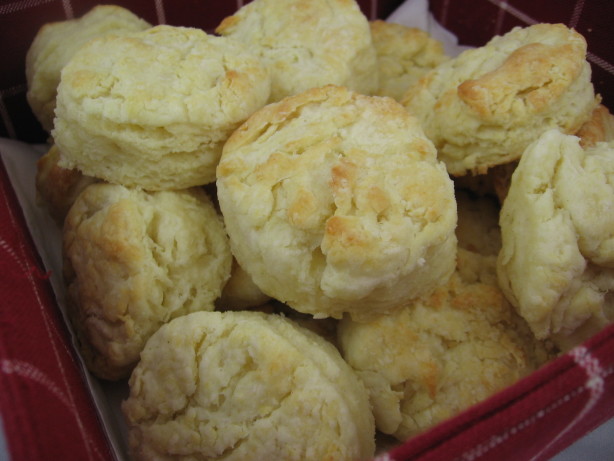
So I haven't been able to do much blogging since my baby was born, but my kitchen has still been busy. Tonight I made up some delicious buttermilk biscuits and hoped that my picky toddler would totally snarf them down - I was in luck! He devoured them. They were flaky with a beautiful golden brown top. One thing that I will say about technique for biscuit making is that the key is not in the ingredients, but in the handling of the dough: handle it as little as possible or you will have tough biscuits. And that's it! Bon appétit!
ps - we found these were great the next morning served with some fresh jam. Another idea would be to use them the next morning for a bacon & egg on a biscuit type a' thing. Num'...

Ingredients:
2 cups all-purpose flour, plus more for dusting the board
1/4 teaspoon baking soda
1 tablespoon baking powder
1 teaspoon salt
6 tablespoons unsalted butter, very cold (I freeze it for 15-20 minutes)
1 cup buttermilk (approx)*

*if you do not have buttermilk,  you can add 2tbs white vinegar to your 1 cup of milk and let it stand for 10 minutes until the milk thickens slightly. No, it's not REAL buttermilk, but it's still delicious.

Directions:
1. Preheat your oven to 450°F. Grease a baking pan.

2. Combine the dry ingredients in a bowl, or in the bowl of a food processor.

3. Cut the butter into chunks and cut into the flour until it resembles course meal. If you are using a food processor, just pulse a few times until this consistency is achieved.

4. Add the buttermilk and mix JUST until combined. If it appears on the dry side, add a bit more buttermilk. It should be very wet. Turn your dough out onto a floured board.

5. Gently, gently PAT (do NOT roll with a rolling pin) the dough out until it's about 1/2" thick. Fold the dough about 5 times, gently press the dough down to a 1 inch thick. Use a round cutter to cut into rounds. (You can gently knead the scraps together and make a few more)

6. Place the biscuits on a cookie sheet- if you like soft sides, put them touching each other. If you like"crusty" sides, put them about 1 inch apart- these will not rise as high as the biscuits put close together. Bake for about 10 minutes- the biscuits will be a beautiful light golden brown on top and bottom. Do not overbake & watch them very closely!

Thursday, August 7, 2014

Coconut Cream Rice Pudding

We first came across this recipe when we paddled the Chochocouane River up in La Vérendrye, Québec. It was a 'add water when you get to camp' kind of recipe using minute rice but powdered milk and we LOVED it! It has now become a Giles-haus favourite since it is both lactose free and gluten free. The only thing that I've found about any recipes that I've tried is that you end up with a pretty solid product at the end - solid in the deliciousness sense and solid in well, the solid sense: the rice soaks up a lot of the coconut milk. If you have some extra coconut milk around, it's great just to mix some in the next day to return it to its slightly runny state. I've also used some soy milk for the same purpose.


Ingredients:
1 1/2 cups basmati rice
3 cups water
2 cans coconut milk (highest fat content possible)
1 brick of creamed coconut solid
1 1/2 cups sugar
1 tsp. salt
1 tsp. vanilla
1 chopped mango (fresh or dehydrated, as per your preference)

Directions:
1. In a large, heavy pot, boil your rice and water for 7-8 minutes.
2. Add the coconut milk, coconut solid and sugar and simmer again for another 15-16 minutes - stirring occasionally.
3. Add salt and vanilla and cook for another 2 minutes.
4. Remove from heat and cool. Yum!


Funnel Cakes

 Probably one of my favourite fair foods of all time is the classic funnel cake. When I came across this recipe, I thought it was too good to be true. And maybe it was. Guys, the deliciousness of these deep fried wonders knows no bounds. If you could take a bite out of heaven, I imagine that it would taste like funnel cake.

Okay, I do have a few warnings to issue before we get down to business: 1. These are extremely addictive and, well, not very good for you. Be sure you have others to share with before you make these. Otherwise, umm, you can imagine. 2. In addition to tasting like those delicious fair-made funnel cakes these may also make your kitchen smell a little like a fair—for a long time. We are deep frying, people—I won't sugarcoat the details (Ha! I'm hilarious...ly lame). Open a window. It's a good thing. Unless it's snowing.

Now the timing, batter thickness, and funnel spout size are keys to funnel cake success. If your batter is too thin or watery, you'll have an enormous mess that spreads and won't hold together. If your batter is too gloppy you won't be able to pour it out in a timely enough fashion to avoid an overdone crunchy mess. A 1-cup funnel with a 1/4-inch opening is an ideal size, a squeeze bottle with a 1/4 inch opening is even better—it's easier to control the flow rate. Being a purist (aka don't own a squeeze bottle), I use a funnel and have always had great results. I find a good clue to knowing you have the right batter consistency is to see when you get a 'trace' of batter that forms on the rest of the batter when you pour it over with a spoon. I hope this makes sense... You'll probably find you have to play around with your batter just a bit to get the right consistency.

Bon appétit friends!

Ingredients:
2 eggs
1 1/4 cups milk (possibly more or less... see above)
1 cup water
1/2 teaspoon vanilla extract
3 cups all-purpose flour
1/4 cup sugar
1 tablespoon baking powder
1/4 teaspoon salt
Oil for deep-fat frying
Confectioners' sugar


Directions:
1. In a large bowl, beat eggs. Add milk, water and vanilla until well blended. Combine flour, sugar, baking powder and salt; beat into egg mixture until smooth. In an electric skillet or deep-fat fryer, heat oil to 375°.

2. Cover the bottom of a funnel spout with your finger; ladle 1/2 cup of batter into the funnel. Holding the funnel several inches above the oil, release your finger and move the funnel in a spiral motion until all the batter is released (scraping with a rubber spatula if needed).

3. Fry for 2 minutes on each side or until golden brown. Drain on paper towels. Dust with confectioners' sugar and serve warm. Yield: 8 cakes.

Monday, March 17, 2014

Avocado Quinoa Salad

I'd like to devote this next post to a very dear (and very missed!) friend, Erin Long. Erin is such a lovely, caring and all around wonderful wife, mother and friend. When I was pregnant, Erin had me over a couple of times to show me her ropes - how she cared for her 3 year old daughter and couple months old son. I was so freaked out awaiting the birth of my baby and she did such a good job alleviating my fears. We would have tea and lunch and eat delicious things like fresh, homemade biscotti bread with hot drizzling chocolate and, one of my new staples, the Oprah Quinoa Salad. Erin showed me that you can have tons of stuff loaded up on your life plate and still eat good, wholesome food on your dinner plate.

This is a great salad to make up for lunches during the week. If you have any left over chicken, toss it in. It tastes GREAT. Other great add ons would be: cranberries, oranges, cilantro... anything really. Enjoy & bon appétit!

Ingredients:
Dressing
Finely grated zest and juice of 1 lemon
3 Tbsp. olive or vegetable oil
1/2 tsp. ground coriander
1/2 tsp. ground cumin
1/2 tsp. paprika
Salt and freshly ground black pepper

Salad
1 cup red or white quinoa, rinsed well
1/2 tsp. salt
2 cups cold water
1/4 cup finely diced dried apricots
1/2 an orange, chopped
Warm water
2 ripe avocados
2 green onions, sliced diagonally
1/4 cup toasted slivered or sliced almonds

Directions:
In a bowl, whisk together lemon zest, lemon juice, oil, coriander, cumin and paprika. Season to taste with salt and pepper.

In a saucepan, combine quinoa, salt and cold water; bring to a boil over medium-high heat. Stir, reduce heat to low, cover and simmer for about 15 minutes or until water is absorbed and quinoa is tender. Fluff with a fork, spread on a large baking sheet and let cool completely.

Meanwhile, place apricots in a small bowl. Cover with warm water and let stand for about 5 minutes or until plump. Drain and set aside.

Peel avocados and cut into bite-sized chunks. Place in a bowl and toss with 1 Tbsp. of the dressing to prevent discoloration. Place cooled quinoa in a large salad bowl. Add apricot/orange mixture, avocados, green onions and almonds. Add the remaining dressing and toss to combine.

- recipe cred to Oprah

Chipotle Mayo Burgers with Grilled Onions

Not sure if you noticed, but lately the Giles' have been digging their chipotle chilies in adobo sauce. I'm pretty sure that I've raved about it before on the Blog, but if not, here I go again. If you make any of your own 'tex-mex' type food (tacos, fajitahs etc.), chipotle chilies in adobo is a MUST. Tonight I decided to mix it into some mayonnaise and serve up my burgers with some nicely grilled red onions. It's fun to spice up an old classic. Also had some nice fresh Canadian feta in the fridge, so I threw some of that on for good measure too. YUM. Burgerlishious. Bon appétit!

Ingredients
1 1/4 pounds ground chuck
kosher salt and black pepper
canola oil, for the grill
1 medium red onion, cut into four 1/2-inch-thick slices
1/2 cup mayonnaise
1 to 2 tablespoons chopped chipotles in adobo sauce
2 teaspoons lime juice
4 buns (we make ours fresh from our homemade pizza dough recipe!)
1/2 cup fresh cilantro leaves

Directions
1. Heat grill to medium-high. Form the beef into four ¾-inch-thick patties. Use your fingers to make a shallow well in the top of each patty. (This will prevent overplumping during cooking.) Season with a total of ½ teaspoon each salt and pepper.

2. Oil the grill and cook the patties with the wells facing up for 4 to 5 minutes. Flip and cook 4 to 5 minutes more. Grill the red onion until tender, 4 to 5 minutes per side.

5. In a small bowl, combine the mayonnaise, chipotles, and lime juice. Dividing evenly, spread the buns with the mayonnaise mixture. Form burgers with the mayo, burgers, onions, and cilantro.

Classic Hummus

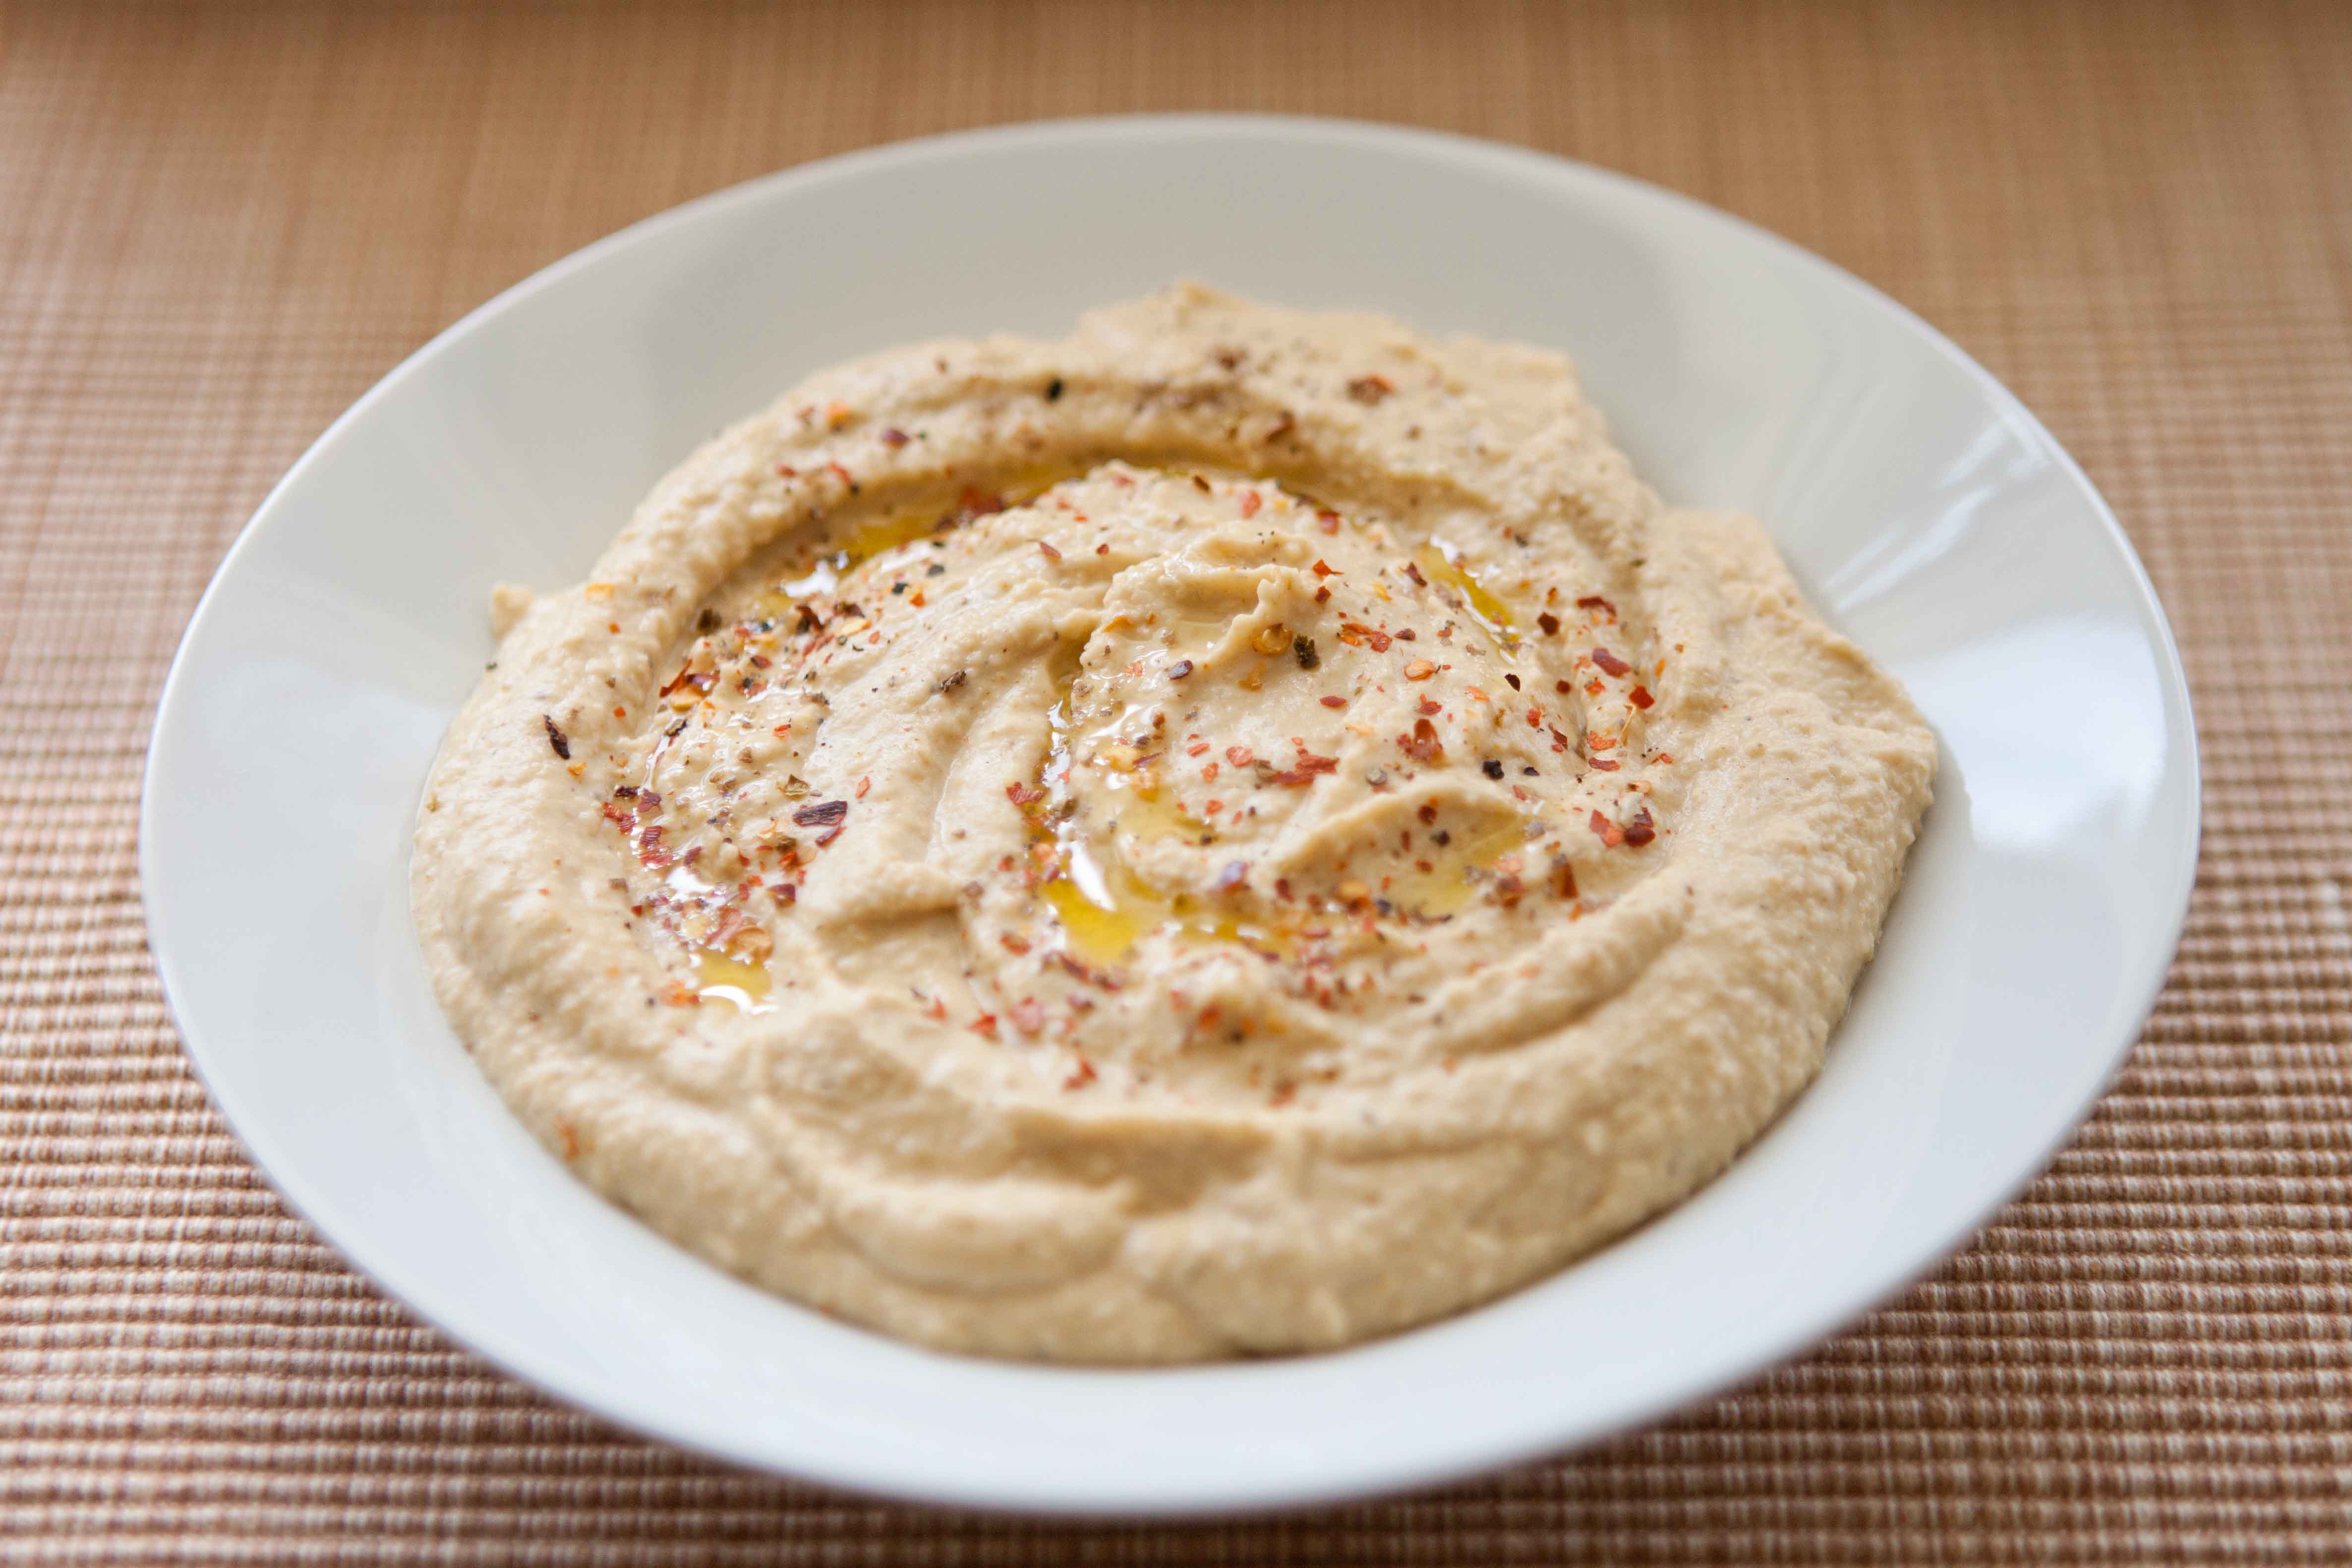
The first time I made hummus with a friend, we went grocery shopping together and she asked me to grab the 'tahini' and meet her at the front of the store. Being a hummus virgin, I had never heard of tahini before and, instead, came back a nice, big zucchini. My friend had a big laugh over this and subsequently brought me back to the international food aisle to show me the actual item we were searching for: tahini, or, sesame paste. I like to think of it like peanut butter but with sesame seeds.

In my mind, this is hands down, the BEST hummus recipe I've ever come across. The important thing is the order in which the ingredients are placed in the food processor. If you want to try to make this recipe without a food processor, say, with a potato masher or even a hand mixer, well, good luck with that. I'm sure your hummus will taste good, but it definitely won't have that nice, smooth, creaminess that all good hummuses are known for. Such a tasty dip for tortilla chips, pittas, veggies etc. My 9 month old loves it spread on top of his 'mum mum' crackers! Bon appétit!

Note: make sure to give your tahini a good stir before using it since the oils will probably have separated

Ps- in case you were wondering, we decided to bring home the zucchini too :)

Ingredients One 15-ounce can chickpeas
1/4 cup fresh lemon juice, about 1 large lemon
1/4 cup tahini
Half of a large garlic clove, minced (***be careful not to O.D on the garlic, it's tempting but you really don't want to add too much)
2 tablespoons olive oil, plus more for serving
1/2 to 1 teaspoon salt (depending on taste)
1/2 teaspoon ground cumin
2 to 3 tablespoons water
Dash of ground paprika for serving

DirectionsPreparing the Hummus
In the bowl of a food processor, combine tahini and lemon juice. Process for 1 minute. Scrape sides and bottom of bowl then turn on and process for 30 seconds. This extra time helps “whip” or “cream” the tahini, making smooth and creamy hummus possible.


Add the olive oil, minced garlic, cumin and the salt to whipped tahini and lemon juice. Process for 30 seconds, scrape sides and bottom of bowl then process another 30 seconds.


Adding the Chickpeas
Open can of chickpeas, drain liquid then rinse well with water. Add half of the chickpeas to the food processor then process for 1 minute. Scrape sides and bottom of bowl, add remaining chickpeas and process for 1 to 2 minutes or until thick and quite smooth.


Creating the Perfect Consistency
Most likely the hummus will be too thick or still have tiny bits of chickpea. To fix this, with the food processor turned on, slowly add 2 to 3 tablespoons of water until the consistency is perfect.


To Serve
Scrape the hummus into a bowl then drizzle about 1 tablespoon of olive oil over the top and sprinkle with paprika.

Recipe cred to Inspired Taste


Monday, August 12, 2013

Sticky Honey Ginger Chicken

Fresh ginger is the cat's meow at Chez Giles. We love it and try to put it in as much of our food as we can. Plus it's super good for you (and your gas!). I like to frequent our neighbourhood Chinese grocery store "Green Fresh!" where I can buy insane quantities for next to nothing. When I came across this recipe in last month's edition of Chatelaine, I was pretty excited. This recipe calls for fresh ginger so don't you dare chicken out and go with the powdered kind. It just won't taste right and you'll have such a feeling of self-gingerless-loathing, that it's just not worth it.

I had a lot of fun grilling up the oranges for this meal as well. We're currently in a tiny apartment with no back porch so we made up this dish on our little panini press, but the bbq would be hands down much better if you have access to one. Bon appetit!

Ingredients
3/4 cup orange juice, about 2 oranges
1 tbsp orange zest
1/3 cup honey
4 tsp minced ginger
1/2 tsp salt
4 skinless, boneless chicken breasts
2 oranges, halved

Instructions
1. Preheat barbecue to medium.

2. Whisk juice with zest, honey, ginger and salt in a large shallow bowl. Pour half into a small bowl and reserve. Add chicken breasts to juice mixture in large bowl. Let stand at room temperature for 15 min, flipping halfway.

3. Oil grill, then barbecue chicken, with lid closed, basting often with marinating liquid, for 6 min. Flip and continue grilling, without basting, until springy when pressed, 6 to 8 more min. Add oranges to the grill, cut-side down, for the last 5 min. Drizzle reserved orange mixture on chicken and serve with grilled oranges.

Recipe & photo cred to Chatelaine Magazine

Sunday, August 11, 2013

Chicken Tacos with Mango-Avocado Salsa

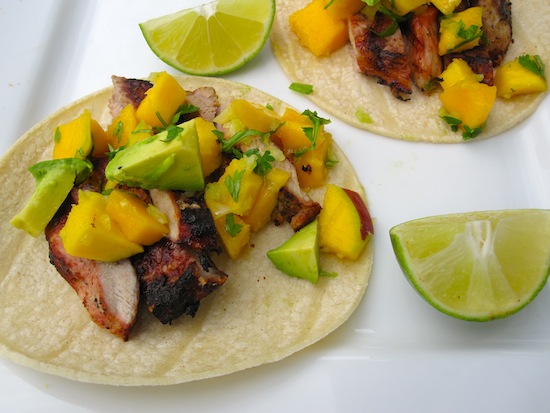
These chicken tacos are the BOMB. So incredibly yummy and a neat spin on an old favourite. The mango-avocado salsa only takes a couple of minutes to make up and gives the tacos such a spunky flavour. You'll want to make sure that the avocado and mango that you are using are nicely ripened or else the flavours won't be as good. Don't forget fresh cilantro! Bon appetit! 

Ingredients:
8 oz (227 g) chicken
1/4 tsp (1 mL) ground allspice
1 pinch salt
1 pinch pepper
1 tbsp (15 mL) vegetable oil
8 soft corn tortillas

Mango Salsa: 1/2 cup (125 mL) diced pitted peeled mango
1 avocado, pitted, peeled and diced
1/3 cup (75 mL) finely chopped red onion
1 tsp (5 mL) grated lime zest
2 tsp (10 mL) lime juice
1 pinch salt
1 pinch pepper

Yogurt Sauce: 
1/2 cup (125 mL) Greek-style yogurt
1 tbsp (15 mL) lime juice

Directions:
Sprinkle chicken with allspice, salt and pepper.

In nonstick skillet, heat oil over medium heat; cook chicken, turning once, until golden. Chop.

Mango Salsa: Meanwhile, combine mango, avocado, onion, lime zest, lime juice, salt and pepper; set aside.

Yogurt Sauce: Combine yogurt with lime juice; set aside.

Heat tortillas according to package directions. Divide chicken among tortillas; top with mango salsa and yogurt sauce.


Recipe cred to Canadian Living Magazine: May 2013

Chicken Burritos with Mojo Sauce

So who doesn't just love a good burrito? I know we do. I'll tell you ahead of time that this is one of those '6 pots on the go' kind of meals but in the end, oh dears yo, serious goodness. And this recipe doesn't make no little, neatly packed burritos - oh no, they was one of those child's arm sized burritos. Yum! Mojo sauce is a tangy mix of cilantro and citrus. It's delicious. Now, I know that the recipe recommends making the beans from scratch, but I just tossed a can into a pot and fried them up with the garlic as recommended - just as bueno! Bon appetit!

Ingredients
Mojo Sauce:
4 garlic cloves
2 serrano chilies, seeds removed
1 large handful fresh cilantro leaves
Juice 2 limes
Juice 1 orange
1/2 cup extra-virgin olive oil
Kosher salt and freshly ground black pepper


The rest:
8 large flour tortillas
1 (3 to 4 pound) whole roasted chicken, shredded
Yellow Rice, recipe follows
Spicy Black Beans, recipe follows
2 avocados chopped
1 cup grated queso blanco or Monterey jack cheese
Sour cream, for garnish
Cilantro leaves, for garnish
Lime wedges, for garnish


Spicy Black Beans:
2 cups (about 1 pound) dried black beans, picked over and rinsed
3 tablespoons extra virgin olive oil
1 medium onion, chopped
1 jalapeno pepper, chopped
2 cloves garlic, chopped
1 bay leaf
Kosher salt and freshly ground black pepper

Quick soak the beans: Put beans in a pot and cover with water by 2 inches. Bring to a boil and cook for 2 minutes. Remove from heat, cover, and let soak for 1 hour. Drain the beans.

In the same pot, heat the olive oil. Add the onion, jalapeno pepper, garlic, and bay leaf and cook until the vegetables begin to soften, about 5 minutes. Add the beans and cover with water by about 1 inch. Bring to a boil, reduce the heat, cover, and simmer for 1 to 1 1/2 hours, or until the beans are tender. Remove the bay leaf and discard. Taste the beans and season them with salt and pepper.


Yellow Rice:
2 cups long-grain rice
4 cups water
2 cloves garlic, smashed
1 teaspoon turmeric
1 teaspoon kosher salt
1 bay leaf

Put all the ingredients into a heavy bottomed pot, stir well, and bring to a boil over medium-high heat. Reduce the heat to a simmer, cover, and cook over low heat until the rice has absorbed the water, about 15 to 20 minutes. Remove from the heat and let sit, covered, for 5 minutes. Discard the garlic and bay leaf, fluff with a fork, and serve.


Directions
Make the Mojo Sauce: Put the garlic, chilies, cilantro, lime juice, orange juice, and olive oil into a blender and process until smooth. Taste and adjust seasoning with salt and pepper.

To make the burritos: Warm the tortillas for 30 seconds in a dry skillet or on the grill until pliable. Place some chicken down the center of a tortilla and top with rice and beans, avocado, grated cheese, and Mojo Sauce. Roll up the burrito and serve topped with a generous drizzle of sour cream; garnish with cilantro leaves and a squeeze of lime juice.


Recipe & photo cred to the Food Network

Slow Cooker Chipotle Beef Tacos

So, as many of you will have noticed, I have taken a serious holiday from the blog-writing in the past couple of months. I blame one main culprit: little baby Malachi. While I love him, he takes up a serious amount of blog-writing time! One good thing about having a baby though is that I have started to frequent my public library much more. While at my last visit (following baby sing-song read along hour...), I discovered an amazing thing: the library has cook books!! A whole shelf of em'. I couldn't believe it! Why I am just finding this out now is a little embarrassing, but there you have it. I swiftly picked up two cookbooks from "Real Simple" and have been devouring all of the new ideas. So, here is the first one to try from this book. It was TASTY and who doesn't love a good slow-cooker meal? So easy! I made it up the night before while a certain someone was already asleep. Enjoy!!
ps - be very careful as to how much chipotle you add. It can make your meal VERY spicy, VERY quickly if you're not careful!

Ingredients
3 pounds beef chuck, trimmed and cut into 2-inch pieces
1 large onion, thinly sliced
4 cloves garlic, chopped
1 to 3 tablespoons chopped canned chipotles in adobo sauce
1 teaspoon dried oregano
2 bay leaves
salt
4 cups thinly sliced cabbage (about 1⁄3 medium cabbage)
4 radishes, halved and thinly sliced
1/4 cup chopped fresh cilantro
2 tablespoons fresh lime juice, plus lime wedges for serving
12 6-inch corn tortillas
sour cream, pickled jalapeño peppers, and hot sauce, for serving

Directions1. In a 4- to 6-quart slow cooker, toss together the beef, onion, garlic, chipotles, oregano, bay leaves, and 1 teaspoon salt.

2. Cover and cook until the beef is very tender, on low for 7 to 8 hours or on high for 3 ½ to 4 hours (this will shorten total cooking time).

3. Twenty minutes before serving, heat oven to 350° F. In a large bowl, toss together the cabbage, radishes, cilantro, lime juice, and ¼ teaspoon salt. Wrap the tortillas in foil and bake until warm, 5 to 10 minutes.
Transfer the beef to a medium bowl (reserve the cooking liquid) and shred, using 2 forks. Strain the cooking liquid through a fine-mesh sieve into the bowl with the beef and toss to combine.
Fill the tortillas with the beef and slaw. Serve with the sour cream, jalapeños, hot sauce, and lime wedges.

Friday, March 15, 2013

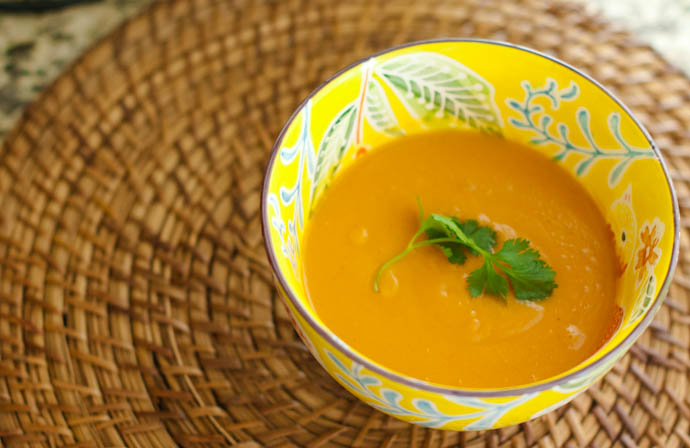
Red Thai Sweet Potato Soup

I love, love, love coconut based soups. I made up this soup a couple of weeks ago for a group of about 20 and really enjoyed it. It was soooo tasty. And coconutty. And just general goodness all around.  Given that I was making this soup for a large group, I got to use my new turbo-charged  food processor, which - I have to admit - gave me chills. I accidentally over-spiced things a little bit, but I like spicy. Using extra coconut milk, yogurt or sour cream can help alleviate some of the heat.

A couple of tips when making this soup: 
- be very, very careful how much curry paste you add. Different pastes have different heat levels and you can very easily make this soup super spicy. Gradually add your paste and taste along the way
- adding chicken strips would be a tasty addition
- if you have one, use a hand mixer to blend the soup - it's much easier than trying to transfer the whole thing over to a blender

Bon appetit! 

Ingredients:
1 tsp olive or rapeseed oil
2 garlic cloves , chopped
1 red chilli , deseeded and chopped
2cm chunk root ginger , chopped
1 stalk lemongrass , bashed
handful of coriander , leaves and stalks chopped separately
2 tbsp red Thai curry paste
750ml chicken stock (made with 2 stock cubes)
1 small can (160ml) coconut cream
500g sweet potatoes , peeled and roughly chopped
1 lime , juice only
1 tsp sugar
½ tsp fish sauce

Directions:
1. Heat the oil in a large saucepan. Add the garlic, chilli, ginger, lemongrass, coriander stalks and curry paste and cook for 2 - 3 minutes until the aromas are released.

2. Add the chicken stock, coconut cream and sweet potatoes and cook for 15 minutes or until the potatoes are soft. Remove the lemongrass and discard. Carefully transfer to a blender and blitz until smooth (I use a hand mixer). If freezing, for best results freeze at this point, otherwise as an easier option freeze complete recipe.

3. Stir through the lime juice, sugar and fish sauce, scatter with the coriander leaves and serve.

Friday, January 18, 2013

Baked Oatmeal

"Baked Oatmeal" was a new term for me up until a couple years ago when Jerms' grandpa married again to his delightful new wife, Glennis. This recipe comes all the way from Pennsylvania and is breakfast bliss. I'd recommend this dish if you're having a big crew for breakfast and don't want too much hassle to go along with it. The great thing about making baked oatmeal is that you can prepare the dish the night before and then just pop it in the oven the following morning. I decided to make up a fresh-blueberry addition, but you can do all sorts of different ingredients that spark your interest and appetite (raisins, cinnamon/nutmeg, peaches, bananas, etc. etc.). Bon appetite!

* I usually double this recipe for 4 or more people.

Ingredients: 
1/3 Cup vegetable oil
1/2 c. sugar (I use brown)
1 egg beaten
1/2 tsp. vanilla
2/3 c. milk
2 c. oats
1 1/2 tsp. baking powder
1 tsp salt
raisins or blueberries optional

Directions:
Mix everything in an oval pan. Bake for 20-30 minutes at 350. 
I often make it up the night before and just turn the oven on in the morning. If you are adding fruit, add it the morning of to prevent significant smearing. 

photo cred to the family kitchen - my camera had run out of batteries :(

Saturday, January 12, 2013

Coconut Thai Red Lentil Suop

This is quite possibly one of the tastiest soup recipes I've come across in a long time. Jerms made it up for the House last week and it was a big hit. The soup is  served with fresh slices of lime & cilantro and I mean, really, how can you go wrong with a coconut milk base? Definitely a keeper for those long cold stretches in winter. Bon appetit! 

Ingredients
1 tbs olive oil
1 tbs curry powder (or up to 2tbs if you are a big curry fan)
1/2 tsp cinnamon
1 onion, chopped
2 carrots, peeled and diced
2 tsp fresh ginger, grated
2 garlic cloves, chopped
2 tsp salt
1 tsp sugar
1/3 cup tomato paste
5-7 cups water (depending on consistency you're looking for)
1 (15oz) can coconut milk
2 cups red lentils
1 (15oz) can garbanzo beans (chickpeas), drained
1 tbs freshly squeezed lime juice
fresh cilantro and lime wedges for serving


Instructions
1. To a large pot or dutch oven over medium heat, add the oil. Add the curry powder and cinnamon and cook, stirring often, until the spices are fragrant, about 2 minutes.

2. Add the onion and cook 2-3 minutes, followed by the carrots, ginger, and garlic, salt, sugar, and tomato paste. Cook, stirring, for 2 minutes more.

3. Pour in the water, coconut milk, lentils, and chickpeas. Stir and bring to a simmer. Cook uncovered, stirring occasionally, for 25 minutes or until the lentils are tender and the soup has thickened.

4. At the very end, stir in the lime juice. Taste for seasoning and serve with fresh cilantro and lime wedges.

Chicken Pot Pies

Anytime I cook with puff pastry, I feel like a baking queen. If you've never used it before - I highly suggest you give it a go. It's remarkably easy and the results are always beautiful. I made up these little pot pies for a dinner with some wonderful friends of ours and we all thought they tasted great. To save time, I made the filling a couple days beforehand. Just a reminder that it takes a good 2 hours for the pastry to thaw - that, or leave it in the fridge overnight.

The egg wash at the end is completely optional, but if you've gone through all the work already, why not give it that last little sparkle? Bon appetit!

Ingredients
3 tablespoons unsalted butter
1 small yellow onion, minced
1 stalk celery, thinly sliced
2 carrots, diced medium
5 tablespoons all-purpose flour
2 cups chicken broth
1/3 pound green beans, trimmed and cut into 1-inch pieces
2 cups diced cooked chicken
Salt and pepper
1 sheet thawed puff pastry
1 beaten egg

Directions
In a large saucepan, melt butter over medium-high. Add onion, celery, and carrots and cook until onion is translucent, about 4 minutes. Add flour and cook, stirring, 1 minute. Gradually add broth, stirring constantly, then bring to a boil. Reduce heat and simmer 5 minutes. Stir in green beans and chicken and season with salt and pepper.

Divide filling among four 8-ounce ramekins. Roll out 1 sheet puff pastry and cut 4 rounds to fit ramekins. Cut a small X in center of each to vent, then place on top of filling. Brush with beaten egg. Bake at 375 degrees until filling is bubbling and crust is golden, 30 to 40 minutes.

Jeremiah's Pancakes (lactose free)

For breakfast this morning we made up a nice batch of pancakes with some fruit salad on the side. A perfect Saturday morning "fun breakfast" as it's referred to in our house. I will admit that I am not exactly a "pancake person" (hisses and boos from all Canadians, I know, I know) - but I just LOVE these guys. We first got this recipe from our very dear friend when we hiked through Frontenac Park earlier this summer. The nice thing about it is that it has no dairy products - ie. great for those are are intolerant to lactose. They make up such an incredibly light, fluffy little pancake - it's amazing that there's no milk in them. I find that this recipe makes enough for about 3-4 people. We make a half batch for 2 people for breakfast. Enjoy!

Ingredients:
2 cups flour
4 tsp baking powder
2 eggs
2 tbsp oil
2 tbsp sugar
1/2 tsp salt
2 cups water
1/2 tsp vanilla extract

Directions:
The man himself, making up pancakes in the bush
Mix all of your dry ingredients together. Add wet ingredients and stir until just moistened (the batter will still be a little lumpy... that's okay!). Heat some oil on medium heat in a large skillet. When the pan is nice and hot, add 1/3 cup servings of batter - flip when bottom is lightly browned and you start to see little bubbles on the top of the pancake. Serve with maple syrup!

Monday, December 17, 2012

Big, Chewy Oatmeal Cookies

One of my favourite foods from my old highschool cafeteria was the big soft oatmeal cookies that the ladies would bake up first thing in the morning. They were HUGE and cost $0.50 a piece. Every now and then I'd buy one before homeroom :)   ... needless to say, it was gone before O'Canada!

These cookies are really tasty. My saying is always that "an under-cooked cookie is a well cooked cookie" so make sure that you remove the cookies just, just as they start to brown. That way, you'll ensure that they stay nice and chewy. Bon appétit!

Ingredients:
1 1/2 cup unbleached all-purpose flour
1/2 teaspoon salt
1/2 teaspoon baking soda
1/2 teaspoon baking powder
1/4 teaspoon freshly grated nutmeg
1 cup unsalted butter, softened
1 cup packed light brown sugar
1 cup granulated sugar
1 eggs
3 cups old-fashioned rolled oats
1 1/2 cup raisins (optional)

Directions:
1. Adjust the oven racks to the low and middle positions, and heat the oven to 350 degrees. Line two large baking sheets with parchment paper.

2. Whisk the flour, salt, baking powder and nutmeg together in a medium bowl; set aside. In the bowl of a standing mixer fitted with the paddle attachment, beat the butter at medium speed until creamy, about 1 minute. Add the sugars and beat until fluffy, about 3 minutes.

3. Beat in the eggs one at a time. With the mixer running on low speed, slowly add the dry ingredients and mix until just combined. Stir in the oats and raisins, if using.

4. Working with a generous 2 tablespoons of dough each time, roll the dough into 2-inch balls. Place the balls on the parchment-lined cookie sheets leaving at least 2 inches between balls.
5. Bake, reversing the position of the baking sheets halfway through baking (from top to bottom and front to back), until the edges of the cookies turn golden brown, 6-8 minutes (check check check them though!). Slide the cookies, on the parchment, to a cooling rack. Let cool at least 30 minutes before peeling the cookies from the parchment.

Homemade Sloppy Joes

Growing up, I love, love, LOVED Sloppy Joes. Under the influence of my father, I honestly believed that they were named after my real-life Uncle Joe who was (according to dad) always a messy eater. I think that I liked making this meal too because it was one of the few dishes that I could actually make by myself - all I had to do was brown the ground beef and add a package of Old El' Paso seasoning. I have since discovered that - amazingly enough - you can make an even better (an cheaper!) version on your own.  This recipe is pretty darn tasty and an easy weeknight dinner. Bon appétit!

* I've tried my best to estimate the seasonings but you may have to do a little tweaking to get the flavours right.

Ingredients
1 pounds ground beef
1 medium onions, chopped
2 to 3 garlic cloves, crushed
3 tsp. cumin
3 tsp. chili
2 tbs. brown sugar
1 tsp. onion powder
1/4 tsp. cayenne pepper
1/4 cup apple cider or cider vinegar
Salt & pepper to taste
Hamburger buns, split

Directions
1. In a large skillet, cook the beef, onions and garlic over medium heat until the meat is no longer pink; drain. Stir in the tomato paste and seasonings. Bring to a boil. Reduce heat; simmer, uncovered, for 20 minutes.
Serve about 1/2 cup meat mixture on each bun. Or cool and freeze in freezer containers for up to 3 months.
Yum!

Saturday, November 17, 2012

Honey Oat Bread

It has been a very long time since I have posted anything on my little blog. There is one big reason for that: I'm pregnant! This'll be baby #1 for us and I must confess that 99% of the past 3 months' dinners have consisted of a welcoming bowl of Cheerios. I have done little to no baking, cooking or meal prep in general and my poor husband has been living off perogies and hot dogs. Today I had a bit of energy and inspiration though (the latter from my brother in law who sent us up some very yummy looking wild pear & wild grape jams!) and decided to whip up a loaf of this delicious honey oat bread from the lovely Darla at Bakingdom. A tip that she suggests is lining the loaf pan with parchment to make the bread easier to remove (a bit will hang over the edges and you just lift it out... brilliant!). I hope that you will enjoy it too! (makes enough for 1 9×5-inch loaf). Bon appétit!
ps - the oats on top will make you feel pro star :)

Ingredients
3 cups (381 grams) all-purpose flour
3/4 cups oats (I have used instant and old fashioned, both work great)
2 1/4 teaspoons instant yeast
1 1/2 teaspoons salt
1 cup (250 ml) milk (almond or soy milk for vegan/dairy free)
1/4 cup (62 ml) lukewarm water
2 tablespoons (28 grams) unsalted butter or margarine
1/4 cup honey (agave for vegan)

Topping:
1 1/2 to 2 tablespoons honey (or agave), warmed
1 1/2 to 2 tablespoons oats

Directions:
In a large bowl, or the bowl of a standing mixer, combine the flour, oats, yeast, and salt.

In a small bowl, or two cup (450 ml) measuring cup, warm the milk so that it’s hot enough to melt the butter, but not boiling. Add the butter, stirring until melted, then stir in the water and honey.

Pour the milk mixture into the flour mixture, mixing until it just comes together to form a dough. Knead for 10 minutes, until the dough is smooth and elastic. If the dough is still very wet and sticky after 5 minutes of kneading, add more flour, 1 tablespoon at a time, until the dough is barely tacky. If the dough is too dry, add water, 1 teaspoon (5 ml) at a time, to soften it up.

Place the dough in a lightly oiled bowl, cover, and allow to rise until doubled, about 1 to 1 1/2 hours.

Once doubled, place the dough on a clean, dry work surface. If the dough is too sticky, lightly flour the surface before continuing. With your fingers, flatten the dough into a 9 by 12-inch rectangle. Tightly roll the dough, tucking the ends as needed, into a loaf. Place the shaped dough into a 9×5-inch loaf pan, cover with a clean dry towl, and allow to rise until doubled, about 1 to 1 1/2 hours.

Preheat oven to 350 degrees (180 C). Place an empty loaf pan on the bottom rack of the oven and bring 2 cups of water to a boil.

When the loaf is doubled again, brush the top with the warmed honey and sprinkle with the oats.

Place the bread in the oven and pour the boiling water into the empty loaf pan on the bottom rack of the oven. Bake for 40 to 50 minutes, until the bread is deep golden brown and the internal temperature is about 190 degrees.

Transfer to a wire cooling rack and allow to cool completely before serving.